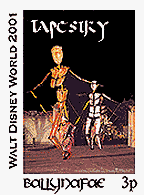
If you’re new to Adobe’s PhotoShop program, it can be overwhelming to figure out all the fabulous bells & whistles it offers. However, it’s a wonderful tool for artistamps!
When I wrote this article around 2002, I was using Adobe 5.0. The commands may vary slightly if you’re using a different version, but the concepts remain the same.
If you have an image that you’ve created with (or scanned into) Adobe, here are the steps to repeat it easily, so the image fills a page of artistamps when you print it:
1. Select the image you want to use. This means it should be surrounded by dotted lines indicating that the Adobe program has “selected” it. If you don’t know how to do this, go into Adobe’s Help menu and look up “selecting an area.”
2. Go into the Edit menu, select Define and then Define Pattern. (Some programs go directly to Define Pattern.) Your image is now saved in Adobe’s short-term memory.
3. Delete your original image, by clicking on the X on the image window, or you can just delete the layer with the image by using Layer–>Delete Layer.
4. Either enlarge that emply window/layer (if you merely deleted the layer) so the Image Size is slightly smaller than the paper you’ll be printing on –OR– (if you clicked on the X and removed the entire image) create a new image (File–>New) in that size.
I like to work with an image that’s about 7″ x 10″ for paper that’s 8.5″ x 11″.
5. Select the entire image/layer. You can do this by hitting Control-A, or by right clicking and choosing Select All.
6. Right click inside the new image/layer, select Fill and then choose Pattern. Your image, repeated to fill the new size, will appear. If you are happy with what you see, you’re ready to print.
7. If your new, repeated image isn’t tidy–and it usually isn’t–you’ll want to remove (crop) the partial images. Use your Select Area tool to surround all of the complete images. Then choose Image and Crop so the loose pieces vanish. Now you’re ready to print.
8. If you’re using nice (price-y) paper for your finished product, it’s a good idea to print a “proof” copy on plain (cheap) paper, to make certain the finished plate of stamps looks pleasing.
If positioning is key, you may want to print on tracing vellum first, lay it over the paper you’ll be using for the finished product, and see if it lines up okay.
9. After you’ve printed your stamps and are ready to close your Adobe program, save just ONE copy of the stamp image, using the Crop feature. You can save the entire repeated image if you like, but that can take up a lot of disk space if your hard drive is nearly full.
Cheatsheet version:
1. Select image area
2. Edit–>Define–>Pattern
3. Delete original image
4. Create new image in size to fit on printer paper
5. Right click to Select All
6. Right click inside area, choose Fill–>Pattern
Amazon and the Amazon logo are trademarks of Amazon.com, Inc, or its affiliates. As an Amazon Associate, I earn from qualifying purchases.

