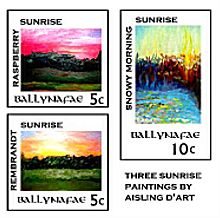
 Q: I want to make some artistamps by hand, not necessarily on the computer. How do I make my art the right size for stamps? Should I be creating the art in stamp size, to start with?
A: Most commercial artists work much larger than the finished, printed product will be. For example, a standard paperback book cover was often a poster-size painting.
When the image is reduced to the correct size, there will be impressive detail in it without a lot of microscopic work in the first place.
When you’re creating stamps, or any reduced-size art, there are several ways to work:
Work to size
Obviously, you can create the work in the size it should be when completed. This is fine for carved stamps, one-of-a-kind work, and so on. However, if you’re working off the computer, or want a lot of detail, this is the difficult way to do things.
Work larger, then reduce at the photocopy machine
Create the images you want, in a larger size. Try to work in a size that can at least fit on the glass of the copy machine.
If your art fills a standard letter-size sheet of paper, and your finished stamp will be less than one inch square, you’re probably including more detail than you need to.
Next, use the photocopier’s reducing option, until the image is the size that you want. That is, if you’re working h-u-g-e, reduce the image to the smallest size the machine permits, then reduce that copy to the size you need.
If you’re using a color copier, this can get expensive as you use trial-and-error to achieve the correct size. Experiment with a regular (cheaper) photocopier first. Make note of the percentages you used to reduce to the ideal size.
Once you’ve figured out what percentage of reduction looks best, switch to the color copier, enter the correct reduction percentage, and print your final work.
Work larger, and reduce with your computer graphics program
If you’re using your own color printer, this is one of the best choices.
Basically, scan your work with your computer scanner, then use your graphics program to reduce the image to the finished size. Repeat the image for a full sheet.
(Some programs call this “tiling,” others–including Adobe–use words such as “pattern.” You can learn how to do this at my article, How to make a sheet of stamps, with Adobe Photoshop.)
Finally, print it on your printer.
If you don’t have your own color printer, many larger copy shops (for example, some FedEx/Kinko’s shops) have computers and color printers for customers to use, for a small fee. Bring them a disk of your completed work, and print it on their printer.
Work larger in b&w, adding color to the correct-size image
You can avoid the color issue altogether by designing black and white artistamps. However, if you want colored artistamps and the previous methods won’t work for you, there are alternatives.
Create the black-and-white line work in a larger format.
Then, reduce it with a b&w photocopier, and tile with repeated copies, as necessary.
Hand-color the image/s.
Finally, either use those as stamps, or visit a copy shop with a color copier, and make multiple photocopies for use as stamps.
No doubt there are other ways to accomplish your goal, but these are among the most popular.
There is no point in using a magnifying glass and a three-haired paintbrush to create eensy-weensy images for the stamps. Work big and bold, and then reduce the images for the best results.
When I work larger for any purpose, I always work at least 33% bigger than the final image, for the best impression of detail in the finished product.
Amazon and the Amazon logo are trademarks of Amazon.com, Inc, or its affiliates. As an Amazon Associate, I earn from qualifying purchases.
