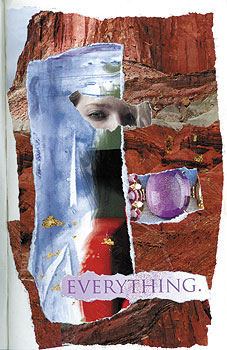
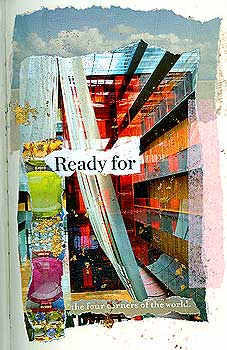
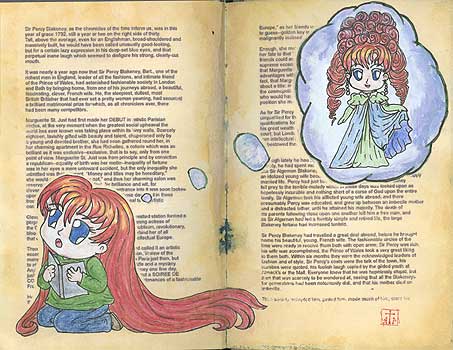
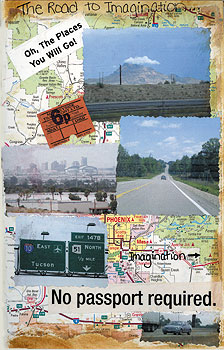
Maps, cityscapes, landscapes… they’re not just for travel journals.
There are many ways you can include them in your personal art journals, too.
If you’d like to create fine art abstract landscapes in your artists journal, I think Cathy Mevik’s demo will inspire you. If you’re not a painter, don’t let this scare you; I think anyone can create landscapes like these.
The video a little over 11 minutes long, but – for those who’d love to paint like this – it’s time well spent.
If you’d like to explore making maps, this book looks fascinating. As soon as I saw this review video, I ordered the book. (The video is eight minutes long, but you’ll get the general idea in the first two or three minutes.)
I thought it was okay, but I’ll admit it didn’t inspire me as much as I’d hoped. Here’s the Amazon link, anyway. Use the “look inside” to decide if it’s your kind of book: The Art of Map Illustration
If drawing and painting aren’t your strong suit, don’t despair. You can still bring maps and architectural designs to your journaling.
Here’s a landscape-y, map-y kind of art journaling demo. It’s by Carolyn Dube, and she uses a stencil, some acrylic paint, and a pen. The video is about four minutes long, and – once you get the idea – you can fast-forward through it to see how she completes it.
At first, Blythe Scott’s work may look like modern landscapes but, close-up, you’ll see mixed media elements. She’s using some materials that never crossed my mind, and they could go into a mixed media artists journals, too.
This five-minute video includes breathtaking outdoor scenes, how her art is inspired, and some great insights about studio work, using drawing, painting, and mixed media elements.
Are you art journaling with mixed media and ephemera?
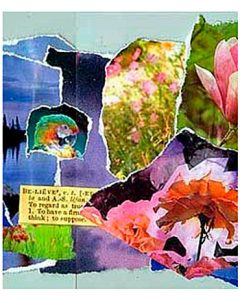
Do you struggle to collect and organize collage photos, papers and ephemera?
Here’s the system that works well for me. It might help you, too.
Art journaling – and mixed-media collages – can require lots of images. And, to remain “in flow” as you’re creating a new journal entry (or embellishing an older one), organization can be vital.
Here are some tips to keep the clutter under control.
Step One: Sort collage elements into groups
Start by deciding how you think about your collages.
Are you primarily color-focused?
Or, do you choose images by themes, such as Nature, Anime, Steampunk, Skies, and so on?
For me, all of my art – including my collages and art journaling pages – is often about color.
So, I organize my loose images into the major color groups (red, blue, green, etc.) and then expand (lime green, turquoise, etc.) as my collection of saved images becomes too large for anything simpler.
Usually, I store them in individual manila folders, based on the main color in the image.
Then, when I want something blue, I open my “blue” folder and I’ll see my primarily blue magazine images, but also blue tissue paper, maybe some bits of blue ribbons or fabrics that I intend to use in collage, and so on.
However, I’ve also started folders that say things like “skies” and “green plants.”
Think about how (and what) you look for elements and ephemera to add to your collages as you work on them.
Also, look at your existing collages. Your categories might be “faces” or even more specifically, “women’s smiling faces,” etc. Or, “nature,” “dark-looking castles,” “cute cottages,” “kissing,” “fast cars,” “vintage images,” or whatever.
Create categories that work for you and your creative process.
Step Two: Keep those folders tidy.
Having a bunch of folders, no matter how well they’re filled with juicy, colorful images, is just the first step.
Then, they need to be accessible.
For me, that means a standard file box with hanging files.
All the blue-related folders (turquoise, sky blue, navy) go into one hanging file. All the photos of forests from travel magazines and National Geographic go in another hanging file, along with a folder that’s gardens and another that’s houseplants. And maybe honeybees and butterflies.
Optional Addition: Bins.
As I work on a collage and tear off pieces, I’m often left with shreds and shards of paper that are too good to throw out.
When that happens, I put them into small bins. In my case, I’m recycling plastic sandwich meat containers from Target. (My family’s favorite ham comes in those containers.)
I have one for blues and greens. One for glittery ephemera. One for ribbons, feathers, and so on.
You get the idea, I’m sure.
When I’m just NOT finding the collage element I need, I open those bins and usually find the perfect element.
Either that, or – looking at those bits – I have an “ah-HA!” moment and know where to look for the element I need. Usually, that’s a magazine or travel brochure from my stack of unread future collage resources.
Why to Stay Organized
If you’re like me, you create your best art when you’re “in flow.” Anything that interrupts can affect the journal page or collage that I’m working on, and not in a good way.
So, the more I can create systems that work intuitively for me, and keep everything organized, the happier I am as an artist.
Find (or create) systems that work for you and keep you organized.
I know that can be a challenge for artists, but it’s also essential for us to create our very best work.
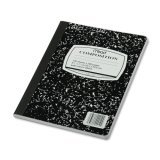
A composition book art journal is any journal that’s kept in a composition book. Those are generally school-type, saddle-sewn (along the crease) notebooks with cardboard covers… similar to exam/test booklets, but a little more permanent.
Composition books are inexpensive, so many people like them especially for informal journaling. It feels less intimidating to use a journal that doesn’t cost much, and is familiar from our years in school.
They’re so affordable, you can buy several. Put one in your car, one in the baby bag, one by your bed, and so on. Then, you’re ready to create a journal page when you have some free time. The journals are so inexpensive, you can rip completed pages out and bind them into your more formal artist’s journal.
(“Binding” the loose page can be as easy as taping it into your other journal. Or, you can glue it, sew it, staple it, etc.)
Composition books have lots of lined pages in them… as many as 100. They come in a variety of sizes, but the traditional ones are about 8″ x 10″ or so. The traditional ones often have a b&w cover that looks sort of marbelized.
You can also find composition books with red covers, plain manila covers, green covers, and so on. You may want to choose one with a color that reminds you of your childhood. (But, the color may not matter if you’re going to cover it with art anyway.)
Also, it’s easy to embellish the cardboard covers. I’d still use something (such as fusible interfacing) on the back so that threads don’t pull through, but you can sew through the cardboard with a crewel needle. Then, you can embroider on it, add beads & buttons, etc., in addition to other embellishments.
You can sew embellishments onto your paper journal pages.
You can use any page in a book like fabric (to sew on, for example) by using iron-on interfacing on the back side of the page.
Yes, just iron it on, the same as you would iron interfacing onto fabric. It won’t always stick 100%, but it will work well enough that you can sew through it.
(If you try to embroider or sew beads onto regular pages in a book, the thread tends to pull right through the paper, if the thread is tugged.)
You can do the same thing with your journal cover. A strong crewel embroidery needle will usually sew through cardboard… but you’ll probably need a thimble to push the needle through.
You can then embroider with embroidery floss, yarn, thin ribbon, etc. You can add buttons, beads, and so on, too.
At left, you can see one of my journal covers that I’ve embellished with sewn-on buttons. (Click on the image to see it larger.) The biggest button is part of the journal closure. When it’s not in use, a string of hemp (secured to the back cover) is wrapped around the button on the front cover to hold the journal closed.
After you’ve finished your sewing (or other embellishment), you can glue a page or fabric over the ironed-on interfacing, so your stitches are concealed. If I’m doing a lot of this in a book, I’ll buy a second copy of the same book, so the “backing” page is what it would have been, if I hadn’t covered the original with interfacing.
You’ll find iron-on interfacing at any fabric shop. It’s usually kept in a bin or on shelving next to where they cut fabric yardage for you.
You can also iron on Stitch Witchery or another fusible adhesive, and that gives you the option of sticking something wonderful on the other side… interfacing isn’t all that interesting.
For example, you could fuse an actual piece of fabric to the paper page.
Then again, after I sew beads onto the page, I like to cover the interfacing side with more paper… maybe a collage.
You can sew onto your journal pages, or turn them into fabric. It’s easy!
When I’m creating collages, especially torn-paper collages when I’m art journaling, I apply Yes!Paste with a foam brush. That’s my favorite adhesive for magazine images, tissue paper, and so on.
If I’m using gel medium to seal my art journaling pages, I’ll apply that with a foam brush, too.
I’ll use a similar brush to add glittery paint and to apply gold leaf, too.
Also, I use foam brushes to apply cheap, vivid, cadmium red paint (acrylic) as an underpainting when I’m working on an art shrine (that I’ll also paint) or a fine art painting.
I generally get at least three to five uses from each foam brush. I wash them thoroughly and promptly after using them.
Some foam brushes are better than others
I used to buy my foam brushes at Michael’s. Recently, to get the best price, I had to buy a package of assorted foam brushes.
That was a mistake. Some of the brush sizes were useless for my work. In addition, the quality wasn’t great.
Now I buy brands that I trust, like US Art Supply’s 1-inch brushes. And – for now – I order through Amazon. It’s convenient. If a product is disappointing, it’s easy to return it, but so far, these brushes have been fine and the price is very good.
Note: If you use the kind with wooden handles, the wood can be recycled in a variety of projects. (For some of my cloth dolls, that handle is the perfect size to reinforce the doll’s neck, as the wooden dowel will extend from the head through the neck and then into the torso.)
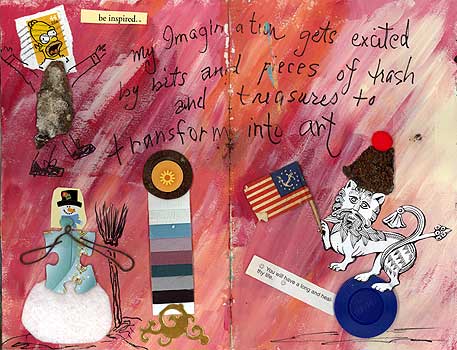
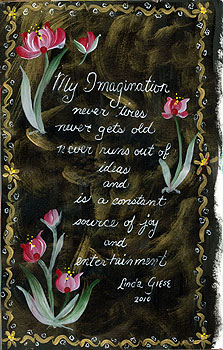
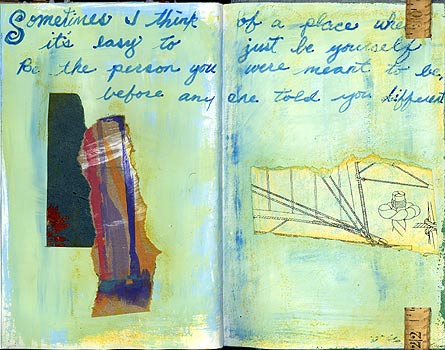
These are the final scans from the American participants in the round robin (RR) journal #1 that began at ArtistsJournals in April 2010.
The first are 10 pages by Linda Giese:
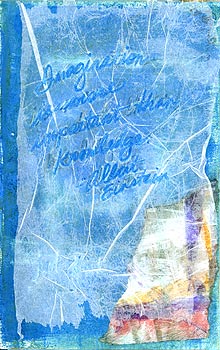
The next journal pages are by Iris Gonyea:
(The text on that collage says, “Imagination is more important than knowledge.” — Albert Einstein.)
Now, the journal will remain with me for about a week or ten days, and I may add something to it. Then, it will be on its way to Stephen du Toit in England, to begin the international portion of its journey.
Last April (2010), I launched two round robin (RR) journals at ArtistsJournals2 (aka AJ2) at Yahoo Groups. (Since then, AJ2 merged with my main ArtistsJournals group at Yahoo Groups.)
RR Journal #1 has returned to me. I’m scanning it before sending it to Stephen in England, to begin the international segment of this journal’s adventures.
The first several pages are below, but the image files are large. Please wait for them to fully load.
I’ve scanned the first ten pages of the journal, so I’m about 1/3 of the way through it. Here are the pages, so far.
The first four pages are my own torn-paper collages. (The glitter and gold leaf don’t really show up in the scans.)
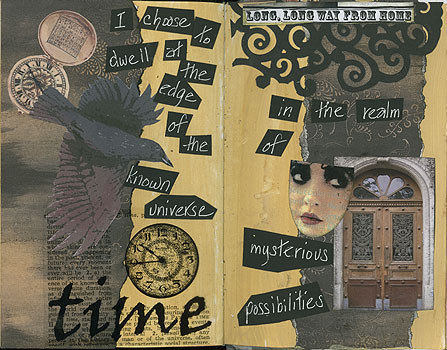
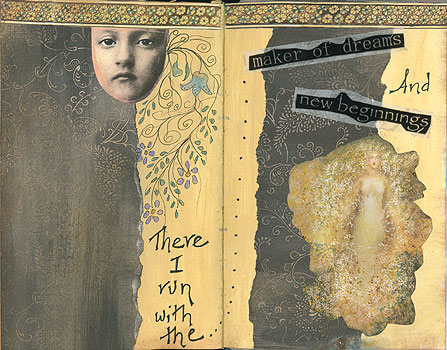
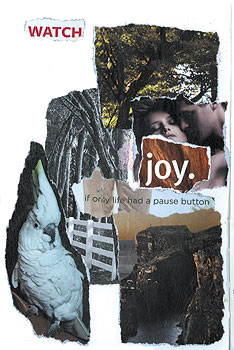
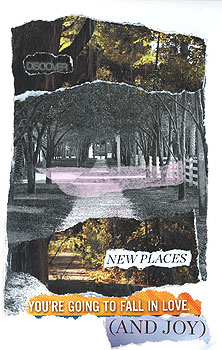
Torn-paper collages are among my favorite ways to illustrate an artist’s journal.
I’ve been creating them for over 20 years now, and I never seem to get tired of them. In fact, two walls in our living room are a mini-museum of my favorite torn-paper collages. (People who visit us can be overwhelmed. It’s like they just want to stand and gawk at the art, undisturbed, for at least 20 – 30 minutes.)
Here’s how to create your own.
Steps to create a torn-paper collage
1. Gather Collage supplies.
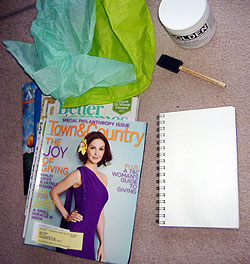
All you really need are some pictures, something to use as glue, and something to support your collage, like a piece of paper.
More details:
For pictures, words & phrases
– Magazines, newspapers, printed materials, junk mail
I especially like fashion, travel and nature magazines for photos. “W” magazine is great for huge, almost surreal images, as well as great words & phrases. “Town & Country” magazine offers a nice mix of fashion, travel, home & garden photos, as well as yummy ads.
If I’m going to sell the finished work, I’m careful about using magazines such as National Geographic. Though their pictures are gorgeous, they have a reputation for being difficult about copyright issues.
Here’s one guideline for using otherwise-copyrighted images: Some Questions About Fair Use. They give a good example of “transformative” artwork… and that’s the kind of collage I create.
For words and phrases, I like health, fitness, religious and New Age magazines, as well as junk mail. That includes the envelopes, which are often better than whatever’s enclosed in it.
I find free magazines at public libraries and sometimes at laundromats (ask if they’re ready to get rid of some of them).
Adhesives and glues for collage art
Previously, I was using Golden Gel Medium (Soft Gel – gloss) with a sponge brush. (That’s what was in my video. I no longer recommend that as an adhesive. It makes the paper buckle and bulge unnecessarily.)
Click to see Yes Paste at Amazon.com
Now, I use YES! Paste. For my work, it’s absolutely perfect, with minimal buckling and puckering, and the ability to reposition the image… for at least a few minutes.
Even better, a jar seems to last forever.
When I use a sponge brush, I rinse it out completely as soon as I’m finished with it. I can usually use the same sponge brush for a week before it starts to fall apart.
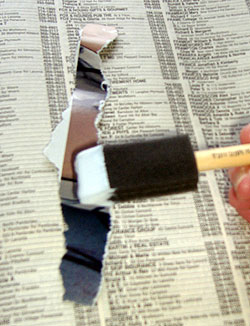
When I’m applying the adhesive, I use an old phone book or junk mail underneath my work.
Support for your collage
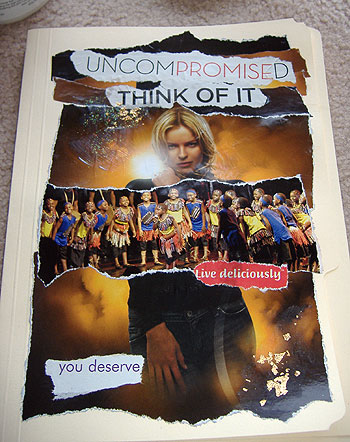
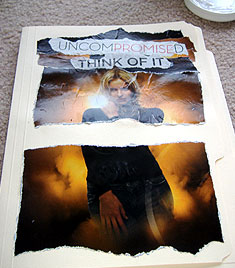
Anything can support your collage. I generally use a regular spiral-bound sketchbook for my daily collages. However, for this one (“Uncompromised’), I used a file folder. I’m not sure why; it seemed like the right choice.
You could use poster board, canvas, wood, or almost any surface that will accept glue.
(Some dishes or tiles work well with collages, but others don’t. Test different materials and adhesives to see what works for you.)
Collage embellishments
In the past – around 2000 – I used a lot of gold leaf and glitter, but that was a personal preference. Almost anything that you can glue to a surface can be used as an embellishment.
2. Select images and words or phrases.
Go quickly through your materials, and – without much thought – choose images, words & phrases that appeal to you. Tear out the entire page and set it aside.
Tip: If you like more than one element on a page, separate them. Otherwise, it’s easy to forget that you were going to use more than one item from a single page.
I often select a word or phrase early in this process. In this case, I chose “Uncompromised” quickly. The word “promise” is in red in it, and I realized (light bulb realization) that when I compromise, I’m breaking a promise to myself or to others. Even if it’s just small and unspoken, it’s still a betrayal (big or little) of an ideal that I held or aspired to.
That’s a concept worth examining, as I work on daily priorities.
Remember that you can use a word or phrase from a sentence. I chose “you deserve” from a laxative ad!
When you feel pleased with your collection of pages, or when you have a stack of about ten pages, pause and begin working with them.
3. Tear the images in the approximate size, and then to the exact size.
If a page is really large, it can be more difficult to tear out the precise element that I want. So, I tear the page around the general area of the element, and then tear more exactly.
When I’m making the final tear, I try to tear it all in one go, not inching along, a little at a time. A smooth tear usually looks nicer, unless you have a specific reason for a very jagged edge.
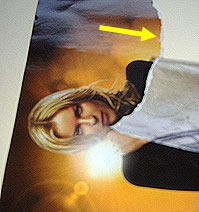
Also, when you tear the magazine page, there will be a white edge in one direction of the tear. (The yellow arrow points to it.) I like to work with either all white-edged images, or keep all of my images without white edges.
4. Apply adhesive to the back of the image.
This is going to be a little messy… or even a lot messy. Revel in it!
I use a sponge brush. Some people use their fingers or a regular brush.
I keep a damp rag or paper towel next to me, to clean glue off my fingers as I work. (I also wash my brushes thoroughly, as soon as I’ve completed my work.)
Work with something underneath the image, so you can cover the back of the image with adhesive.
If the adhesive is too thick, it can be lumpy underneath the image. If the adhesive is applied in a really thin layer, it can dry too quickly. However, as long as some of it sticks to the collage, that can be enough.
If it turns out lumpy, you can use an iron (there are special irons made for this, too) — with some sort of release paper between the collage and the iron, so the iron doesn’t get all gooey from the melting medium — and the heat softens & reactivates the adhesive.
So, even dried adhesive can be reactivated and it’ll suddenly adhere the entire image to whatever’s underneath it.
I only do this when the collage is nearly completed – before I apply any glitter or gold leaf – if there’s clearly a problem where part of the collage didn’t adhere correctly.
Keep in mind that your lower layers (and at least some of their edges) will be covered by later additions to the collage. So, how they look may not matter very much.
5. Place the image where you want it to be, in your collage.
Try to place it exactly where you want it to be, or at least fairly close. If you lift, stretch, or drag a piece of magazine paper, it can stretch and look a little odd in your final work.
If your collage element seems to bubble, it’s okay to pat it flat, but don’t try to smooth it. (I learned that from collage artist Claudine Hellmuth.)
If you brush it or rub it with your fingers to smooth it, it’ll stretch the paper and the finished result might be disappointing.
Bubbled paper seems to shrink back to shape was the adhesive dries, or at least some papers will do that. So, if you’re going to put something over the bubbled piece, let the bubbled part dry, first. It might flatten out on its own.
6. Keep working. Build up more layers. Tear more images as you work, if you need more images.
I usually tear out the first three or four images that I’m going to work with, and then start building the collage.
When I’m happy with them, or if I decide to add another image that I haven’t torn out yet, I pause and tear out what I’ll need next.
If I have a massive pile of torn paper – good stuff and paper that I may (or may not) use – it can become confusing.
7. Continue to build your collage.
Remember that the first layers are the background. As you add layers, they’ll be on top. (It’s amazingly easy to forget this, sometimes.)
The focal point (or points) of your collage should probably be on top. The leading areas tend to attract the attention of the viewer.
However, it’s okay to tuck little surprises in the lower layers, for the viewer to “discover” as he or she explores the collage.
Also, don’t despair if your collage looks messy. Some will be more messy than others. It’s okay.
Here’s a close-up of one area on this morning’s collage.
… Here’s what you need to know if you make a “mistake.”
1. Milky areas will probably dry clear.
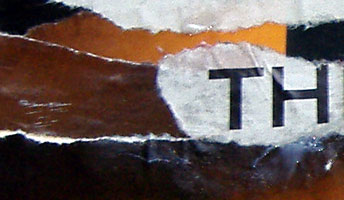
2. If the paper looks translucent in some areas (like right above the letter T in the photo above), they’ll probably turn opaque when the adhesive dries.
3. Anything that looks weird when the collage is nearly finished, can be covered with embellishments (glitter, gold leaf, threads, pieces of mica, paint, etc.) or you can cover it with another image or phrase.
It’s okay to change your mind.
For this collage, I’d selected a great image of a model looking in one direction. However, I discovered an even better photo on the back of it: Mulawi children in colorful, traditional clothing.
So, allow for serendipity as you work.
8. Keep building your collage until you’re happy with it.
It’s okay to take your time. It’s also okay to rush through this in a flurry of creativity.
You can start the collage, walk away from it, and finish it later in the day, or the next day, or the next week!
Tip: When you think to yourself, “I think this is nearly finished,” it’s probably finished. Stop! Take a break, and then take a fresh look at it.
It’s better to stop too early than take the work too far.
9. Consider adding embellishments.
I love embellishments, but you don’t have to add any at all. Every artist has his or her own style.
Tissue paper (it may remain translucent if you use gel medium over and underneath that layer).
Thread, glued on or stitched on.
Beads, mica, sand, pieces of glass.
Paint, oil pastels, stencils, rubber stamp art.
You can even embed something that plays a tune or says something (like in greeting cards) in your collage, for people to press.
The possibilities are unlimited.
10. (Optional) Finish with a coat of gel medium or other sealer.
After the collage is fully dry, you can seal it with a thin coat of gel medium. Well, maybe. It might make the paper buckle.
And really, it’s not necessary. I mean, yes, it will give the collage a uniform level of gloss (or a uniformly matte finish, if you used a matte gel medium).
It might also protect the collage from dust and damage, if you want to leave it “as is” instead of displaying it under glass.
Tip: If you’re using this in an artist’s journal – such as a spiral-bound sketchpad – place a piece of wax paper between the collage and the facing page. That will prevent the pages from sticking together.
My finished collage
Though I could probably explain all of the elements, it’s true that “a picture is worth a thousand words.”
Basically, this is about re-evaluating compromises… things that I decided were okay, short-term, as a step to a more important goal. For me, it’s easy for those to become long-term issues.
For me, the image of the happy children in colorful clothing is important. It’s how joyous and self-expressive we all can be.
And yes, we all deserve to live deliciously, savoring every moment!
Here’s the YouTube video in which I narrate how I make torn-paper collages. It’s only four minutes, so it’s a bit of a whirlwind. And remember: I’m now using Yes! Paste, not gel medium.


 Do you struggle to collect and organize collage photos, papers and ephemera?
 A composition book art journal is any journal that’s kept in a composition book. Those are generally school-type, saddle-sewn (along the crease) notebooks with cardboard covers… similar to exam/test booklets, but a little more permanent.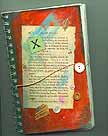

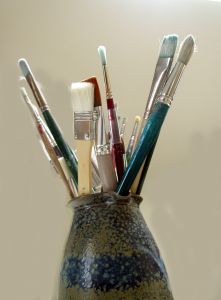 Paintbrushes are important for many artists. I have lots of them for all purposes.