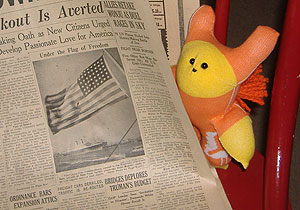
Last year, I began making sock dolls. I was inspired by the book Stray Sock Sewing.
Here’s how I made my sock dolls for the Wild Art Dolls swap in July 2010.
Sock Doll Supplies
You will need one sock, some batting or stuffing, Fray-Check, and your basic sewing supplies. (Needle, thread, scissors, and a thimble if you use one.) You’ll also want something for eyes, nose, and other embellishments. At the very least, that will be embroidery thread, yarn, or a contrasting color of regular thread.
Sock Doll Directions
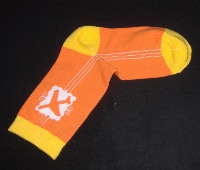
First, I started with a large, children’s sock. I’d already washed it in the laundry so, if it was going to shrink, it had already done so. (If the sock dolly needs a bath later, we don’t have to worry about him or her shrinking, puckering, or losing color.)
You should do the same.
Then, stretch it out so the heel is exactly centered, horizontally. Then, the finished doll won’t look too off-center.
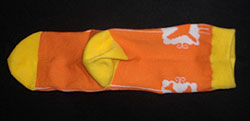
Next, you’ll cut off the toe part of the sock. You’ll be removing somewhere between 1/2 and 1/3 of the sock above the heel. That will vary with the size of the sock and your plans for the doll.
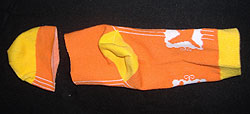
If you remove a smaller amount, the doll will have longer ears and shorter arms. If you remove more, there will be shorter ears and longer arms.
Remember: If something goes terribly wrong, you still have another sock. You can use that to supplement the pieces you cut from this sock, or you can start all over again.
The next step is to cut the cuff of the sock, perpendicular to the cuff. What you’re doing is cutting the seam area for the legs. For shorter legs, leave more uncut. For long legs, cut closer to the heel.
Above all — unless you have an octopus kind of doll in mind — don’t cut all the way up to the heel.
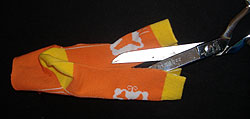
The next step is to cut a notch where the ears will extend. Once again, the deeper the cut, the longer the ears. Avoid cutting all the way down to the heel, unless you want a really deranged-looking doll with a strange, short face.
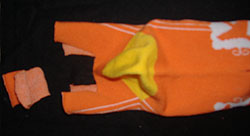
Finally, you’re going to use the toe part that you cut off at the beginning. Lay it flat and snip in into two equal parts. These will be the arms.
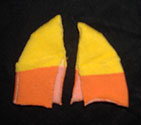
Now, it’s time to seal the edges of the sock so they don’t unravel as you’re working. You’ll use a product called Fray-Check for that. You can find it in many sewing supply stores, crafts stores like Michael’s, or order it from Amazon.com.
If you’re making a lot of sock dolls (like for holiday gifts), pick up a couple of bottles of Fray-Check. You will go through it pretty quickly. (Plus that, it can dry out in the bottle, after a few months.)

Apply a moderate amount of Fray Check to every raw edge on the doll. Be especially generous where there are angles, indicated by the blue arrows. Those points will get the most stress as the doll is being finished.
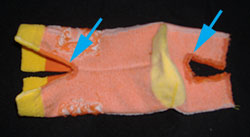
Let the Fray-Check dry completely. This can take an hour or two. Don’t sew while the fabric is damp, or it can stretch and bubble.
Next, sew the top of the head. That’s where you cut the rectangle out, and it’s on the right side of the sock in the photo above.
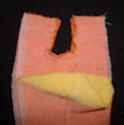
Sometimes I sew along the wrong side of the fabric, and then turn the doll right-side out. At other times, I sew the whole thing from the outside, using an overcast-type stitch.
Then, turn the doll right-side out, so you can start stuffing it.
Next, Add Stuffing to Your Sock Dolls
When adding stuffing to your cloth doll, it should be packed firm.
Don’t over-stretch the sewn edges as you do this, but make sure your cloth doll won’t look all saggy after its been hugged a lot.
For sock dolls, you’ll probably start from the bottom, or wherever the open seams are.
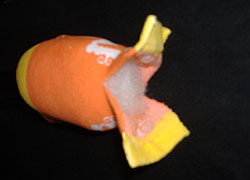
When you’re stuffing the ears, it’s a good idea to make them fairly solid. I use a chopstick or a stuffing tool for this purpose.
If the ears are really long, you may want to insert a wire after the ears are stuffed. You can use a pipe cleaner or any firm but flexible wire for this. Then, you can bend the ears in zany angles.
Sewing the Legs
Now, you’re ready to sew the legs, stuff them, and then sew the edges of the feet.

Sew the leg seams, but not the feet. Stuff the legs. (A chopstick, smooth end of a pencil, or stuffing tool is ideal.)
Finally, when the doll is how you want it to look, stitch along the bottom edges of the feet.
Add Embellishments to Your Sock Doll
At this point, I like to add the beads or buttons for eyes, and a nose. I usually use embroidery floss for the nose.
The doll is beginning to have character. I think that’s important, before attaching the arms. Arms can make a remarkable difference in the attitude of the doll.
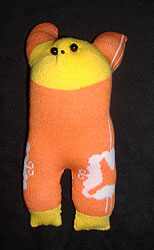
Add the Arms
For the arms, you’ll sew the seams on the toe pieces you cut at the beginning.
 Sew just the longest side of each one and stuff it. Depending on how hard it is to hold the shoulder part together, you may want to baste it closed after the arms are fully stuffed.
If they’re only loosely stuffed, you can skip the basting step and attach the arms directly to the doll.
Add More Embellishments, Maybe
After that, you can add wings, hair, a pom-pom tail, or any other embellishments you like.
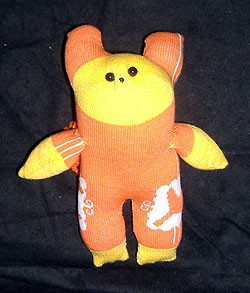
More Examples
Here are a couple of other sock dolls I’ve made. They were propped up in Rubbermaid sandwich containers, so you can see them better. That also gives you an idea of the scale of them.
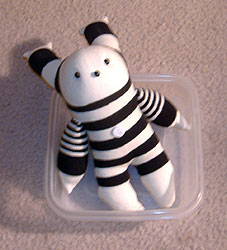
Here’s the same doll in profile. He has a yarn pom-pom tail.
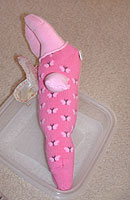
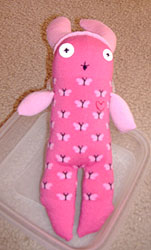
Another doll, shown below, is made from an adult’s pink sock. The top of the head looks like the doll is wearing a cap. I made the cap from a second, different pink sock. I let the lower edges roll up, like the brim of a knit cap.
I also embroidered a heart on her, and gave her faerie wings.
Once you get used to making these dolls, you’ll find ways to mix n’ match pieces from different socks for different effects.
I can usually make one doll in an evening (about three or four hours), while I’m watching TV or talking with my family.
Sock Doll Tips
-
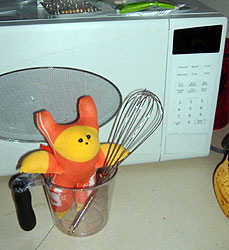
Sock dolly helps in the kitchen! Use children’s socks for the best colors and patterns. For larger, colorful socks, I find good patterns & prices at places like TJ Maxx, especially in their sale sections. Want tiny socks for the dolls or for ears, arms, or a tail? Check the discount section of Michael’s Arts & Crafts. Some of their Mary Engelbreit-type socks can be wonderful for sock dolls!
- Use Fray-Check by Dritz. Amazon carries it, or find it at Michael’s, JoAnn Fabric, etc. I seal all edges before I sew them. (Usually, it takes a couple of hours for the Fray-Check to dry thoroughly. If you sew the edges while the Fray-Check is damp, the fabric can stretch too much.)
- Always use good batting or stuffing. Even more than other cloth dolls, the squishy nature of sock dolls means you can’t afford lumps or flat spots. (Among my favorites: Soft-Touch by Fairfield.)
- If your doll might get soiled easily, use any waterproofing spray on stain-resisting spray, after you complete the sewing but before you add any beads or buttons.
- If you’re making a doll that you’ll turn inside-out, after sewing, always try to make the final seam (the one you’ll sew on the outside) where the doll sits down. That way, the seam isn’t so noticeable.
- If your doll should sit and not fall over easily, make a small bean bag that will fit inside the “rear end” of the doll. Fill that bean bag with something heavy. I use anything like poly-pellets, or well-rinsed gravel intended for fish tanks, or even unscented kitty litter. (The latter, being clay, can deteriorate and turn to messy dust if handled too often.)
- If your dolls are small enough, check the dollhouse furnishings aisle (at Michael’s, etc.) for accessories you can use with (or glue to) your sock dolls.
Amazon and the Amazon logo are trademarks of Amazon.com, Inc, or its affiliates. As an Amazon Associate, I earn from qualifying purchases.


thanks for your sock doll tutorial