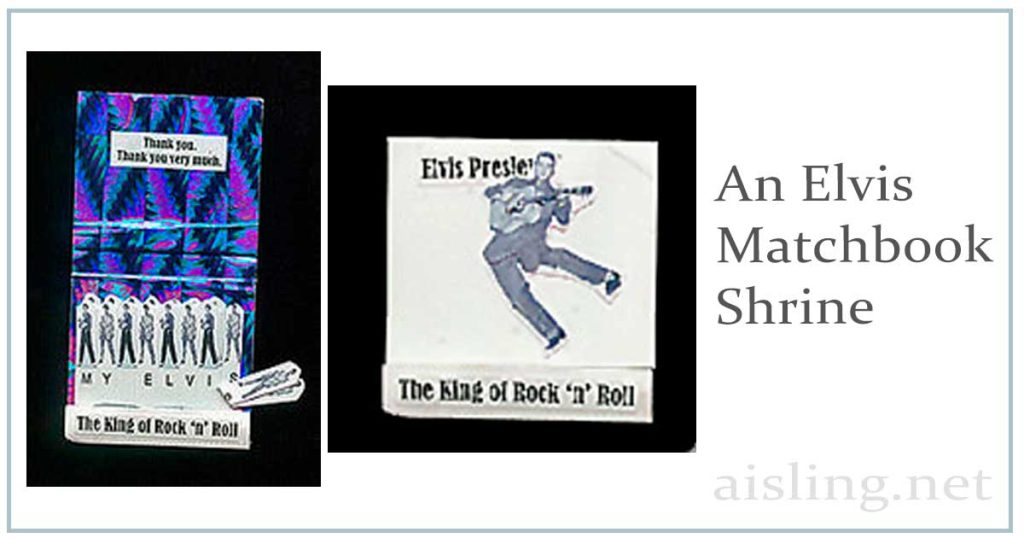
You can never have too many Elvises!
I made this shrine from images I scanned from a deck of Elvis playing cards, plus some glittery wrapping paper, a plain matchbook, and a few phrases related to the King of Rock ‘n’ Roll. (The image above is from around 2001, so the quality isn’t as good as I’d like.)
The “matches” are three layers deep. I folded a couple of them over so you can see the layers. A thin bead of hot glue holds them in place at the bottom.
(The glue is inside where the matchbook folds over to hold them. That’s where the striking area is on some matchbooks. On my matchbook shrine, there is no staple.)
Instructions
Although you can make an Elvis shrine, there are many other themes suited to matchbook shrines. For example, you could create a shrine to orchids, or to sunglasses, or to Godzilla.
These how-to tips apply to any kind of matchbook shrine.
Collect graphics to use or as inspiration
If you don’t have images that are ready to use, you can ask any search engine for help. (AI may be useful, too.) For an Elvis shrine, you might try results from a “photos of Elvis Presley” search.
However, if you plan to sell your matchbook shrine, keep copyright laws in mind. That’s especially true if you’re planning to sell them at sites like Etsy.
Adding original graphics
When you plan your “match” images, ¼ inch wide is good. Allow lots of white space beneath. Distorting the image can look a little weird. If your matchbook shrine is humorous, like my Elvis shrine, you can stretch the image to fit a pretend match.
Desaturating the image (in a graphics program) allows the graphics to match (so to speak) the widest possible range of background/collage colors.
Cutting
Cut the collage elements bigger than you need, then trim carefully when you’re working with teensy stuff.
Scallop the “match heads” first, then cut between the matches almost to the bottom of the set of matches. Leave about ¼ to ½ inch at the bottom, where the matches will be covered by the fold-up part of the matchbook. The matches will be hot glued in place, inside that fold.
Also, when you trim them, leave a bit of “breathing space” around the top of each match.
Assembling
If you’re covering a matchbook, put the adhesive on the matchbook, then stick a too-large piece of paper/fabric to it.
After the adhesive dries, trim the paper or fabric you’ve used as the cover.
A thin bead of hot glue along the bottom edge is best for holding the matches in place. It will blob up, so use just a little.
Embellishments
You can add almost anything that will fit the matchbook, from beads to glitter to ribbons or fabric, and so on.
Continue ’til it’s done!
Your matchbook shrine can be as simple or complex, and as plain or ornate as you like.
Pause if you’re not sure whether it’s done. You can always add more elements later.
Even if you went too far, you can probably remove the excess elements.
At some point, you’ll have that “Yes, it’s finished” feeling, and be ready to show your matchbook art shrine to others.
Let me know if you have any questions. I’m always eager to be helpful!
Amazon and the Amazon logo are trademarks of Amazon.com, Inc, or its affiliates. As an Amazon Associate, I earn from qualifying purchases.

