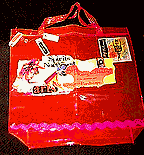
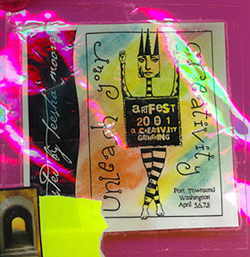
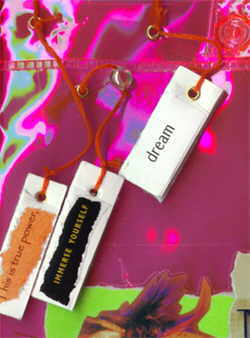
These are notes from my popular Artfest 2001 workshop about using images and word art to embellish purses and tote bags.

Supply list
- Vinyl bag with at least one transparent side.
- Plain white paper as your collage support
- Collage elements – flat (or nearly flat) items and images
- Some kind of paper adhesive
- Clear laminating plastic, clear 2″ wide packing tape, or clear adhesive-backed shelf paper
- Optional: beads and cord or floss, or small dimensional embellishments (see directions for ideas).
Guidelines (not instructions – this is your bag!)
First, select a vinyl bag. (My sample came from Michael’s Arts & Crafts store. In 2001, they were $1.99 each. In 2009, they’re still under $5 if you shop carefully. Sometimes, you can even find them at pound or dollar stores.)
Use a plain sheet of paper for your collage base/support. Otherwise, the back of your work will show through the other side of the vinyl bag.
Create a collage using modpodge, gluestick, gloss medium or other adhesives. As long as it doesn’t pucker the paper, almost any glue will work.
You can use charms, trinkets & raised elements, but they don’t stick well. Sorry. Hang them from the bag, instead.
If you like, you can create two collages, one to go on top of the vinyl, and one to show through from the inside.
You can even cut the vinyl so the inside one shows through better.

Cut your laminating plastic to size. Trim closely, but allow at least a half inch around your collage, so the plastic will stick.
-
- I use shiny laminating plastic sold on a roll at A. C. Moore. A similar product at Michael’s is often matte, like Contac paper. I like the shiny stuff. Sometimes, you can find this at Staples or an office supply shop. You can also use 2″ wide packing tape, or any clear adhesive product that suits your mood and artistic vision.

Next, place your collage, face down, on the laminating plastic. When you pick up the laminating plastic, the non-sticky side and the collage should be facing you.
Stick the plastic-covered collage onto an appropriate place on the bag.
Embellishment ideas
– IF you like: Punch holes in the vinyl using a 1/8″ punch. Add tiny grommets/eyelets using the tool, hammer, and wood block. Tap lightly!

– String evidence or charms/trinkets from ribbon or thread, tied so they hang through the grommet/eyelets.
– If you’d like… attach more “evidence” (a term we used to reference journaling-type additions) at the bottom edge of the bag. Grommets are not required here if you’re sewing something the width of the bag. Just go ahead and sew through the vinyl. If it rips later, use clear packing tape to repair it.
– You may want to replace the handles with something better. For example, a strong measuring tape may make a great handle, or you could use braided ribbons, or…?
– Use your tote, accept compliments, and make fresh tote bags regularly since these are easy, inexpensive, and fun!
Amazon and the Amazon logo are trademarks of Amazon.com, Inc, or its affiliates. As an Amazon Associate, I earn from qualifying purchases.
