When a student copies

In the days of the Old Masters, apprentices and students would copy their masters’ works over & over again, until they could mimic the technique perfectly. Then, they’d develop their own styles.

When a student (or someone who’s learning a new technique) copies my art exactly–or very closely–I like to think of them in that context. It takes the oh-my-goodness gasp out of the moment.

From my experience, in every class of 30 students, one will want to copy my work very closely, or even line-for-line.

I encourage them to use the class to explore their own creativity. However, some students need to copy, to get comfortable with the materials or the technique.

That’s okay with me. After all, I love to teach, and I’m thrilled when people choose to take a class with me… no matter what their learning modalities.

You may have to exercise your diplomatic skills if one student copies another, or if a student suggests (correctly or not) that another student’s work isn’t entirely original. This rarely happens, but it needs to be addressed swiftly.

Often, it’s best to ask the complaining student to step outside the classroom to discuss this. If the issue doesn’t resolve quickly, you may need to ask the other student to join the conversation.

If you’re out of the classroom for very long, it’s not fair to the other students. Sometimes, you may have to leave it as “Let’s all agree to disagree,” and get back to the class. (When that happens, I usually discover that this has been an ongoing issue with one or both of the students. If so, a five-minute discussion isn’t likely to resolve it; let it go and get back to making the class fun and educational.)

We can’t evaluate every student’s vision, to see if it’s original, copied, or inadvertently “borrows” some elements from existing art. But, in the classroom, I bring up the Old Masters example. That generally takes some of the edge off this volatile subject.

Copying and coincidence in art

Many artists–especially new and/or tired ones–talk about being “copied” by others. Sometimes, it’s not clear who is doing the copying, if anyone is. And, artists–even established ones–are often influenced by the same things as others, and develop startlingly similar ideas as a result.

RICE’S MILAGROS DOLLS

For example, awhile ago I visited Rice’s website, voo-doo-cafe.com, and saw milagros-type dolls almost identical to the ones that I’d been quietly working on for several months.

(Mine didn’t turn out as well as hers did. I sold a few and then abandoned the idea. Rice shines in this area; I don’t.)

There is no way that Rice knew what I was doing, and vice versa. It was simply coincidence.

LESLEY’S ‘FRAGMENTS’

Likewise, in the early 1980s I made pieced and appliqued quilting squares for other artists to use in their fabric art vests, wall hangings, and other art. I sewed them on my favorite treadle sewing machine, using a variety of techniques including primitive image and text transfers. These squares sold quickly in shops along coastal Maine, but by the mid-1980s when I moved to Florida, I’d stopped making them.

Nevertheless, I was stunned when I saw Lesley Riley’s “Fragments“, which are almost identical to what I was making in the early 80s.

Was she “copying”? Of course not! I doubt that she ever saw one of my fabric art pieces. Nevertheless, after seeing Lesley’s pieces I delayed plans to make more of them myself. I’m a little phobic about being accused of “copying,” I guess.

(Note: Both Rice and Lesley are very good friends of mine. And, I’ve mentioned my dilemma to Lesley, who immediately laughed and told me to go ahead with my fabric art, and not worry how it looked to others.)

SIMILARITIES ARE INEVITABLE

My point is, we’re working with similar materials, often similar inspirations… it’s impossible NOT to be on the same wavelength as other artists, whether you share contact or not. You really do have to just plunge ahead with your own projects, products, visions, and dreams. As your work evolves, your unique signature style will be there, and make the differences clear.

But, it’s vital to keep these kinds of coincidences in mind, when you think that someone has copied you, too. It could be simple coincidence then, as well, no matter how “just like mine” their art/workshop/project seems to be. And that’s difficult to detach from, sometimes, when the similarities are overwhelming… especially when you’ve invested a lot in an idea or project.

Yes, my visibility makes people think that I invented the techniques that I use. I didn’t. NObody “invented” them really… we’re all inspired by different resources, or at least in different ways.

Oh, people do research some techniques. I’m responsible for several in popular use, including one kind of gel image transfer. But, that’s still not “copying” as far as I’m concerned. I stumbled onto a few things that worked and cheerfully shared them with others. We all do this. Techniques generally aren’t proprietary.

What makes our art unique–not “copying”–is how true we are to that individual, internal voice that speaks from our respective souls.

COPYRIGHT

Copyright issues come into play when someone is using your notes, or copying your art, line-for-line. But, you cannot copyright an idea, a trend, or a project, per se.

You can trademark a name or a slogan. You can patent a specific design, including the essential points that make it distinctive. But, to do this formally can be complex and expensive, and making it into a legal issue if someone copies is generally more expensive than it’s worth. And, nobody looks good when you sue. There are always hard feelings.

This is an area where we may always have confusion and problems. We must keep moving ahead and creating from our own visions, and take a chance that someone 100 or 1000 miles away isn’t acting on the same impulses and inspirations.

YOUR VOICE IS WHAT MATTERS

Stay true to your own voice. Always be yourself, and trust in that. Art has the most vitality when it is authentic.

When you’re expressing your deepest self, your message will be uniquely yours, but it will also have elements in common with what everyone else thinks and feels, because–underneath it all–we share more than people may realize.

Aisling’s Artistamps 2000 – 2005

I’ve been making artistamps since around 1978.

My first stamps were handmade, one by one, and sent with my zines of that era. I hand-carved a border that looked like a perforated stamp edge, and stamped it repeatedly to create the ‘frame’ of each stamp. Then, I put art in the middle.

At present, I don’t have copies of any of them. (I may find some as I go through old boxes of art supplies, etc., but that’s unlikely.)

But hey, if those mailings brought people joy, they served their purpose.

This webpage features many of my early digitally-created artistamps. Many of them are clickable, opening printable images… of varying quality. (When I saved my first digital files, I didn’t always understand things like resolution. So, some of them look and/or print better than others.)

airmail artistamp rhiannon artistamp 1 rhiannon stamp
create! artistamp ecp April Fool's artistamp electronic collaborative project artistamp
another ECP stamp - Sojourn in Egypt kilmallock post office stamp

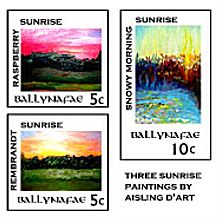
Sunrise Series

This block of stamps features some of my sunrise paintings.

sunrise paintings

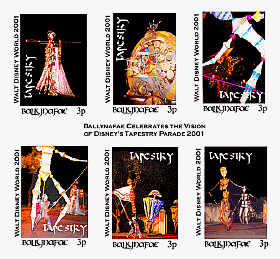
Tapestry Parade Series

This block of six stamps includes photos of Disney’s EPCOT parade, Tapestry. The puppeteers include Disney cast member Jeremy Pace (in the lower left stamp). The link opens a PDF version of the stamps.

Tapestry parade stamps

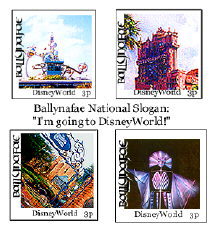
Disney World Tribute Series

This series features photos from Disney World. This set is not available in printable size.

disneyworld artistamps

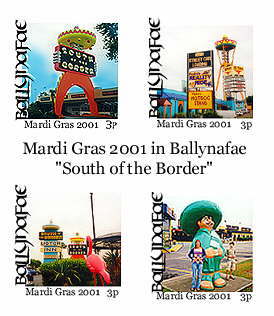
Ballynafae Mardi Gras – 2001 Series

Also not available in printable size, this series includes photos from the popular tourist attraction, ‘South of the Border’.

Mardi Gras stamps - Ballynafae

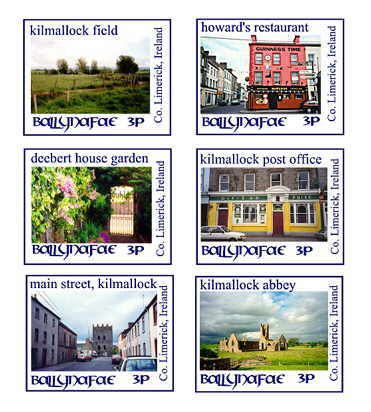
Kilmallock Ireland Series

Kilmallock is south of Limerick, Ireland, and it’s one of my favorite towns in Ireland. Many of my ancestors came from this area.

kilmallock artistamps

Copyright and art

This article originally appeared at this site in 2004.

Someone asked me about copyright law, the Sargent images that I’ve used in my printed (reproduced) projects and products.

Copyright and art for artistsI’m not an attorney, so this is my personal opinion.

In general, works created before 1923 are in the public domain, at least in the United States. And, once something is in the public domain, the individual piece can’t go back into full copyright.

Despite Dover Books’ ominous-sounding copyright notices, for example, the individual images that they use – the ones that are already in the public domain – cannot be copyrighted by them.

In my non-legal opinion, all that Dover Books can copyright is how the images are assembled and used. That is, I can’t burn a copy of their clipart CDs and sell them as my own, or even give away copies of the CD if it detracts from Dover’s potential sales.

And, if I use a significant number of images from a single Dover source -enough to compromise future sales of that book or CD – I should pay Dover’s reasonable fees for significant single-source use. (About $5 per image, as of mid-2004.)

Completed works v. elements in them

Likewise, the Sargent image in my collage is in the public domain, but nobody can copy the collage that I created with that image, except by my permission. My copyright – which exists automatically, as soon as I created the work – protects my collage but not the Sargent image in it.

Sargent died in 1925, which is why I’m comfortable using his work in my art. Most of his published work was created well before the 1923 public domain date.

(But, if I use a recent photo of Sargent’s art, and I didn’t take the photo myself, that can be a copyright violation.)

Regarding copyrighted works used in collage… that’s a tricky question and if you ask a dozen lawyers, you’ll get two dozen different opinions.

Photocopies v. originals

Generally speaking, if the piece that you use is readily recognizable as a copyrighted work, don’t print copies of it. The risks are greater if the work/item/photo you’re using is still protected by copyright and represents a essential part of your finished work… but defining “essential part” is something taken up by the courts on a regular basis… and the laws change, steadily.

Except for US paper money, which you aren’t supposed to damage in any way, you can use pieces of anything copyrighted in your art… as long as you bought it (or otherwise acquired it, legally).

For example, I’m working on a collaged cigar box purse, using a whole lot of Elvis playing cards that I bought. That is perfectly legal… they’re my cards and I can do what I want with them, as long as I don’t do anything to defame the copyright holder in any way, or cheat him/her out of rightful income.

But, if I’d taken those same cards and photocopied them to use in collage… that’d be illegal. By photocopying instead of paying the copyright owner (or his/her agents) for the images that I’m using, I’d be technically depriving them – in this case, the Presley Estate – of their rightful income.

Using others’ work as collage elements

Regarding selling the finished art, even if all pieces of it were acquired legally… We’re again getting into a dicey area.

In some states – I think that California is one of them – if someone’s art is resold, the artist is entitled to a percentage of the profits from the sale. This protects, say, someone from buying a movie script for cheap, and then reselling it to MGM for big bucks without giving the original writers a cut of the money.

It also prevents you from using a published photo or even text as an important collage element, and then selling the finished work for huge money without sharing the wealth with the copyright holder. (I believe that Sonny Bono was responsible for this legislation.)

For an artist’s worst nightmare, see the Rauschenberg case, where he use a page from an old Time magazine in one of his “found art” collages, and was successfully sued by a guy whose photo was on the original Time magazine page. (The story of this is at ItsArtLaw.org)

Andy Warhol as a precedent

Andy Warhol and others used copyrighted images (such as the Campbell’s soup can) without thinking twice. Well, it’s a different era now in a more litigious society, and we’re working with different laws, and laws that are more strictly applied.

I wouldn’t use modern images as a significant part of any collage in a Cafe Press calendar, or on fabric created by Spoonflower, etc.

Many pages in Teesha Moore’s “Play” magazine featured collages & journal pages with copyrighted images. Today, several major monthly art magazines display collages with copyrighted images, as well.

I’ve avoided those kinds of risks in my own zines, but that’s a personal decision, and one I may re-think as other artists seem to establish a safe precedent.

Get professional advice

The only thing that’s clear is that there is considerable flexibility in terms of what can and cannot be used in reprinted collage art. Read as much as you can, talk with an attorney, and then decide.

The simplest solution is to use only public domain and copyright-free images, including things like photos that you take yourself.

Related links:

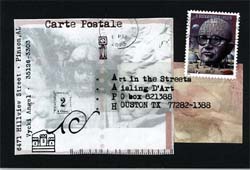
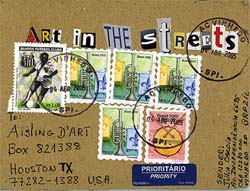
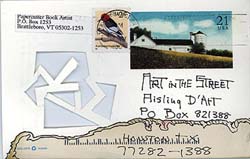
Art Day 2005 Mail Art Call: Art in the Streets

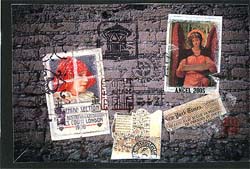
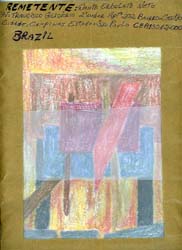
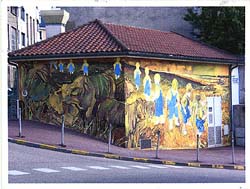
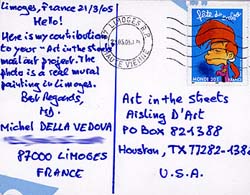
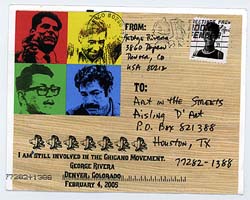
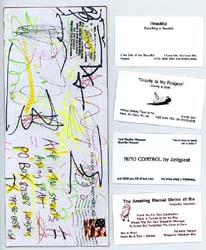
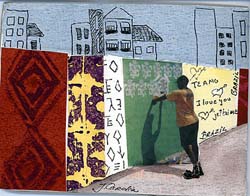
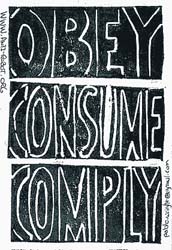
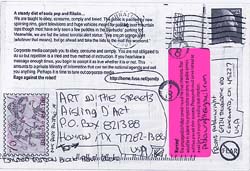
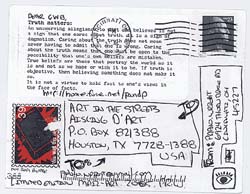
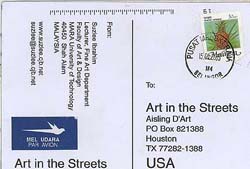
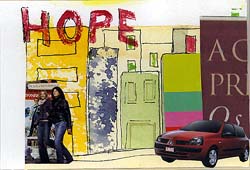
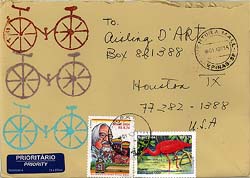
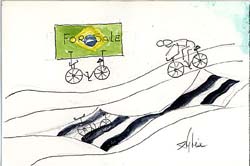
The theme for the Art Day 2005 mail art call was “Art in the Streets.” These 18 entries were diverse and fabulous.

In 2005, Art Day was under different management than in the years that followed. So, this was the only year I was the organizer for that event’s mailart celebration.

I received the art in Houston, Texas, and scanned. Then, I forwarded it to Los Angeles, Calfornia, and from there it was placed on public display as part of a large Art Day celebration in nearby Glendale.

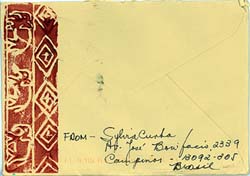
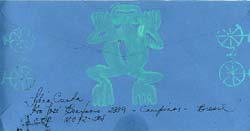
The scans include postcards, envelopes, and any enclosures in them. If the return address was clearly part of the art, it is displayed. If I wasn’t certain, I omitted it or blurred it.

THE ARTISTS: The participants were, alphabetically by last name: Vycki Angel (Pinson, AL), Julia Cardia (Vinhedo, Brazil), Sylvia Cunha (Campinos, Brasil), Michel Della Vedova (Limoges, France) Dante Erbolato Neto (Sao Paolo, Brazil), Sandoval LeFebure (Austin, TX), Suzlee Ibrahim (Shah Alam, Malaysia), Joe Messiah (Portland, OR), George Rivera (Denver, CO), Ashley Schick (Clearwater, FL), Shmuel (Brattleboro, VT), Pablo Wright (Cincinnati, OH),


AL1aAL1bAshley-Schick-a
dante-erbolato-netoFR1a
FR1b george-rivera
Joe-Messiah Julia-Cardia-a
Julia-Cardia-bpablo-wright-1a
pablo-wright-1bpablo-wright-2a
pablo-wright-2bSandoval-Lefebvre
suzlee-ibrahim-1a suzlee-ibrahim-2a
suzlee-ibrahim-2bSylvia-C-Brasil-a
Sylvia-C-Brasil-env-a Sylvia-C-Brasil-env-b
sylvia-cunha-2asylvia-cunha-2aenv
sylvia-cunha-2aenvbAL1a
AL1b Ashley-Schick-a
dante-erbolato-netoVT2b

Write About Your Art? Yes, You Can!

Have you wanted to see your own article published in Expression, The Artist, Somerset Studio, or Art Doll Quarterly?

Do you dream of someday writing a successful book about the art that you love?

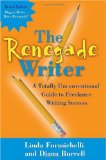
Renegade Writer book One day, waaaay back in 2005, I had coffee with NJ writer Mary Beth McCabe Temple.

She & I discussed what we have in common, which includes writing. And, she’s far more successful than I am, by a lot. She’s making connections at light speed and landing some amazing deals.

Of course, I wanted to know her secret. She generously provided me with some great contacts, but repeatedly emphasized the book, The Renegade Writer. (That’s a link to the original edition. It’s super-affordable to buy, used.)

Well, all of the local bookstores had sold every copy they’d had. So, I ordered it from Amazon.

A few days later, the book arrived. My first reaction was, “This is it? This is a skinny little paperback!”

Then, I started reading it. WOW! This is one of those books that is utterly jam-packed with one very practical idea after another, and many of these are… well, renegade ideas. After reading maybe five or six pages of this book, no wonder Mary Beth is doing so well!

See, I’ve been writing professionally–off and on–for over 20 years. I thought that I pretty much knew the routine: Ideas, queries, proposals, editors, contracts… everything.

I was really, really wrong.

If you’ve been thinking that it’d be fun to be published, either with a self-promoting article in Somerset Studio or in a best-selling book, buy this book. Either the original or the newest edition (linked below). The basics remain the same, but the newer edition can be more helpful.

I don’t say this often about writing books, because many of them just repeat the same stuff over & over again, and you can get all the info you need by reading a copy from the public library. Or, you can get the high points in a single issue of The Writer or Writer’s Digest magazines… which your public library probably subscribes to.

But, this book is VERY different. It’s a must-own if you’ve thought about getting published. You’ll refer to it often for advice and when you need a common-sense pep talk. You’ll highlight it, scribble lots of notes…

Really, buy a copy. Right now.

Your first article sale will probably more than cover the price.

Here’s the third edition link, available in Kindle format: The Renegade Writer, 3rd Edition.

“Plan B” Teaching

Most of us went from making to teaching, pretty directly. In many ways, the best advice is that slogan, “Just do it.”

But, how can you build confidence and prepare for the unexpected?

Start with some “dress rehearsals”

Practice teaching with less formal groups. Older Girl Scouts (high school students) are a good audience. If your church has a social group, especially for women, that might be good.

Consider teaching at senior citizen centers, give a free class at your public library, adult ed center, and so on… all provide ready audiences and good experience for you.

Then, price your classes low to get word-of-mouth publicity at local shops. Teach as many classes to as many people as you can.

I’d start with a project-oriented class… a single product… something that they can complete during the class. Then, find a balance between process and product. No two teachers work alike in that respect, and different students arrive with different expectations. Working around those variables takes some practice.

Bring more than you think you’ll need

Handouts are good.   They should outline, step-by-step, how to complete the product or process that you’re teaching. Illustrations are very helpful. Some students need to see it in print… it’s how they process information.

Bring extra supplies and tools. There will always be one student who didn’t bring the right supplies. Also, every student loves an opportunity to experiment with tools or unusual materials before buying their own.

For example, I often bring my grommet hardware if we’re working with fabric, or dies with letters on them if there’s anything where we can use metal (or even copper tape).

Which “extras” you bring will depend upon what you’re teaching, of course.

Every class has surprises

Start with a small number of students if one-on-one time is important. Five or six students can work well if you’re teaching a lot of technique.

If you teach larger groups, there can be trade-offs, and that can be a dilemma.  The larger the group, the more likely you’ll have more than one student who doesn’t “get it.”
In a class of 20+ (the size that I usually teach), there will often be one or two students who arrive unprepared, who didn’t really understand the class description, or who are simply feeling grumpy.

If it’s one student, you can work with them individually to help them overcome hurdles.  If two or more are unhappy, they talk with each other and there can be an unfortunate ripple effect.

Never, ever take that personally.

Adapt quickly and give one-on-one time if it’s clear that someone just isn’t getting it, and he or she is frantic to figure things out.

Otherwise–especially if two or more students are “stuck”–it’s good to have a second, less challenging project in the back of your mind, that uses the same materials.

After lunch, check with each student to see how he or she is doing. That’s the best time to identify people who need extra attention, while there’s still plenty of classroom time left.

At the other end of the spectrum, every class includes at least one student who’s qualified to teach, whether they do so or not.  Let them be helpful, if they want to.

Some of my best classes have resulted from fabulous moments when a student offered to share his or her special tricks and techniques with a particular medium… from cast toilet tissue ornaments, to a clever page-folding design for an altered book.

Your rapport with your students can make all the difference.

The occasional disaster

Now & then a grumpy student will let the anvil drop (sometimes literally) about ten minutes before the class is over, or as she’s going out the door.

It’s one of the hardest things to get past when it happens. We want every student to be very happy with our classes.

If they’re not, we’d like clues or comments while we still have enough time in the day to get them back on track… and happy.

Check with each student throughout the day. Look for hints when someone needs one-on-one time.

That’s the best you can do, usually.

If you have unhappy students in every class, or more than 20% of your students leave class disgruntled, re-examine what you’re teaching and how you’re teaching it.

You may need to make a small change or two, such as a faster or slower pace. Maybe your students each need more space to “spread out,” or need extra breaks during the day.

But, don’t let the occasional, very vocal critic wear you down, especially if you had no opportunity to fix whatever they thought was wrong.

Remember that it happens to all of us, and every teacher feels awful when a student leaves unhappy… no matter whose fault it was.

Fortunately, this kind of surprise is rare. I’m just telling you about it so you don’t quit teaching the first time it happens.

Nobody’s perfect. Just do your best.

Don’t try to be all things to all people. You can’t do it.

Do your best to keep the majority of your students happy, and teach only what you love.

Every teacher has an “off” day now and then. Sometimes it’s your fault. Sometimes, it’s outside your control… a too-hot (or too cold) room, and so on.

Try always to have a “Plan B” for every possible surprise. There will still be occasional disasters… the kiln that won’t heat, the darkroom that has a light leak, or rainy weather when your class includes an outdoor activity.

Students are generally very understanding, if you’re ready with an alternative project and a sense of humor.

And, in many cases, you can take what looks like a total fiasco, and turn it into your best class ever. It all depends upon the situation, your alternative resources, and how quickly you can think on your feet.

In most cases, you’ll come up with creative solutions to unexpected challenges.

Your students will feel that the class was entirely worthwhile, and even laugh about things that went a bit awry. Sharing creativity is what matters. Your students’ discoveries and “ah-HA!” moments can be tremendous. That’s what makes teaching rewarding, and that’s why we keep teaching… not the paycheck.

Practice makes… better!

At each class, you’ll learn more about teaching, about students, and even about your art techniques & materials.

As you gain experience, you’ll get better & better. Before long, you’ll be ready to teach in more professional venues such as shops with fabulous reputations, and absolutely amazing national art events.

Start small, learn as you teach, and keep it fun.

How to start teaching art

The first and most important rule is… Ask how to get started at the places where you’d like to teach.

It’s that simple. Just visit, call or email the people who might hire you to teach.

Other than that, anything that I say reflects only my experiences and opinions. The one and only opinion that matters is that of the person who’ll write your paycheque.

That said, here’s what I’d recommend:

1. Develop your skills as an artist, and think of projects that beginners can tackle–and complete–in a two-hour workshop. And, put your art online at your own banner-free website. (This means being hosted by a service that you pay for.) Learn to use the search engines to attract visitors. (That’s an entire course in itself, btw.)

2. Approach local shops–even Michael’s–with an offer to teach. Also check with Adult Ed, town Recreation Departments, etc. They’ll generally tell you what they pay, or what you should charge.

Let them know whether you’re more interested in making money, or getting lots of exposure; that affects how much you’ll charge. Short, inexpensive classes will generally draw more students.

3. Teach. Teach a LOT. Make sure that every handout has a way for students to reach you… your website URL, your email, and offline ways for people to contact you.

Every time you teach, add that to your resume. At this point, I hardly ever use a resume, but sometimes it comes in handy. I relied on one often when I was a new teacher.

Also remember: It doesn’t matter if you don’t have a degree in art… or if you don’t have any degree. (I have an honorary doctorate, and that’s all.)

Your enthusiasm is what sells you as a teacher, most of all.

4. Keep expanding where you teach. Bigger shops, more students, and so on… that’s not only good PR, but it’s lucrative as well. Also, let TV shows know that you’re available. Many of them–such as HGTV’s “That’s Clever!“–are often looking for new artists to feature.

5. Apply at art events. Watch the websites of art events, to see if/when they say that they’re looking for teachers’ proposals.

A proposal generally includes:

    -Class description, sometimes a short blurb plus a longer version-Photos and sometimes actual samples sent to the event organizers-Supply list (what your students should bring)-Your bio, including your website URL

    -Your photo (either in a class, or your shoulders & face, aka a “head shot”)

    -How much you want to be paid, per student (if you set the fees) and how many minimum/maximum students in each class

    -How many days you can teach

    -Whether the class is for beginners, intermediate, advanced

    -Whether the class is process-oriented (you focus on materials and/or techniques) or designed to complete a project in class (product-oriented)

    -How long the class is (sometimes events specify only full-day classes)

    -The application form (often available online)

6. Send your art (or photos of it) and maybe articles to every place that you can find, for PR. This includes magazines such as Somerset Studio, of course, but also zines relating to art, as well as to the subject matter of your art if you’re working in a popular/themed genre.

7. Read as much as you can about your kind of art, as well as books about PR, about running a business, and specifically the business of art. Take courses–especially online courses–relating to this.

Keep doing all of this, steadily. If you let up, even for a few months, people assume that you’ve quit or something. The rule in PR is: If you don’t give them something to talk about, they’ll make it up, and it’ll usually be unflattering. So, keep the PR going.

Then, it’s mostly a case of waiting for things to open up for you. And, they will.

When to make changes

If your teaching career goes flat, you MUST make changes. Either start teaching something new in your field, or look for new places to teach. Every time you reinvent yourself, you are faced with the prospect of teaching at a loss, while you build up again.

If you teach a particular style of widget-making, consider how those widgets can be used in other fields. If you can’t get classes at the widget store, consider questions like these:

– Can you add widgets to a fiber project, to teach at a yarn or weaving store, or a quilting shop?

– Would a paper/stationery shop feature your handmade (or hand embellished) journals with widgets on the cover or the pages?

– Can your widgets be added to jewelry?

And so on. There are always new ways to look at your work, at your markets, and the places where students might be eager to learn what you can teach.

Your students come first, always

Put your focus on your students and ignore the paycheck as best you can. If you’re giving your students far more than they paid for, you’ll get word-of-mouth PR that’s invaluable. And frankly, that’s where the teaching gigs come from, most often.

It’s not far removed from saying, “Do what you love, the money will follow.” And, that is the sequence… do what you love first. If you love teaching, please teach.

(If you’re trying to teach just to make money, don’t even start. Really. The students can tell, and the experience will only make you bitter.)

Students pick up on how enthusiastic a teacher is, and how much he/she cares about them as individuals. That’s the most important part of teaching. If you get that right, everything else will fall into place.

How much do artists earn?

I’m not netting $50K right now, but in past years, I have earned in that vicinity. I earned the most right before my third child was born, and–if you adjust for inflation–my gross was around $180K, with maybe 3/4 of that being net income.

The bulk of my income came from three sources:

Original art

The largest part of my income came from my original work. I sold through galleries and art associations. I made the most at art association shows, especially one-day outdoor shows. My second best art association outlet was selling through banks; a local bank accepted our art (through the art assoc) for their lobby walls, and my most expensive pieces ($500+ in early 1980s) sold there. Art associations also take a lower commission than many commercial art galleries.

Writing articles & books

My second highest–and most consistent–income was from writing. I wrote & wrote & wrote… mostly how-to articles for magazines, for book publishers, for anyone who would buy. I found my markets through the annual guide, “Writers Markets.” (Always get the latest edition. Your library probably has a copy.)

I sold first rights and then reprints, and the money added up. Those twice-yearly royalty checks from books are nice!

A little here, a little there…

I also made money in peripheral ways… doing custom illustration for printers, doing graphics for convention brochures, zines, and so on. I was always finding new outlets for my creativity, and it paid off in word-of-mouth referrals. I placed no paid advertising for my art, anywhere.

Working at home

In those days, I did no teaching at all. I’m painfully shy (really) and even one-day outdoor art shows were excruciating. So, almost all of my work was done at home, with two toddlers underfoot, and I provided the sole financial support of my family.

Then I remarried, had a third (wonderful) child, and my career seemed to threaten my new husband.

20 years later, I divorced and began the rebuilding process. So far, so good!

Back on track

I have been very successful in the past, working almost entirely from home. I expect to continue in that mode.

The “starving artist” cliche isn’t your only option if you want to earn your living as a full-time artist. No two artists will follow the same path. Find what works for you.

Remember that the average toddler falls down over 300 times before learning to walk. If you try career options that result in dead ends, don’t give up. Hope that it doesn’t take you 300 tries to find your best career path, but don’t give up!