How to Make Sock Dolls – Step-by-Step

Sock dolly reads vintage newspapers.

Last year, I began making sock dolls. I was inspired by the book Stray Sock Sewing.

Here’s how I made my sock dolls for the Wild Art Dolls swap in July 2010.

Sock Doll Supplies

You will need one sock, some batting or stuffing, Fray-Check, and your basic sewing supplies. (Needle, thread, scissors, and a thimble if you use one.) You’ll also want something for eyes, nose, and other embellishments. At the very least, that will be embroidery thread, yarn, or a contrasting color of regular thread.

Sock Doll Directions

Start with a large, children's sock.
This is the sock I started with.

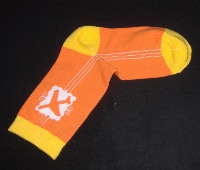
First, I started with a large, children’s sock. I’d already washed it in the laundry so, if it was going to shrink, it had already done so. (If the sock dolly needs a bath later, we don’t have to worry about him or her shrinking, puckering, or losing color.)

You should do the same.

Then, stretch it out so the heel is exactly centered, horizontally. Then, the finished doll won’t look too off-center.

Prepare the sock to become a sockdoll.
Arrange the sock so the heel is centered.

Next, you’ll cut off the toe part of the sock. You’ll be removing somewhere between 1/2 and 1/3 of the sock above the heel. That will vary with the size of the sock and your plans for the doll.

Remove the toe part of the sock.
Remove the toe part of the sock, and a little extra.

If you remove a smaller amount, the doll will have longer ears and shorter arms. If you remove more, there will be shorter ears and longer arms.

Remember: If something goes terribly wrong, you still have another sock. You can use that to supplement the pieces you cut from this sock, or you can start all over again.

The next step is to cut the cuff of the sock, perpendicular to the cuff. What you’re doing is cutting the seam area for the legs. For shorter legs, leave more uncut. For long legs, cut closer to the heel.

Above all — unless you have an octopus kind of doll in mind — don’t cut all the way up to the heel.

Cut the legs by starting at the sock cuff.
Starting at the cuff of the sock, cut both layers up the middle.

The next step is to cut a notch where the ears will extend. Once again, the deeper the cut, the longer the ears. Avoid cutting all the way down to the heel, unless you want a really deranged-looking doll with a strange, short face.

Sock doll directions - cut a notch for the ears.
Cut a rectangle or square out of the remaining area where the toe was.

Finally, you’re going to use the toe part that you cut off at the beginning. Lay it flat and snip in into two equal parts. These will be the arms.

Sock doll arms.
Cut the toe part in half – just one snip – to make the arms.

Now, it’s time to seal the edges of the sock so they don’t unravel as you’re working. You’ll use a product called Fray-Check for that. You can find it in many sewing supply stores, crafts stores like Michael’s, or order it from Amazon.com.

If you’re making a lot of sock dolls (like for holiday gifts), pick up a couple of bottles of Fray-Check. You will go through it pretty quickly. (Plus that, it can dry out in the bottle, after a few months.)

Fray-check by Dritz
You’ll need Fray-Check, a product by Dritz.

Apply a moderate amount of Fray Check to every raw edge on the doll. Be especially generous where there are angles, indicated by the blue arrows. Those points will get the most stress as the doll is being finished.

Apply Fray-Check to the raw edges.
Apply Fray-Check to all raw edges. (Remember the arm pieces, too.)

Let the Fray-Check dry completely. This can take an hour or two. Don’t sew while the fabric is damp, or it can stretch and bubble.

Next, sew the top of the head. That’s where you cut the rectangle out, and it’s on the right side of the sock in the photo above.

Sock doll ears, ready to sew.
Sew the ears and the top of the head.

Sometimes I sew along the wrong side of the fabric, and then turn the doll right-side out. At other times, I sew the whole thing from the outside, using an overcast-type stitch.

Then, turn the doll right-side out, so you can start stuffing it.

Next, Add Stuffing to Your Sock Dolls

When adding stuffing to your cloth doll, it should be packed firm.

Don’t over-stretch the sewn edges as you do this, but make sure your cloth doll won’t look all saggy after its been hugged a lot.

For sock dolls, you’ll probably start from the bottom, or wherever the open seams are.

Stuff the doll from the bottom.

When you’re stuffing the ears, it’s a good idea to make them fairly solid. I use a chopstick or a stuffing tool for this purpose.

If the ears are really long, you may want to insert a wire after the ears are stuffed. You can use a pipe cleaner or any firm but flexible wire for this. Then, you can bend the ears in zany angles.

Sewing the Legs

Now, you’re ready to sew the legs, stuff them, and then sew the edges of the feet.

When your doll looks like this, you're ready to work on the legs.
When your doll looks like this, you’re ready to work on the legs.

Sew the leg seams, but not the feet. Stuff the legs. (A chopstick, smooth end of a pencil, or stuffing tool is ideal.)

Finally, when the doll is how you want it to look, stitch along the bottom edges of the feet.

Add Embellishments to Your Sock Doll

At this point, I like to add the beads or buttons for eyes, and a nose. I usually use embroidery floss for the nose.

The doll is beginning to have character. I think that’s important, before attaching the arms. Arms can make a remarkable difference in the attitude of the doll.

Ready for the arms.
Ready for the arms!

Add the Arms

For the arms, you’ll sew the seams on the toe pieces you cut at the beginning.

Sock doll arms.Sew just the longest side of each one and stuff it. Depending on how hard it is to hold the shoulder part together, you may want to baste it closed after the arms are fully stuffed.

If they’re only loosely stuffed, you can skip the basting step and attach the arms directly to the doll.

Add More Embellishments, Maybe

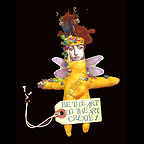
After that, you can add wings, hair, a pom-pom tail, or any other embellishments you like.

Completed doll.
The completed doll!

More Examples

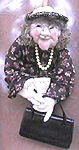
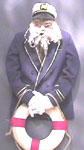
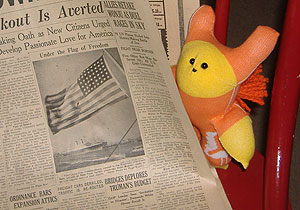
Here are a couple of other sock dolls I’ve made. They were propped up in Rubbermaid sandwich containers, so you can see them better. That also gives you an idea of the scale of them.

Black-and-white sock doll. Bead & button embellishments.

Here’s the same doll in profile. He has a yarn pom-pom tail.

Another doll, shown below, is made from an adult’s pink sock. The top of the head looks like the doll is wearing a cap. I made the cap from a second, different pink sock. I let the lower edges roll up, like the brim of a knit cap.

I also embroidered a heart on her, and gave her faerie wings.

Doll in profile.

Once you get used to making these dolls, you’ll find ways to mix n’ match pieces from different socks for different effects.

I can usually make one doll in an evening (about three or four hours), while I’m watching TV or talking with my family.

Sock Doll Tips

  1. Sock dolly helps in the kitchen!

    Use children’s socks for the best colors and patterns. For larger, colorful socks, I find good patterns & prices at places like TJ Maxx, especially in their sale sections. Want tiny socks for the dolls or for ears, arms, or a tail? Check the discount section of Michael’s Arts & Crafts. Some of their Mary Engelbreit-type socks can be wonderful for sock dolls!

  2.  Use Fray-Check by Dritz. Amazon carries it, or find it at Michael’s, JoAnn Fabric, etc. I seal all edges before I sew them. (Usually, it takes a couple of hours for the Fray-Check to dry thoroughly. If you sew the edges while the Fray-Check is damp, the fabric can stretch too much.)
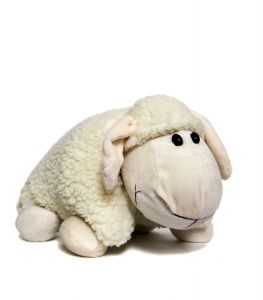
  3. Always use good batting or stuffing. Even more than other cloth dolls, the squishy nature of sock dolls means you can’t afford lumps or flat spots. (Among my favorites: Soft-Touch by Fairfield.)
  4. If your doll might get soiled easily, use any waterproofing spray on stain-resisting spray, after you complete the sewing but before you add any beads or buttons.
  5. If you’re making a doll that you’ll turn inside-out, after sewing, always try to make the final seam (the one you’ll sew on the outside) where the doll sits down. That way, the seam isn’t so noticeable.
  6. If your doll should sit and not fall over easily, make a small bean bag that will fit inside the “rear end” of the doll. Fill that bean bag with something heavy. I use anything like poly-pellets, or well-rinsed gravel intended for fish tanks, or even unscented kitty litter. (The latter, being clay, can deteriorate and turn to messy dust if handled too often.)
  7. If your dolls are small enough, check the dollhouse furnishings aisle (at Michael’s, etc.) for accessories you can use with (or glue to) your sock dolls.

Choosing Fabric for Your Cloth Doll

Dali's house in Costa Brava
Nobody said you have to follow the “rules.”

The first rule of cloth doll making is: BREAK THE RULES!

Nobody said the skin fabric has to be pink. Or muslin. Or brown. Or whatever.

Your doll’s skin can be purple. Or green. Or paisley. Or white lace over silver lame that you’ve fused to muslin.

Nobody said that your dolls’ legs and arms and faces all have to be made with the same fabric.

If your art doll is for show more than for actually playing with, the skin can be something other than fabric. Like twisty paper. Or layers of raffia that you’ve fused to muslin so the “skin” holds together and the muslin doesn’t show. Or a paper grocery bag. Or autumn leaves. Or even dollar bills, fused to muslin to make a big enough piece of “fabric.”

Nobody said her (or his) clothing has to be tasteful, or stereotypically shocking with black lace and a boa, either.

Of course, sometimes you MUST make a good trashy doll, just for the sake of having her around. Or an Elvis impersonator doll, for the male counterpart. (Or, in my case, Voodoo doll Barbie.)

Nobody said that your doll has to wear clothing made of fabric, either. Feathers might work. Or foil. Or maybe you’ll melt some 3.5″ computer disks (ventilate very well if you heat them) and give her a high-tech breastplate.

When you’re making a cloth or mixed media doll, you have many, many options.

Don’t be limited by rules in your head. And don’t be limited by rules from famous dollmakers or even your teacher.

Cloth doll goddess Elinor Peace Bailey once made an amazingly insipid doll, just to break her own anti-rules.

The point is, when you plan your doll, think big. Think original. Break the rules. Be outrageous.

But mostly, be your most creative self.

Cloth Dolls – How to Choose the Best Doll Stuffing

Cloth doll - lambNot sure how to choose the right cloth doll stuffing?

Here’s the punch line: Buy the best doll stuffing (ex: fiberfill, polyfill, batting, cotton wool) that you can afford.

The cheap stuff may look the same in the bag. It may even feel the same if you squeeze it.

You may think, “I’ll bet this is a no-name brand made by the expensive brand, and it’s really the same stuff (so to speak), for half the price.”

You’d be wrong.

In terms of lumps in your doll (or your teddy bear), and how the batting holds up over time, there is only one way to go: Buy the best doll stuffing you can afford. You won’t regret it.

The stuffing I use in my cloth dolls

I like Fairfield and Mountain Mist stuffing and batting for my own dolls. I buy their top-of-the-line products, and I’m always pleased with the results.

Yes, those top brands can seem expensive.

However, if your handmade cloth doll might have to be laundered in a washing machine, cheap stuffing will wad up and the doll will lose its shape. In fact, it could look like a strange lump.

Generally, if you stick with a respected brand name, you should be fine.

batting for doll making
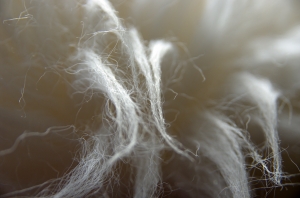
Right now, I lean towards Fairfield for doll stuffing, but that’s a matter of personal taste.

As long as you’re buying a very good brand, and avoid their “bargain stuffing” (if they have one), try different kinds and see which suits your dollmaking style.

And…

While we’re talking about cloth doll stuffing, remember to stuff your art dolls so the filling is tightly wedged into the doll.

If it’s too loose, the doll will look lumpy after she’s been picked up, hugged, and otherwise played with for a few months.

Doll stuffing tools

For the best results, collect a variety of doll stuffing tools. One great tool is called a Stuff-It. It used to be sold by Dritz, but it’s hard to find now. It can be used to stuff teensy fingers, as well as turn nice corners.

If you can’t find that — and if you’re stuffing lots of tiny corners, fingers, etc. — you’ll fall in love with the Clover Stuffing Tool.  It’s not as generally practical as the Dritz Stuff-It tool, but for detailed stuffing, you’ll want to own the Clover tool.  It’s also ideal for turning itsy-bitsy cloth fingers.

Your dollmaking kit will also include a chopstick or two. The lacquered kind with the fine point on one end and a round or square end on the other, is amazingly handy. You may want to sand the lacquer with very fine sandpaper, so the lacquer doesn’t slip through the stuffing too easily.

If you do a lot of dollmaking, go to any arts & crafts store and select a few plastic tools intended for shaping clay.

You’ll be amazed at how handy they are, for turning and stuffing dolls.  I bought this set and I’ve used them for all kinds of arts & crafts projects… none of which involved clay.

The idea is to have tools that are pointy, but not too pointy for the job. If you try to use a pencil point, it invariably slips through the stuffing, leaving a lead-black mark that shows through the fabric. Ick. Getting pencil marks off fabric… well, it’s not easy.

Likewise, trying to stuff with scissors results in unexpected holes when the scissors slip, despite your best intentions and efforts at control.  (Yes, I cried when it happened.)

How much doll stuffing to buy

Here’s what’s more important than how much doll stuffing to buy: The quality.

My VERY best advice is to buy great doll stuffing. It’ll stay fluffy and actually fill your doll or figure, for a very long time.

(Otherwise, after a short amount of time, or even a single washing, the stuffing can compress. Your doll will look sad and flat. And then you’ll have to open up the doll and add more stuffing… and who has time for that?)

SO, here’s how much you should plan to buy:

  • You’ll need at least two or three times as much as you think, looking at the bag. It will compress to about one-quarter its original size. Or more.
  • Buy a one-pound bag for making just ONE normal, happy teddy bear.  (That same bag will fill at least half a dozen sock dolls, and several medium-sized dolls.)

NEVER buy cheap doll stuffing. It’s not worth it.

Even from the start, the doll just won’t look quite “right.” I don’t know why, as the stuffing’s weaknesses usually doesn’t show up right away.

But I learned quickly; cloth dolls (and teddy bears, and other stuffed figures) don’t look as good if the doll stuffing isn’t top quality.

If you have to cut corners, select a budget fabric rather than purchase cheap stuffing.  (See my article about preshrinking fabric for fabric advice.)

Buy the best cloth doll stuffing, and your dolls will thank you for it.

Here’s one that I use and recommend:

Mountain Mist doll stuffing - recommended

Mountain Mist Premium Fiberloft

I’m using this in my current cloth dolls and figures.  It’s easy to handle, holds its loft well, and — with a Stuff-It tool — it wedges nicely into tiny corners.

It seems to wash well, so I also use this for a trapunto effect (stuffing details separately, through concealed openings in the fabric) in my other fabric art.

Because this stuffing holds up well and remains fluffy, it’s a good choice for large dolls and stuffed animals that a child will use as a pillow.

You can find it at most fabric stores, or order it through Amazon.com.

Rainbow colors divider

A related articles :

Tips and Tools for Creating Soft-Sculptured Dolls by Miriam Gourley. (That’s at the Wayback Machine, so the illustrations are missing, but the info is still useful.)

Have a question or a helpful tip?  Leave your thoughts about cloth dolls – and batting/stuffing for them – in a comment, below.

Cloth Dolls – Should You Preshrink Fabrics

Should you preshrink fabrics (or prewash them) before making a cloth doll?

clothes on a clothesline
If you’re preshrinking fabric, use a dryer, not a clothesline.

Yes… and no.  It depends upon what’s important to you.

Why not to prewash or preshrink fabrics

Fabrics, especially cottons, never look quite so “fresh” after prewashing.

The sizing* and surface finish wash off, so the fabric doesn’t look as smooth. In most cases, you’ll never wash the doll in a machine anyway.  Why worry about shrinkage?

Also, not preshrinking fabric saves you considerable time since you won’t be ironing it.

You can rush home with your new fabrics, and head straight to the cutting table. That’s ideal if you have amazingly creative visions in your head, and you can’t wait to turn them into a doll or two or three!

Dolls seem to turn out best when the full energy of your brilliant concept is right there, fresh in your mind.

Pausing to do anything mundane, such as washing & drying, can be lethal to that fresh & vital energy.

In other words: You don’t have time to preshrink fabrics.  Just get to work and create that doll!

Yes, the fresh-from-the-store surface treatment may repel inks and paints when you’re adding details (such as the face).  That’s easy to fix.  Add a couple of drops of a surfactant** to your painting water, to break down the resistance. Prewashing is not necessary.

Why you should prewash or preshrink fabrics

When fabrics have been treated with sizing and a surface finish, they often won’t accept paint, pen, and/or felt marker designs as well.  If you’re adding a lot of artwork to the surface of your doll, that’s a problem solved by prewashing.

If the doll has an accident — like when something spills on her — you can wash her (carefully, of course) without worrying about the results. Prewashed fabrics have already shrunk, bled, puckered, and softened as much as they’re likely to.

If you always preshrink fabrics as soon as you bring them home, you can confidently use the same fabric in your wearable art and know that the finished garment can be tossed into the washing machine.

How I preshrink fabrics

First, I trim any loose threads off the fabric. They’re going to fray in the laundry.  Sometimes, those loose thread can wrap the fabric into a tight, wrinkled ball by the time the drying is completed.

If it’s a small and expensive piece of fabric, I may fray-check the cut edges to prevent further unravelling and fraying.

Dritz makes a product, “Fray Check,” for this, and other manufacturers have similar products. It’s a lifesaver, in my opinion.

Before prewashing, I refold the fabric so it is not folded along the same line as it was on the bolt.

If you don’t do that, the original fold line will promptly wear and fade, even in the first washing.  You’ll have to cut around that part of the fabric.

I always wash the fabric by itself, or in the laundry with dark items that will not bleed.

(“Bleeding” colors mean colors that aren’t permanently dyed.  Some of the color will wash out during the first washing, and sometimes during successive laundering. )

For example, my kitchen dishtowels don’t show stains, so they can be washed when I preshrink fabrics.  If I’m not concerned about mixing fabric weights in the laundry, I often wash older blue jeans with my new fabrics, too.

Three things can happen when you preshrink fabrics:

First, there’s the effect of water on the fabric.

Some fabrics pucker, wrinkle, and go limp in water.

The puckering and wrinkling can be steamed out when you iron. The limpness is resolved with a spray sizing or starch, usually added when you iron.

However, if you’re going to paint or draw on the fabric, it’s best to apply the sizing or starch after you paint or draw, so the pigment is well absorbed.

Next, consider the effect of soap and water on the fabric.

The colors may run as you preshrink fabrics. The texture of the fabric may change, too.

Almost anything can happen, particularly if you’ve bought a cotton by an unknown manufacturer, or a mixed-fiber fabric from the markdown bin.

I use cold water the first time I wash a fabric. Some people also add a small amount of vinegar or salt to the water, to set the colors. Or you can use one of those disposable towels that absorb excess (“bleeding”) colors in the washing machine.

Sometimes, texture changes can be remedied with plenty of steam ironing and starch or sizing.

However, some fabrics will never look the same as when they were new, which is why some dollmakers prefer not to prewash.

Finally, there’s the effect of dryer heat. I use the hottest dryer setting and dry the fabric for over an hour, usually tossing in other loads of laundry rather than wasting dryer heat on just one piece of fabric.

(Exposure to dryer heat can be the most important step when you preshrink fabrics.)

In my experience, shrinkage is not eliminated until the fabric has been through two to three hours of dryer heat.

Summary

If you love the fabric just as you bought it, and you don’t plan to wash your cloth doll, ever, there’s no reason to preshrink fabrics.

However, if your doll may be exposed to wear & tear, and stains or dirt are possible, preshrinking can reduce worries.

Fabrics can change color, size and texture in the laundry and dryer.  In some cases, you can restore the texture.  Faded colors and shrinkage usually cannot be reversed.

I preshrink almost all of my fabrics before using them in dolls, but there are exceptions when the doll will be displayed, not worn (as a pin doll) or played with.

* Sizing: Similar to starch, sizing is a fabric treatment that makes the fibers stiffer, crisper, and “fresher” looking. Sizing washes out in the laundry, but you can replace it in the rinse cycle, or with spray-on sizing when you iron.

** Surfactant: A product which breaks the surface tension of water, and helps “cut through” the protective layers sometimes applied to stain-resistant (and other) fabrics.

I use a Shaklee product called Basic H, and place two or three drops in a pint of water when I’m using watercolors on a doll, if the paint beads too much. But, you can do the same thing with a drop of dishwashing liquid. (That is, liquid soap intended for washing dishes by hand.)

Consider every reason to preshrink fabrics (or not to) before deciding.

Alice C. W. Dennis – doll artist interview – part three

Q. If someone is new to dollmaking, what’s your best advice?

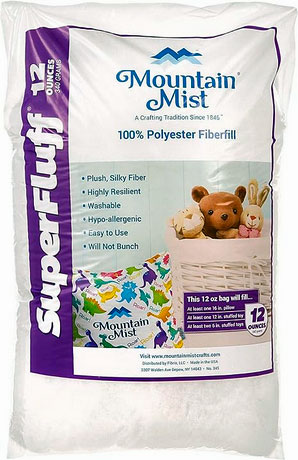
Go for it. Don’t worry about how it is done by others. Experiment first, create your style, then read what others have to advise.

Some of the best things I have done I have done not knowing the correct way. I feel there is more creativity when there is more freedom.

Sure there are some things you will need to know for some projects but take a look at the best known doll artists their work is unique.

Do your own thing. Be unique.

Q. What book or books would you recommend to a new dollmaker?

Any and all of Susanna Oroyan’s books : Anatomy of a Doll, Designing the Doll, Finishing the Figure.

Q. What tools or products do you recommend for the best possible results?

For needle-sculpture–good value NEW nylons, never support hose. Or, a very stretchy swimsuit fabric, or loose weave linen. A small-eyed slender long strong needle, and upholstery thread.

The glues I prefer are for fabric, Fabric-tac by Beacon. For gluing embellishments of different materials together, I like E-6000 or Goop.

I don’t like to use hot glue because it does not stand up to temperature changes. Many times my wreaths are hung outdoors.

Q. How and where do you sell your dolls?

I sell my dolls at fine art and craft fairs, and I have a booth at a local craft mall. I will soon be opening a portal at the www.CNYDAG.com. I have received a few orders from people who are members of the doll lists as well. (I would like to sell on eBay, but haven’t yet.)

Q. Where do you see your dolls going in the foreseeable future?

In the future I  hope to take part in selected Fine Art and Craft shows. I also hope to be able to take part in a doll conference.

The portal at the www.CNYDAG.com website will link the viewer to my www.picturetrail.com/whatanexpression site. In the future I hope to have my own web-site.

I would like to have photos of my work in national publications. My long, long term goal is to be a dollmaker that is as well known as elinor peace bailey! I want to continue to make more expressive wreaths as well as design more one-of-a-kind dolls, each with a full body.

I want to expand the media I use. Of course I will continue with cloth and needle-sculpture, but also want to do more with polymer as well as other clays and papier mache’.

I love the Bossons Heads that I  purchased a couple of while we were in Germany. I would love to do a line similar to those… only “ala Alice”.

Alice C. W. Dennis – doll artist interview – part one

Alice C. W. Dennis makes art dolls with wonderful facial expressions.  In this interview on three pages, she shares her insights, inspirations, resources, and recommendations for new dollmakers.


dolls by alice c. w. dennis (c)2005

The interview starts here…

Q. How do you describe your dolls?

I sometimes have difficulty with this. My “creations” are of everyday people, mainly. I am known for my “people wreaths”. These wreaths are wall art; busts of people.

Using a wreath for an armature, I do a caricature of a person of a certain occupation, interest, hobby or character. I needle sculpt the faces from nylon or swimming suit fabric. I use gloves for the hands. I either paint the eyes right on the fabric or sometimes make them from polymer clay.

Q. Are your dolls intended for play, or mostly for display?

Display mainly, although sometimes I do make dolls for play as well.

Q. Did you play with dolls when you were little? Do any of them influence your work today?

Yes I had dolls. The only one that really impressed me was also the only handmade one I had. It had been made for my older brother. It was a cloth doll sailor, with an embroidered face, and tight curls for hair that I think were made from french knots.

Q. Are your dolls “real”? Do they seem to dictate how they are created, what facial expression they wear, and what you name them?

Definitely! They evolve with each step. Once I thought I was making a sea captain. Boy was I surprised when It turned out that I was making a likeness of Dame Edna!

The older characters I make seem to be full of stories. I feel like they are eager to sit and talk for hours about their experiences. When finished their name seems apparent, as if I have always known them.

Now and then I do see the actual people who have influenced the faces. I have seen them in the line at my bank or at the coffee shop. It always surprises me when I realize I have needle-modeled a face from a person I might have seen often but don’t really know.

Q. How long have you been making dolls? How did you get started?

The Christmas eve after my first child (a daughter) was born, my mother gave me a sewing machine and a book on how to sew.

The first thing I made was a rag doll for her. I used a pillowcase for the fabric for the body and old clothes of mine for the fabric for the doll’s clothes. I found an old foam pillow and tore it up to use for the stuffing. LOL what a lovely doll it was!!!

I continued sewing and made dolls and stuffed animals for gifts over the years.

In 1981, I bought a little old lady face magnet. I looked at it and thought, “I can do that.” I began experimenting with needle sculpture.

In 1984, I bought Judy Mahlstedt’s pattern, Emily. I learned so much from that pattern. I showed the first Emily I made to some friends and they all ordered one! I got permission from Judy to make and sell the little puppet baby. I have continued making that little puppet baby for these past 20 years.

The success I had with Judy’s pattern gave me the confidence to experiment more and create my own dolls. Often people asked if I couldn’t make something in the line of home decoration. I made life size figures, which people bought for antique cars and front porches, and living rooms. I made vacuum cleaner covers as well as tree ornament angels, tooth fairies, and “angels of the month.”

One day while watching the Carol Duval show, there was a young man that fashioned a scarecrow wreath. He gave it a simple muslin head. I saw it and thought, “That is it! I can make people wreaths using my needle-sculpted heads and give them much, much more detail!”

Artfest Doll

Many years ago, I taught at Artfest.  It was a golden era, and – for the first few years – I had a wonderful time.

At one Artfest, organizer Teesha Moore gave us simple cloth dolls.  I think her grandmother had assembled them.

When I received mine, I promptly embellished her.  Here’s the result.

Artfest doll - 2001 or so

(I apologize for the size of the image. It’s from around 2001, I think.  All of my online images were very small, because – with dial-up connections, and some people paying by-the-minute for Internet service – load time and file sizes were a big concern.)

My embellishments:

I added rubber stamps, beads, wool hair, antennae with beads, and wired, rubber-stamped, paper “faerie wings.”

I think she’s in storage right now.  When I find her again, I’ll take a better photo and add her to this website.