Homage to Dr. John – mixed media collage

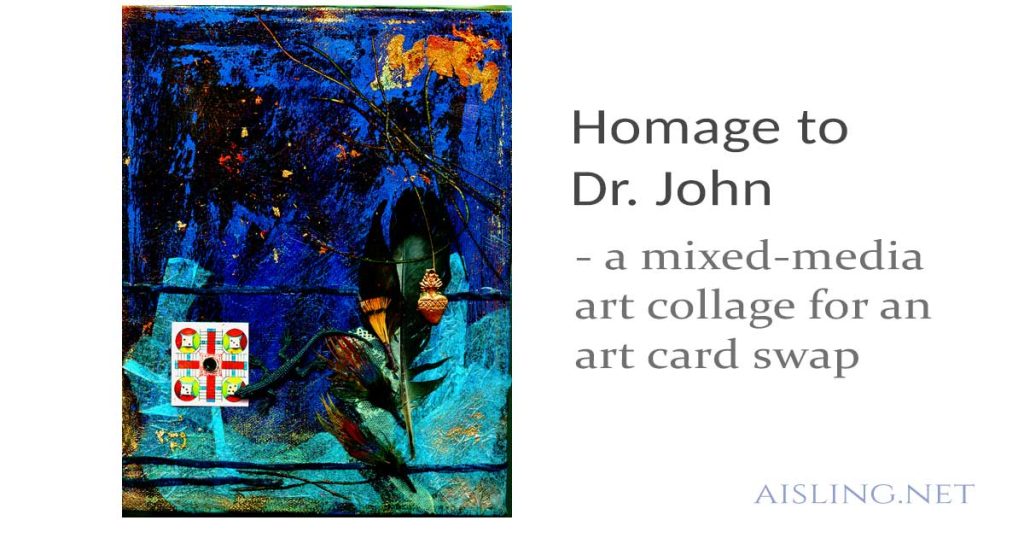
This is a collage to honor the music of Dr. John (aka Mac Rebbenack). It’s art I created for the Homage to Music card deck exchange hosted by Red Dog Scott.

Dr. John is among my favorite musicians, since I first heard his music around 1970. On an early album, Gumbo, he described his sound as “a combination of Dixieland, Rock & Roll, and Funk.” Add a little Mardi Gras and gris-gris, and you’ll get the idea.

Not everyone understands his music; I do, and it inspires much of my art.

This collage was over a month in preparation. Here’s how I made it.

The first step: gesso and paint the canvas

I started with a stretched canvas that I’d primed with gesso, and then painted metallic gold (spray paint).

Then, I began layering Burnt Sienna, Cobalt Blue, French Ultramarine Blue, and finally a black that I mixed using French Ultramarine and Burnt Umber.

Because I use oil paints for their depth of color, each layer had to dry for at least ten days.

(In workshops, I use acrylics because the layers dry in minutes, not weeks.)

Then, I sanded it down for added texture

After the layers were dry, I began sanding them down for texture. Beneath the canvas, I place a wooden block just inside the stretcher bars, so the canvas was evenly supported.

I sanded down different amounts in different areas.

Then, I began the collage.

Next, I added mixed-media collage elements

My first layer was tissue paper, crumpled and “painted on” with Golden brand Soft Gel Medium.

Next, I “painted on” a piece of antique lace. Over that, I glued three strips of teal chenille yarn.

For small pieces, I use the Golden Medium as glue; for larger pieces, I use hot glue.

Then, I added feathers. Some were gathered at the beach, others were purchased.

Sealing the canvas was next

Next, I coated the entire canvas with more Golden Medium, and waited for it to dry until tacky. At that point, I began applying Gildenglitz. For the larger areas, I increased the adhesion with pieces of double-sided tape.

Embellishments and ephemera took it to the next level

Almost finished, I glued on a dollhouse Parcheesi board, a plastic lizard, and a heart milagros that I had sprayed gold and highlighted with Dr. Martin’s calligraphy ink, in copper.

And finally, gold leaf highlights

The final step—when everything else had fully dried—was to add highlights with Rub N Buf gold leaf, in antique gold.

When I teach related workshops, I encourage students to work with rich & deep colors, gold leaf or glitter, and found objects.

Sometimes, found objects — natural ones like leaves and feathers, or bit of metal found by the roadside and in parking lots — can take this kind of collage to the magpie level, too.  I love the whimsy of that.

This tribute to Dr. John remains one of my favorite collages.

“Art and Alchemy” Pendant Shrine

I created this pendant shrine for a friend. The symbols in it were specific to her interests.

When I started this project, I knew that I wanted to make a pendant/shrine using a matchbox, a Premo-covered book, and hemp and glass beads strung together.

The results were fabulous!

Here’s how it looks from the outside. First, I created the little book to match the size of the matchbox cover. It has just a few pages inside.

The book was printed on paper, folded and bound with muslin, glued inside the covers, and then bound with hemp twine, which is also used for beaded strands.

The pendant was made from a matchbox covered with metallic purple Premo (polymer clay) with added gold leaf accents. The images on clay were applied from laser prints, with gin.

It’s been years since I made this, but I think I printed it backward on paper, turned it print side down on the baked Premo cover, and then soaked the paper with gin so the ink transferred.

Images included a classic “palm reader” hand image and then the words “art” and “alchemy” scaled to the size of the mini-book cover.

I glued the mini-book to the matchbox cover, which I’d painted with a matching metallic purple paint.

When it was dry, I sealed the surface with a clear acrylic spray.

Above, the photo shows the outside of the art shrine/pendant. The book cover opens to a small book

Above, you can see that the inside of the matchbox slides out, revealing the tiny art shrine inside.

The shrine was lined with black velvet fabric, glued in place with Perfect Paper Adhesive.

Inside the shrine, there is a tiny, metallic-looking photo image of an ancient Ishtar figure. (I think it was reduced from a photo in National Geographic magazine.)  On either side of the figure, I placed two tiny, actual candles. (I used the smallest birthday candles that I could find, lit them for just a second so the wicks would be black, and then placed them in miniature candleholders made of Premo, as well.)

The beads are glass, or made from Premo and gold leaf, strung on thin hemp cord.

It was a successful gift for a good friend.

The Pringles Lid Superman Shrine – Step by Step

You can make a small shrine using a Pringle’s potato chip lid. Here are some general instructions to create the base for the shrine.

It was created using very small artwork—some of it original—and a Pringle’s potato chip lid. You know, one of those clear plastic snap-on lids that allows you to reseal the container.

First, I washed it with dishwashing liquid to remove all grease from it. Then, I cut a notch in each side, so it could fold.

But, even if I scored it along the fold line, the lid wouldn’t stay folded at a right angle.

side of shrine

Plastic—such as this potato chip lid—has a “memory,” which means that it likes to return to the same shape it was made into at the factory.

In this case, the Pringle’s lid wants to snap back into a flat position. For the shrine to look right, it must be fastened at a 90-degree right angle.

My solution was to use my Fiskars 1/16″ punch.

I put four holes in the rim of the Pringle’s lid: two on the upright part of the shrine (one hole on each side) and two on the flat part of the shrine (also in the rim, one hole on each side, right and left).

Then, I used embroidery floss and an embroidery needle. I knotted the thread as if I were sewing and pushed the needle and thread through the hole on the bottom/flat side of the shrine. (The hole is actually in the rim, but it’s on the half of the lid/shrine that rests on the table.)

I sewed this from the inside so the knot is hidden under the rim of the lid.

Then, I put the needle and thread through the corresponding hole on the top/upright side of the shrine. It’s less important whether you go from the inside out or vice versa.

Either way, I went through the hole twice, knotted the thread, and left a good tail on it when I cut it.

Then I put a dab of glue (Perfect Paper Adhesive, but white glue will probably work fine) on the tail of the thread, and tucked it inside the rim of the lid/shrine.

I repeated this process on the other side of the shrine.

I know… this may be impossible to understand without a bazillion diagrams.

If none of this makes sense to you, experiment. You’ll probably come up with an even better design!

Here’s how the finished Superman shrine was displayed in our home. The pocket shrine is near the lower left corner of the photo.

Superman pocket shrine displayed in our home.
The pocket shrine is near the lower left corner of the photo.

Layering Paint and Polyurethane for Rich Depth

After draping your art shrine or assemblage with plaster and gauze, you can achieve astonishing results by layering paint and polyurethane.

These photos show just a few of my experiments with this technique.

It’s best to read this entire page before shopping for paint, polyurethane, and related supplies. You may get some great, unique ideas as you read…

Start with a surface that you’ve prepared by adding texture with plaster and gauze.The surface should be painted with at least one coat of gesso so that it doesn’t absorb so much paint.

You’ll also need a paintbrush of some kind (foam is okay) and paint.

I’m using mostly Brera acrylic paints, an Italian line from Maimeri (pronounced “my-MERR-y”), in my art.

You’ll also need polyurethane with a glossy finish.

1. If you need to paint a dark background, do that first, avoiding the raised areas that will be covered with gold. You can mask the areas that will remain unpainted, by covering them with easily-removed masking tape, if you like. I rarely use this, and prefer to apply the background paint carefully.Generally, I mix two or three colors on the brush as I paint, to give the surface a greater sense of depth. If I want the shrine to be very dark and mysterious looking, as in the three illustrations above, I’ll paint the raised areas as well as the background.

In this demo, I’m using Brera Violet #443, Brera Phthalo Blue #378, and Winsor & Newton Finity in Permanent Rose. I’m leaving the raised areas white, so the gold will be especially light, too.

2. When the background is fully dry, paint gold onto the raised areas. It’s okay to be a little sloppy. You can use one regular layer or a couple of thin layers of paint, depending upon what works best for you. In humid climates, two thin layers are usually best, allowing them to dry fully between coats.In this demonstration, I’m painting with Brera #142, Luster Gold acrylic paint. You can use any brand of interference-type gold for this, or even gold ink or a gold leaf type of paint.

When wet, the paint will look whitish and opaque. The white vanishes as it dries, leaving the surface translucent gold. If you painted the raised areas with a dark color first, you will definitely need two coats of the gold paint over it, to get a “real” gold look.

3. When the gold has dried, apply a very moist layer of paint in the color of your choice. Generally, you’ll use the same colors as your background. Press the paint into the holes in the gauze and the depressed areas in the texturing.If you’re covering a large area, paint some of it and wipe off the paint (see step 4), then paint another area of the surface, and wipe the paint off, and so on. In the photo, the lower left corner has been painted, the upper right has been painted & wiped, the and rest is still gold, waiting for paint.

If you were sloppy with your gold, also paint over the areas that were highlighted. Let the paint dry for just a minute or two. (I used Cobalt Blue for this layer.)

4. Using a paper towel or soft rag, gently wipe some of the fresh paint off, leaving some of it behind, especially in the depressed areas. Then, let the paint dry fully.In this photo, you can see how the paint remains in the tiny holes of the gauze, and in the depressed areas of the shrine.
5. Paint with a high-gloss polyurethane. Acrylic polyurethane is not as shiny, but it dries faster and without toxic fumes. Regular polyurethane must be used with good ventilation, takes at least four hours to dry, requires turpentine or paint thinner for cleanup, and can yellow slightly with time.I use the paint-on kind of polyurethane, with a foam brush. However, you can use spray polyurethane in a well-ventilated area. Several light layers are better than one thicker layer.

Important: Let each side dry flat before turning the shrine to polyurethane another side of it.

6. When the polyurethane has dried, repeat steps 3 and 4, using another color of paint in the same and/or different areas on the surface.(Don’t cover the whole thing again. I like to paint areas no larger than one inch squares, and sometimes just 1/2 inch streaks.)

Add up to four layers of paint (use polyurethane after adding two colors, for maximum depth). If you add more than four layers of additional colors, it can look gaudy or muddy. (But, if you make a mistake, you can generally scrub down to the last polyurethane layer, and try again.)

If you want a “golder” look–and I usually do–highlight just the peaks of the texturing with gold. Press small pieces of gold or other leafing into the almost-dry paint, if you like.

Add one or two coats of polyurethane after the final layer of paint. Additional layers can add to the ‘dichroic glass’ illusion.

Optional: When you paint the raised areas with gold, you might try painting the entire surface of the piece with a thin coat of Luster Gold or an interference gold. This paint is generally translucent.

In the photo on the left, the light is shining directly on the box. To the right, I’ve tilted the box slightly so that light penetrates the gold paint, and you can see the color beneath it.

Remember that, although these effects look like metal, they’re still based on plaster and gauze. So, the surface can be brittle if dropped or chipped.

The more you coat it with polyurethane, the better your protection.

However, it’s best to treat these objects as fragile.

They’re lovely to look at!

Embellishments for Mystery & Dazzle

Plaster gauze is ideal for embellishing your art shrines and assemblages. Add gold foil, gold leaf, glitter, beads, vintage jewelry, crystals, or other features, and your art can really stand out!

Plaster Gauze

To learn the basics of using plaster gauze (or plaster plus gauze… generally the same product), see:

When using plaster-embedded gauze, you can create fabulous textural effects with common household and art objects.

Among my favorites are soft drink bottlecaps. Place one with the open side up, and drape the wet gauze over it. Press it around the shape, inside the cap, and leave enough gauze around the bottlecap to hold it in place on the shrine.

After it dries and you’ve painted the shrine, flat-bottomed glass beads and stones fit perfectly, one in each bottlecap. (My current package of those beads is labelled “Glass Decorative Gems.”  They’re inexpensive and available at arts and crafts stores, budget import shops, and—of course—at Amazon.com.)

Here’s how it looks when finished:

bead in a bottlecap embellished shrine

However, you can use other supports for the gauze.

One of my favorites is a Pringle’s potato chip can lid. This creates a circular area with a lip that is perfect for putting the focus on an inset image, such as a religious icon, or small embellishments such as a rusty lock, etc.

I used a Pringle’s lid for the shrine at the top of this page.

You can also drape the gauze over wooden shapes such as stars, moons, a Celtic cross, numbers, letters, and so on.  Check arts & crafts stores for inexpensive wooden cut-outs that will add interest to your shrine.

You might want an eerie effect, draping it over a doll’s face, similar to the “mummies” that were popular in art a few years ago.

There are an endless number of textured and dimensional objects to try under gauze. Check your toolbox, trash, or even your drawer of kitchen tools for ideas.

Remember two things:

  • This gauze sticks to anything, including Altoid tins.
  • And be sure to drape enough of it around the applied object so that it is held in place when the gauze dries.

Other Materials (like Pringle’s Lids)

Simple textures can be fun, but they can quickly bore the viewer. You may need to add additional materials and supports to create interest.

In this shrine, in addition to the Pringle’s lid support, I added a rusty lock (adhered with hot glue), a scrap of a vintage book page, plus several colors of acrylic paint, some of them metallic. And so on.

If you visit some antiques stores and flea markets, you’ll find wonderful items, often low-priced. The rusty lock and vintage papers I used here came from a flea market. Neither cost more than $5.

Here’s a close-up of the finished art, so you can see it better. (The original photo was from long ago, reduced for Internet limits back then, and I don’t have the larger version. So, this is a bit pixelated.)

Pringles Lid and Rusty Lock - on a cigar box assemblage

Asparagus Wand

The Asparagus Wand was created for Sukie’s “Fairy Wand Exchange,” in July 2001. I made four of them to add to the wands already being sent by my daughter – who’d adopted the name “Applefaerie” – and me.

The Asparagus Wand is shown below.

aspara-1side

It started in Michael’s Arts & Crafts store, where my daughter and I were wandering the aisles looking for ideas.

When I saw the plastic asparagus, it struck me funny. It also made me think, “Hmm, what about a jewel-encrusted asparagus in the hand of an elegant faerie?”

Hmm…

It also reminded me of one of our favorite—but retired—Disney World attractions, Kitchen Kabaret, which used to be downstairs at EPCOT’s attraction, The Land.

(We still have moments of singing, “Veggie, veggie, fruit-fruit!” See the video lower in this post.)

So, when Applefaerie’s schedule prevented her from completing all six of her wands for the exchange, I had a good excuse to embellish the asparagus.

The completed wands are rather simple, with just a few beads emerging from between the petals on the stalk. Most petals are embellished.

asparawand-closeup
Close-up: Beads and pearls in the asparagus petals

All of the beads are an iridescent peach color, with golden and greenish highlights. The pearls are freshwater, peach-colored pearls, as well as some white faux pearls.

Each wand is slightly different. However, each has a 20-gauge gold-toned wire at the top that holds a star bead, and one or two other beads in place with a curled wire top.

My vision included fresh asparagus stalks in the fields in spring, with their jewels just beginning to peek out between the petals.

By harvest, these wands would be heavy with opulent jewels, as if from the Tower of London exhibit.

However, during the lighter, just-starting-to-grow phase, these asparagus are perfect for the faeries to use as magick wands.

It was an amusing fantasy and an equally fun project. I love remembering it!

Rainbow colors divider

And, for those who fondly remember “Veggie, Veggie, Fruit, Fruit” in Epcot’s Kitchen Kabaret show, here’s the video:

Capolan exchange: Relic Room Assemblage

This is an Altoid tin shrine created for a 2000 Capolan exchange, and titled the Relic Room Assemblage.

5boxgif
The outside of the box:
Altoid tin, secured with an antique button, and hemp twine with beads.

Preparing the Altoid tin:

First, I hammered it to age it. Then I sprayed it with a cream-colored epoxy paint, intended for use on large appliances. Finally, I sprayed the tin with copper and gold spray paints, to create a spattered effect.

The closure: I hammered two holes in the cover with an awl, and tied an antique button to the top. The button is used to hold the tin closed. The tin is secured with hemp twine, on which I strung wooden beads, glass beads, and a semi-precious stone.

Inside the tin: (Numbers are keyed to the illustration.)

5inside

1. On the bottom inside of the tin, I glued text from an old snake oil (patent medicine) magazine.

2. Inside the lid, I glued red paper, plus (real) antique stamps. I rubber stamped it, too. The hemp twine which secures the antique button on top, is tied inside the tin, so the knot shows here.

3. A card describing the owner of the tin, with his photo. The 19th-century photo actually shows one of my Irish ancestors, James “Jamie” Cronin.

The card says:

    This box and its contents were found in the jacket pocket of Dr. James Cronin, late of Kilmallock, Co. Limerick, Ireland.altoidcardDr. Cronin was an amateur anthropologist and student of the Tuathai. He had formed a unique thesis regarding the juxtaposition of Christian and metaphysical icons, in relation to miracles.

    Dr. Cronin’s next destination was Hy-Breasail, where he planned to test his theory about the number five representing perfect stasis and change in the Tarot.

4. Each box contains a small brass monkey. It’s a reference to the golden era of “adventure” fiction, including Arthur Conan Doyle, Edgar Rice Burroughs, and so on.

5. Part of a playing card from a fortune-telling deck. It’s aged (sandpaper and folding), smudged with gold leaf, and punched with the number 5, using an antique check-writing punch.

6. Each box has at least one actual bit of currency from an exotic country.

7. Matchbox, covered with reproduction newspaper from Harper’s Weekly during the Civil War. It’s stamped with the number 5 from a clock stamp set. I aged the paper with coffee.

8. Each box has a slightly different content, but each one contains an antique strip of paper on which I stamped “I will grant you three wishes.” The boxes also contain fetish items, including (sometimes) an animal figurine of wood or quartz, and/or a small golden ring.

9. On fabric, I transferred the image of St. Jude, patron saint of lost causes. The miracles of St. Jude are tremendous. On the reverse side, I transferred a cryptic mix of images, including a dark photo of Disney’s Haunted Mansion being struck by lightning, plus a scan of a Tarot card, The Tower, from a deck called The Vision Tarot.

stjudesmtowersm

I made a total of four of these tins for the Capolan/Relic Room exchange, in July 2000. (I made a fifth one, for myself.)