Gesso – What It Is and How to Use It

Gesso can be a useful for art journaling as well as painting and mixed media art.
I use gesso often when I’m creating heavily embellished pages in my art journals.

(Usually, I use Liquitex gesso, or whatever comes from a reliable brand, isn’t too water-y,  and is inexpensive. See my current recommendations at the foot of this article. They’re what’s in my studio, and – as I’m updating this article – HandyArt gesso delivers the best price-per-ounce.)

If you’re doing a lot of embellishing and layering, gesso can provide more support. It can strengthen the paper you’re working on.

However, you don’t have to use gesso on your art journaling pages.

In fact, most artists never use gesso in their journals. I only suggest it if you’re working with thick paint, heavy embellishments – like magpie journals and junk journals – or mixed media.

What is gesso?

Gesso is a primer, meaning it’s the first layer you might apply to the surface you’re working on, whether it’s paper, wood, canvas, or something else.

Gesso looks a lot like paint, and it goes between the surface you’re working on (the support) and whatever you’re using for your artwork.

Originally, gesso was white. Only white. Artists put it on surfaces such as:

  • Canvas
  • Wood
  • Hardboard (such as masonite, MDF, or plywood)

On wood and hardboard, gesso works a two-way barrier.

  1.  It prevents the board from soaking up the paint too much.
  2.  It also prevents any acids, oils or glues from migrating into your finished painting. (The latter could spoil the colors.)

On canvas, gesso prevents the fabric from soaking up the paint. The colors won’t bleed, and you won’t use as much paint.

That’s a good reason to use gesso on paper if you’re painting in your art journals: You’ll have more control over the color, and you’ll save money on paint. (Generally, gesso is a lot cheaper than paint is.)

Gesso makes the surface a little stiffer. It can also give the surface a little more texture (called “tooth”), so the paint sticks better.

Today, gesso comes in many colors. White is still the most popular, but black and colors are also used for art journaling and other art.

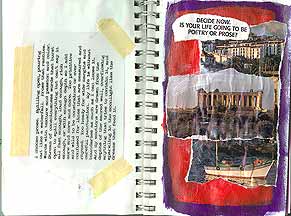
So, the gesso can be part of your finished art journaling page, too. Here’s an example:

Pages 31 - 32 from the Decluttering Journal

Gesso is useful for mixed media artwork, too. When I’m using a cigar box as the support for an art shrine, I almost always cover it with gesso, unless the design on the box is going to be part of the finished shrine.

(Also, some wooden cigar boxes look spectacular if they’re simply polished, so the wood shines around the art and embellishments you add.)

What’s the difference between gesso and regular paint?

Gesso is usually thinner and creates a slightly rough surface when you apply it.

A quick history of gesso, and some recipes

Long ago, artists made their own gesso. They mixed calcium — like chalk — in a thin base of animal glue.

Yes, it was rather smelly. It also had to be shaken or stirred regularly, because the chalk quickly settled to the bottom of the mixture.

I don’t recommend making your own gesso, but if you want to try it, here are a couple of websites with recipes:

When you see religious paintings and icons painted on wooden supports, gesso is probably underneath the artwork. That gave the wood some “tooth” so the paint stuck to it (and didn’t peel off), but it also kept the paint from sinking into the grain of the wood.

By the mid-20th century, gesso began to change. In 1955, the first water-based acrylic gesso was created by Liquitex, the paint company. That gesso could be used underneath oil paint and underneath acrylic paint.

In recent years, some artists have questioned whether or not acrylic gesso should be used under oil paint.

That’s not an issue for most people working in art journals. We’re usually using acrylics and watercolors, or other water-based media.

However, if you also work with oil paints and want to buy just one gesso for both, discuss this with someone who’s current on this topic. (Or, look it up online to see what the latest theories are.)

Gesso and art journaling

As many of us began art journaling, we found new uses for acrylic gesso. For example, it’s ideal for use under collages.

Note: The acrylic/oil issue shouldn’t affect art journalers who use oil pastels and crayons over acrylic gesso.

However, since the oil in oil paints, oil pastels, and similar products can weaken the paper in your journal, it’s a good idea to treat the paper with a coat of gesso, first.

When I journal, I use white gesso most of the time.

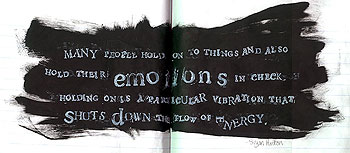
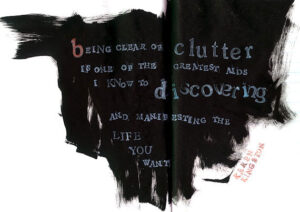
I’ve also used black gesso as part of the finished work. Here is an example of a page with black gesso on it. It’s from my Decluttering Journal.

Black gesso art journaling - Declutter pages

I used rubberstamp letters (alphabet letters) and an opaque white stamp pad. I also added details with a white gel pen. The “tooth” (rough texture) of the black gesso can work well with opaque gel pens, such as Sakura Gelly Roll pens.

How to use gesso

Like paint, gesso can get messy.

1. Spread newspaper on the desk, table, or floor where you’re working, just in case.

2. Shake the gesso container so it’s well mixed. Whether it’s acrylic gesso or traditional gesso, it’s still likely to separate.

3 Because gesso is water-based, you can use a regular brush to paint it on. I use a sponge brush for fast coverage.

4a. If you’re art journaling, apply a thin coat of gesso to one side of the page. That’s usually enough.

4b.  OR, if you’re using heavy embellishments and the page needs to be very strong, use gesso on both sides of the page. Depending on how thick the gesso is,  you may need to apply more than one layer to each side of the page.

Remember that the binding of your journal is also subject to wear & tear. Sometimes, especially when it’s a spiral-bound journal, I’ll paint gesso out to the edges of the page, including around the holes where the wire is.

Also, an art journal with heavy embellishments will only hold up to a certain amount of page-turning. You may want to limit how many people handle it.

In my classes, I often pass around my journals so people can look through them. I closely watch the condition of my journals, and “retire” them from classroom use when they start to show signs of stress.

Cheap gesso has more water in it and will take longer to dry.

If you’re going to apply gesso to the back of the page, too, be sure to let the paper dry completely before painting that second side.

Otherwise, you’ll seal in moisture and actually weaken the paper.

Does price or quality matter?

No two people are likely to agree on this topic.

When I’m using white gesso — which is most of the time — I buy whatever’s cheap. (Currently, that’s Liquitex.) It works fine for my art journaling pages.

I often buy gesso in large tubs — like ice cream containers — to save money. As long as you put the lid back on securely, gesso stores well.

That’s sort of the best of both worlds: By buying in bulk, I get the best price for a higher-quality gesso.

When I want a colored gesso, especially black gesso, I spend considerably more and shop for very good brands.

In addition, I’ve tinted small amounts of cheap white gesso for special projects.

How to tint white gesso

I start with a jar or paper cup that’s partly filled with white gesso.

Then, I slowly add coloring until I achieve the color that I want.

For color, I’ve used:

*Remember: If your Kool-Aid contains a sweetener, that can attract paper-munching insects and rodents. So, be sure it’s UNsweetened, not artificially sweetened.

Getting fancy

You’ll find other kinds of gesso, each created for different kinds of art. (I don’t use them for art journaling or mixed media collages, but you may have a use for them.)

  • In addition to colored gessos, some companies make a “hard gesso.” It goes on thick and can be sanded to a smooth finish. It would be too heavy for use on regular journal pages, but it could be useful on a heavy journal cover or other rigid support.
  • Gesso powder will mix into acrylic (and other) gessos to make them heavier, thicker, textured, and so on. This isn’t easy to find, so I can’t recommend it. Not for art journaling, anyway.

Gesso – Summary

  • Gesso is the primer. That is, it’s the first layer in some art. It helps paint stick to any surface, including paper, cloth or board.
  • Gesso prevents paint from soaking into your art journaling pages.
  • Gesso strengthens paper so that you can apply layers of collage and heavier embellishments.

You don’t have to use gesso, ever. It’s just an extra tool for certain kinds of art journaling.

I don’t use it for all of my mixed media art journaling, but definitely for my heavier, layered pages.

BRANDS I’M USING RIGHT NOW


If you have a question, or want to share your own experiences with gesso, leave a comment below. Thanks!


Art Journaling with Mixed-Media Collage – Tips for Beginners

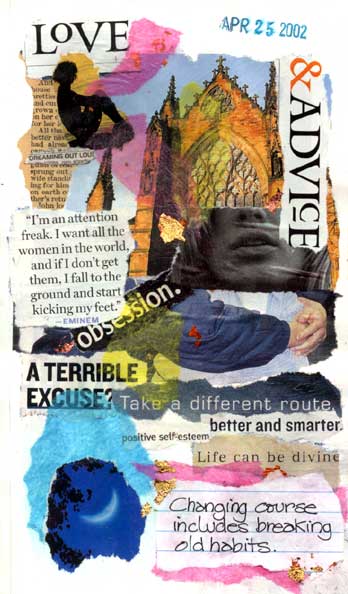
Changing course collage - better and smarter - a different route
Journal page from 25 April 2002

I start each day with an art journaling collage, like I used to do “morning pages.”

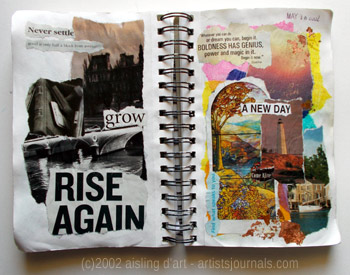
As you can see from the collage at right, I’ve been doing this—off and on—since 2002.

  • I allow myself half an hour for the initial collage process.
  • Then, later in the day, I may go back several times – adding more things – until I’m pleased with it.

But it all starts with the determination that there will be a collage when I’m finished, whether it’s good art or not!

Art journal page preparations

Usually, I coat each page of my art journal with gesso. Then, I know the pages are strong enough to support my collages, even heavy ones here and there.

I’ll leave a page or two for writing, then gesso two or three pages so they’re prepared for collage art, and so on.

That forces me to include lots of art in my journal. It’s still a diary, but it’s more than that.

Gesso for art journaling

For my art journaling, I use any cheap gesso from the fine art supplies section of Michael’s.

Gesso makes the paper stronger, so it doesn’t suck up the glue or paint so much, and it has “tooth” to grab whatever I apply to it in layers.

I buy primarily white gesso.

Yes, you can buy it in colors, but if you start with white, you can add color to it (in small batches) with watercolors (including Dr. Ph. Martins), acrylics, even food coloring or unsweetened Kool-Aid if you like! But I’m usually happy working with white.

Then, the collage images

I store a wide range of images in folders, kept in a heavy cardboard portfolio, to use when I want to do a collage.

I also keep a stack of magazines & newspapers on hand for my collage work.

And I go through them and grab whatever images, words, and phrases strike my fancy at that very moment.

If they connect somehow, great.

If they’re completely unrelated, that’s okay, too. It usually makes sense to me when I put it all together, in the context of my thoughts at the time.

I love layers in my work, so I’m big on using colored tissue paper.

Adhesives hold it all together.

Years ago, in my Yahoo!Groups community, Artists Journals (aka “AJ”), I recommended using Golden Gel Medium (soft/gloss). However, it often made the paper buckle.

Now, I’m using Yes! Paste. I apply it with a sponge brush or a cotton swab, depending on what I’m applying to the page in my art journal. It rarely buckles or puckers. I absolutely love this product!]

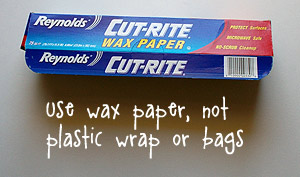
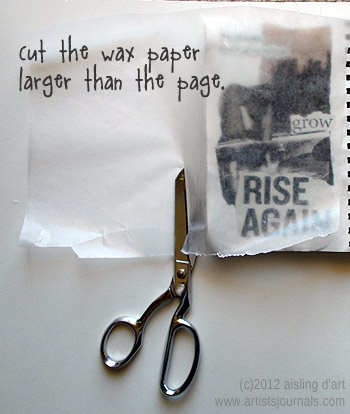
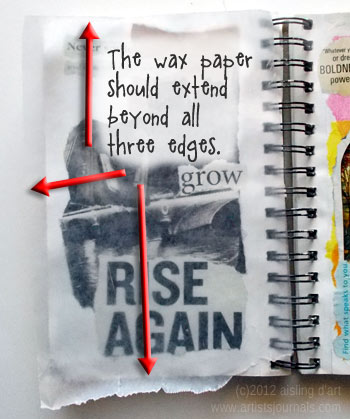
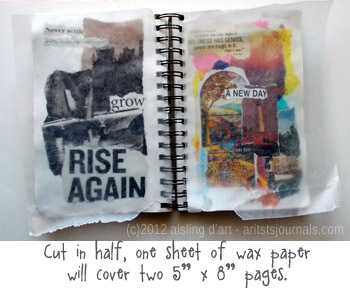
While the page dries, I’ll place a piece of waxed paper over it so I can turn the page and either write or do another collage. If it’s facing another damp-and-drying page, I’ll keep waxed paper between the pages for a week or two until the adhesive is fully cured.

Adding embellishments to your art journal

Don’t limit yourself to paper and the occasional paint or colored accent.

I highlight some of my work with different types of leafing, such as gold, copper, etc., and adhere it with the same medium or paste.

For some of my work, I think of other ways to attach stuff.

For example, on a “hurting” day, a bandaid may hold an image in place.

On other days, I may use grommets, paper clips, straight pins, safety pins, etc.

Think beyond tradition and rules!

I never fret because an item prevents the journal from fully closing, nice and flat.

Frankly, by the time I get done with lots of pages, the whole thing is so layered (and sometimes a bit buckled), it hasn’t a chance of closing flat, ever again!

Cover additions are a nice touch

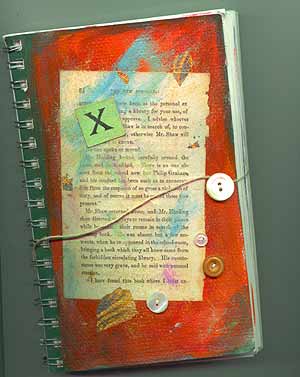
Often, I sew a button to the front cover of the journal, and a piece of string (I like hemp twine) or ribbon attached with a grommet to the back cover, so I can tie the journal closed when I carry it around or shelve it.

But you may think of other ways to secure your art journal. Think of it as yet more mixed-media art, not just “What’s going to hold this journal closed, in my purse or backpack.”

Do. Don’t plan!

button and string tie on an art journal cover

These art journaling collages are exciting to me.

I never know how they’ll turn out until I start putting the random bits of paper together and realize the internal message.

It’s sort of like bringing what’s deep inside me, forward.

From time to time, I’ll display my new (real) art journaling and mixed-media art pages here as I create them.

For example, you can see some of my 2008 collages at a follow-up article, How to Collage in Your Art Journal.

My best advice is to make your journal your own.

Sure, mimic others while you’re learning if you need to.

But, as soon as possible, follow your “what if…?” whims.

Experiment, and then tweak if necessary.

Soon, you’ll find your own art journaling style. Of course, it will evolve over time, as we do as individuals.

In many ways, I feel as if art journaling reveals who we really are.

That’s important as self-expression and as a legacy for the future.


Artists Journals – My Letter to Erin

Below is an article about creating an artists journal.  I wrote it early in 2002.  Before you read it, here’s the backstory:

Back then, I was preparing to leave a difficult marriage.  My then-husband wanted me out of the house, but I insisted on staying until my youngest child finished high school.  It probably wasn’t one of my better ideas, but it seemed like the right thing to do, at the time.

Emotionally (and sometimes, mentally) I was holding on by a thread.  The Harry Potter books were what kept happy outcomes in my mind, and several supportive friends were invaluable to me.  They made sure that I got out and saw people, regularly.  I am so grateful to them.  I’m sure that I was difficult to deal with, at times.

One friend in my circle of friends suggested that we could all get together and create our own version of Hogwarts.  It would be a place to learn things like authentic bookbinding, assemblage and found art techniques, and so on.  Of course, it was a fantasy, but several of us were going through difficult times.  Pretending it might be real, someday… that helped tremendously.

One day, my wonderful friend Erin asked me to explain how I worked on the journals that I kept during that time.  The journals were where I expressed my hopes, fears, aspirations, and anxieties, usually through my art, but sometimes with accompanying text.

I replied to Erin, and then I posted my (slightly edited) explanation as an article.  Here it is.

My friend Erin asked me how I work on art/journals.

Generally, I have a couple of them going. One is my angry one, that no one will ever see. It’s unattractive, but keeps me from venting too inappropriately sometimes. Pain and rage are scribbled on its pages.

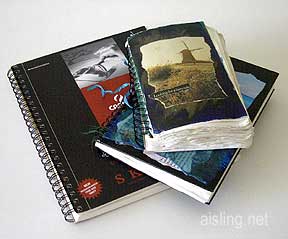
5" x 8" journal entitled "Hogwarts Journal."Then I’ll have the one at hand. Right now, with maybe ten more pages left in it, it’s my “Hogwarts Journal.” (That’s it in the photo, at left.)  It’s a journal that started as a place to jot notes & sketches for the university I’d love to create someday, either on my own or with my friends.
I started this journal because my partners-in-crime for this project are as busy as I am.  I see one member of the group infrequently, but for longer periods of time. I figured that I could just hand him this journal when our paths cross, and it’d save me hours of explaining my ideas (and probably forgetting half of them) .

But though I thought I was finished with this journal weeks ago, it was always at my elbow, convenient for adding more art & ideas, often unrelated to Hogwarts.

Now it’s nearly full, with about 1/2 Hogwarts ideas, and 1/2 totally different art & ideas.

I also have an event-related journal in progress (I’m writing this in Feb 2002, immediately after Celebrate Art!) And another one that seemed like a good idea before the event, but I didn’t like the stilted not-really-art that I produced trying to deal with pre-event stress, so it went into the trash yesterday.

(No, I don’t usually throw out art, but honestly, this was truly awful stuff, beyond redemption!)

Generally, I start with standard sketchbooks. You know, the ring-binder kind that they sell at Michael’s, and other art supply shops. I like the 5″x8″ size. (For the following illustrations, I’m using my Hogwarts journal.)

First, I gesso & paint and then collage the cover. (Gesso keeps the paint from seeping into the paper.) I use whatever gesso is cheap & available in bulk.

Recently, I added a hemp/string & button closure to this journal, because the pages are too irregular for it to stay closed. I lace the string through two mini-grommets I’ve mounted in the back cover, and I wrap the hemp/string around the antique button loosely sewn on the front. (It’s secured with a smaller antique button on the inside of the front cover.)But, next in the process, I start the title page, which will evolve as the journal does. This one isn’t finished yet.

Along the way, I’ll alternately write and make art in the journal. (I like the phrase “make art” because it sounds like “make love,” and it’s an equally passionate expression.) I deliberately gesso ahead a few pages when I’m doing art, to make certain I keep punctuating my journal with art.

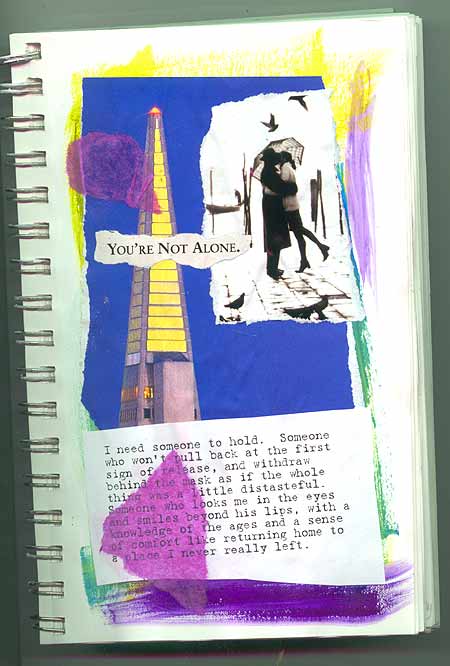
Below is an early page from this journal. This collage started with line taken from a magazine: “You’re not alone.”

A page from my journal, reminding myself that no one is truly alone.

This entry was from the time when I deliberately dropped my boundaries and started accepting hugs from people again.  And I discovered that some friends give fabulous hugs, while other people in my life… well, my own journaling on that page says it:

“I need someone to hold. Someone who won’t pull back at the first sign of release, and withdraw behind the mask as if the whole thing was a little distasteful. Someone who looks me in the eyes and smiles beyond his lips, with a knowledge of the ages and a sense of comfort like returning home to a place I never really left.”

The tissue paper–like most of my images–was applied with Golden Gel Medium (soft, gloss). This leaves the tissue transparent enough to read the text through, while giving it the sense of layers that I value in my art.

Generally, my elements are antique paper (from flea markets), magazine images & text (W magazine and Nat’l Geographic), art & text that I create on the computer, and acrylic paint, glitter, and sometimes gold leaf. Surface embellishments include found feathers & other items, antique buttons, freshwater pearls, and… whatever else finds its way into my art supplies!

And yes, the pages do buckle and bubble beneath the gesso, paint, gel medium, and layers. That’s why I use a string-and-button closure. And no, I don’t mind that it’s such an irregular and funky design. I’m very process oriented, and if the pages buckle and warp… so be it.

So anyway, that’s today’s art blurb. I hope it helps!