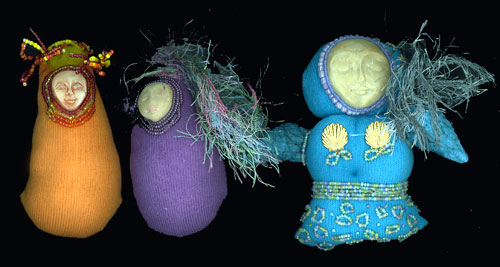
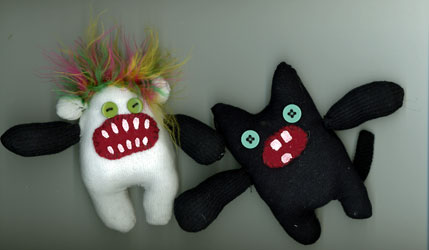
The first rule of cloth doll making is: BREAK THE RULES!
Nobody said the skin fabric has to be pink. Or muslin. Or brown. Or whatever.
Your doll’s skin can be purple. Or green. Or paisley. Or white lace over silver lame that you’ve fused to muslin.
Nobody said that your dolls’ legs and arms and faces all have to be made with the same fabric.
If your art doll is for show more than for actually playing with, the skin can be something other than fabric. Like twisty paper. Or layers of raffia that you’ve fused to muslin so the “skin” holds together and the muslin doesn’t show. Or a paper grocery bag. Or autumn leaves. Or even dollar bills, fused to muslin to make a big enough piece of “fabric.”
Nobody said her (or his) clothing has to be tasteful, or stereotypically shocking with black lace and a boa, either.
Of course, sometimes you MUST make a good trashy doll, just for the sake of having her around. Or an Elvis impersonator doll, for the male counterpart. (Or, in my case, Voodoo doll Barbie.)
Nobody said that your doll has to wear clothing made of fabric, either. Feathers might work. Or foil. Or maybe you’ll melt some 3.5″ computer disks (ventilate very well if you heat them) and give her a high-tech breastplate.
When you’re making a cloth or mixed media doll, you have many, many options.
Don’t be limited by rules in your head. And don’t be limited by rules from famous dollmakers or even your teacher.
Cloth doll goddess Elinor Peace Bailey once made an amazingly insipid doll, just to break her own anti-rules.
The point is, when you plan your doll, think big. Think original. Break the rules. Be outrageous.
Not sure how to choose the right cloth doll stuffing?
Here’s the punch line: Buy the best doll stuffing (ex: fiberfill, polyfill, batting, cotton wool) that you can afford.
The cheap stuff may look the same in the bag. It may even feel the same if you squeeze it.
You may think, “I’ll bet this is a no-name brand made by the expensive brand, and it’s really the same stuff (so to speak), for half the price.”
You’d be wrong.
In terms of lumps in your doll (or your teddy bear), and how the batting holds up over time, there is only one way to go: Buy the best doll stuffing you can afford. You won’t regret it.
The stuffing I use in my cloth dolls
I like Fairfield and Mountain Mist stuffing and batting for my own dolls. I buy their top-of-the-line products, and I’m always pleased with the results.
Yes, those top brands can seem expensive.
However, if your handmade cloth doll might have to be laundered in a washing machine, cheap stuffing will wad up and the doll will lose its shape. In fact, it could look like a strange lump.
Generally, if you stick with a respected brand name, you should be fine.
Right now, I lean towards Fairfield for doll stuffing, but that’s a matter of personal taste.
As long as you’re buying a very good brand, and avoid their “bargain stuffing” (if they have one), try different kinds and see which suits your dollmaking style.
And…
While we’re talking about cloth doll stuffing, remember to stuff your art dolls so the filling is tightly wedged into the doll.
If it’s too loose, the doll will look lumpy after she’s been picked up, hugged, and otherwise played with for a few months.
Doll stuffing tools
For the best results, collect a variety of doll stuffing tools. One great tool is called a Stuff-It. It used to be sold by Dritz, but it’s hard to find now. It can be used to stuff teensy fingers, as well as turn nice corners.
If you can’t find that — and if you’re stuffing lots of tiny corners, fingers, etc. — you’ll fall in love with the Clover Stuffing Tool. It’s not as generally practical as the Dritz Stuff-It tool, but for detailed stuffing, you’ll want to own the Clover tool. It’s also ideal for turning itsy-bitsy cloth fingers.
Your dollmaking kit will also include a chopstick or two. The lacquered kind with the fine point on one end and a round or square end on the other, is amazingly handy. You may want to sand the lacquer with very fine sandpaper, so the lacquer doesn’t slip through the stuffing too easily.
If you do a lot of dollmaking, go to any arts & crafts store and select a few plastic tools intended for shaping clay.
You’ll be amazed at how handy they are, for turning and stuffing dolls. I boughtthis set and I’ve used them for all kinds of arts & crafts projects… none of which involved clay.
The idea is to have tools that are pointy, but not too pointy for the job. If you try to use a pencil point, it invariably slips through the stuffing, leaving a lead-black mark that shows through the fabric. Ick. Getting pencil marks off fabric… well, it’s not easy.
Likewise, trying to stuff with scissors results in unexpected holes when the scissors slip, despite your best intentions and efforts at control. (Yes, I cried when it happened.)
How much doll stuffing to buy
Here’s what’s more important than how much doll stuffing to buy: The quality.
My VERY best advice is to buy great doll stuffing. It’ll stay fluffy and actually fill your doll or figure, for a very long time.
(Otherwise, after a short amount of time, or even a single washing, the stuffing can compress. Your doll will look sad and flat. And then you’ll have to open up the doll and add more stuffing… and who has time for that?)
SO, here’s how much you should plan to buy:
You’ll need at least two or three times as much as you think, looking at the bag. It will compress to about one-quarter its original size. Or more.
Buy a one-pound bag for making just ONE normal, happy teddy bear. (That same bag will fill at least half a dozen sock dolls, and several medium-sized dolls.)
NEVER buy cheap doll stuffing. It’s not worth it.
Even from the start, the doll just won’t look quite “right.” I don’t know why, as the stuffing’s weaknesses usually doesn’t show up right away.
But I learned quickly; cloth dolls (and teddy bears, and other stuffed figures) don’t look as good if the doll stuffing isn’t top quality.
If you have to cut corners, select a budget fabric rather than purchase cheap stuffing. (See my article about preshrinking fabric for fabric advice.)
Buy the best cloth doll stuffing, and your dolls will thank you for it.
I’m using this in my current cloth dolls and figures. It’s easy to handle, holds its loft well, and — with a Stuff-It tool — it wedges nicely into tiny corners.
It seems to wash well, so I also use this for a trapunto effect (stuffing details separately, through concealed openings in the fabric) in my other fabric art.
Because this stuffing holds up well and remains fluffy, it’s a good choice for large dolls and stuffed animals that a child will use as a pillow.
You can find it at most fabric stores, or order it through Amazon.com.
Should you preshrink fabrics (or prewash them) before making a cloth doll?
Yes… and no. It depends upon what’s important to you.
Why not to prewash or preshrink fabrics
Fabrics, especially cottons, never look quite so “fresh” after prewashing.
The sizing* and surface finish wash off, so the fabric doesn’t look as smooth. In most cases, you’ll never wash the doll in a machine anyway. Why worry about shrinkage?
Also, not preshrinking fabric saves you considerable time since you won’t be ironing it.
You can rush home with your new fabrics, and head straight to the cutting table. That’s ideal if you have amazingly creative visions in your head, and you can’t wait to turn them into a doll or two or three!
Dolls seem to turn out best when the full energy of your brilliant concept is right there, fresh in your mind.
Pausing to do anything mundane, such as washing & drying, can be lethal to that fresh & vital energy.
In other words: You don’t have time to preshrink fabrics. Just get to work and create that doll!
Yes, the fresh-from-the-store surface treatment may repel inks and paints when you’re adding details (such as the face). That’s easy to fix. Add a couple of drops of a surfactant** to your painting water, to break down the resistance. Prewashing is not necessary.
Why you should prewash or preshrink fabrics
When fabrics have been treated with sizing and a surface finish, they often won’t accept paint, pen, and/or felt marker designs as well. If you’re adding a lot of artwork to the surface of your doll, that’s a problem solved by prewashing.
If the doll has an accident — like when something spills on her — you can wash her (carefully, of course) without worrying about the results. Prewashed fabrics have already shrunk, bled, puckered, and softened as much as they’re likely to.
If you always preshrink fabrics as soon as you bring them home, you can confidently use the same fabric in your wearable art and know that the finished garment can be tossed into the washing machine.
How I preshrink fabrics
First, I trim any loose threads off the fabric. They’re going to fray in the laundry. Sometimes, those loose thread can wrap the fabric into a tight, wrinkled ball by the time the drying is completed.
If it’s a small and expensive piece of fabric, I may fray-check the cut edges to prevent further unravelling and fraying.
Dritz makes a product, “Fray Check,” for this, and other manufacturers have similar products. It’s a lifesaver, in my opinion.
Before prewashing, I refold the fabric so it is not folded along the same line as it was on the bolt.
If you don’t do that, the original fold line will promptly wear and fade, even in the first washing. You’ll have to cut around that part of the fabric.
I always wash the fabric by itself, or in the laundry with dark items that will not bleed.
(“Bleeding” colors mean colors that aren’t permanently dyed. Some of the color will wash out during the first washing, and sometimes during successive laundering. )
For example, my kitchen dishtowels don’t show stains, so they can be washed when I preshrink fabrics. If I’m not concerned about mixing fabric weights in the laundry, I often wash older blue jeans with my new fabrics, too.
Three things can happen when you preshrink fabrics:
First, there’s the effect of water on the fabric.
Some fabrics pucker, wrinkle, and go limp in water.
The puckering and wrinkling can be steamed out when you iron. The limpness is resolved with a spray sizing or starch, usually added when you iron.
However, if you’re going to paint or draw on the fabric, it’s best to apply the sizing or starch after you paint or draw, so the pigment is well absorbed.
Next, consider the effect of soap and water on the fabric.
The colors may run as you preshrink fabrics. The texture of the fabric may change, too.
Almost anything can happen, particularly if you’ve bought a cotton by an unknown manufacturer, or a mixed-fiber fabric from the markdown bin.
I use cold water the first time I wash a fabric. Some people also add a small amount of vinegar or salt to the water, to set the colors. Or you can use one of those disposable towels that absorb excess (“bleeding”) colors in the washing machine.
Sometimes, texture changes can be remedied with plenty of steam ironing and starch or sizing.
However, some fabrics will never look the same as when they were new, which is why some dollmakers prefer not to prewash.
Finally, there’s the effect of dryer heat. I use the hottest dryer setting and dry the fabric for over an hour, usually tossing in other loads of laundry rather than wasting dryer heat on just one piece of fabric.
(Exposure to dryer heat can be the most important step when you preshrink fabrics.)
In my experience, shrinkage is not eliminated until the fabric has been through two to three hours of dryer heat.
Summary
If you love the fabric just as you bought it, and you don’t plan to wash your cloth doll, ever, there’s no reason to preshrink fabrics.
However, if your doll may be exposed to wear & tear, and stains or dirt are possible, preshrinking can reduce worries.
Fabrics can change color, size and texture in the laundry and dryer. In some cases, you can restore the texture. Faded colors and shrinkage usually cannot be reversed.
I preshrink almost all of my fabrics before using them in dolls, but there are exceptions when the doll will be displayed, not worn (as a pin doll) or played with.
* Sizing: Similar to starch, sizing is a fabric treatment that makes the fibers stiffer, crisper, and “fresher” looking. Sizing washes out in the laundry, but you can replace it in the rinse cycle, or with spray-on sizing when you iron.
** Surfactant: A product which breaks the surface tension of water, and helps “cut through” the protective layers sometimes applied to stain-resistant (and other) fabrics.
I use a Shaklee product called Basic H, and place two or three drops in a pint of water when I’m using watercolors on a doll, if the paint beads too much. But, you can do the same thing with a drop of dishwashing liquid. (That is, liquid soap intended for washing dishes by hand.)
Consider every reason to preshrink fabrics (or not to) before deciding.
Some swaps say, “Documentation will be provided,” or something like that.
Here’s what that means: The person organizing the swap will provide a list of everyone who participated in the swap, mailart call, or whatever.
In some cases, that list may be just people’s names. In others, it’s each person’s name and address. (If you don’t want your address in the documentation, tell the swap/call organizer.)
Sometimes, the list will be included in whatever you’re receiving by return mail. More often, the list will appear online for everyone to see. (Again, if this is a privacy issue, let the host or organizer know.)
Some swaps may not include a list of participants. (Mailart calls usually do.)
However, here’s another tip: If you’re in a swap that’s 5-for-5 or something like that, the list of participants is not a list of whose art should be in the envelope you receive.
Unless the participant list is established before the swap – and that’s rare, although some hosts (like Red Dog Scott) may do this – you will never receive one item from every swap participant.
What you’ll receive is the number of items specified when the swap was announced.
And, you may receive a list of who else participated in the swap.
When organizing an art swap of any kind, postage can be a Very Big Headache. Here are some tips to keep the postage problems to a minimum.
Different people send items that are varying sizes and — more importantly — different weights.
Even in a cloth doll swap, you never know who’ll embellish their dolls with feathers, and who’ll use metal hardware, lots of beads and/or thick clay additions. Weights can vary considerably!
Never assume that the package being sent to you will require the same amount of postage as the one you sent to the swap host.
PRIORITY MAIL SOLUTIONS
Many people — including me — insist that the swaps have to fit in a Flat Rate Priority container, either the Flat Rate envelope, or a particular Flat Rate box. That resolves most postage issues, since all the packages will cost the same to ship.
Then, we ask for postage to cover shipping the swap to you.
DELIVERY CONFIRMATION
IF you want Delivery Confirmation, include the postage to cover that, as well as the completed form, already addressed to you.
Remember: If you don’t ask for Delivery Confirmation and your swap is lost in the mail, you cannot accuse the swap host of failing to mail it… unless the entire group never received their swaps, either.
(Though I sometimes decide to send a swap with Delivery Confirmation to all participants, I pay for that myself unless I made it part of the swap rules.)
DO THIS
It’s important to send exactly what the swap host requests.
Send the right number of items.
Send the exact amount of postage requested.
Include a mailing label or an addressed return envelope/package… whichever the swap host asked for.
AVOID THIS
Do NOT…
Send a different amount of postage because you think the swap host made a mistake. If you think he or she made a mistake, ask the person! (I often “round up” five or ten cents, to compensate for the people who send not quite enough postage.)
Put your postage on the return envelope, unless the swap host told you to.
Omit the return envelope, IF the swap host told you to include it.
Omit a mailing label that already displays your address. Swap hosts should not have to hand-address the packages.
Ask the swap host to use a different form of shipping than was announced in the swap.
In other words, read the swap instructions and follow them exactly.
While you may scratch your head and wonder why I’m taking the time to spell this out, I recently hosted a swap* and 100% of the participants sent me less postage than I asked for. (It wasn’t worth the trouble to get the missing cents, so I paid out-of-pocket at the post office.)
Hosting a swap can be more work than people realize. Make the host’s work as easy as possible.
Swaps are wonderful fun! Encourage people to host swaps by making their work as easy as possible… follow their rules!
*Don’t ask which swap it was. It’s over. I’ll make the rules far clearer — and I’ll be far stricter — in future swaps with that group.
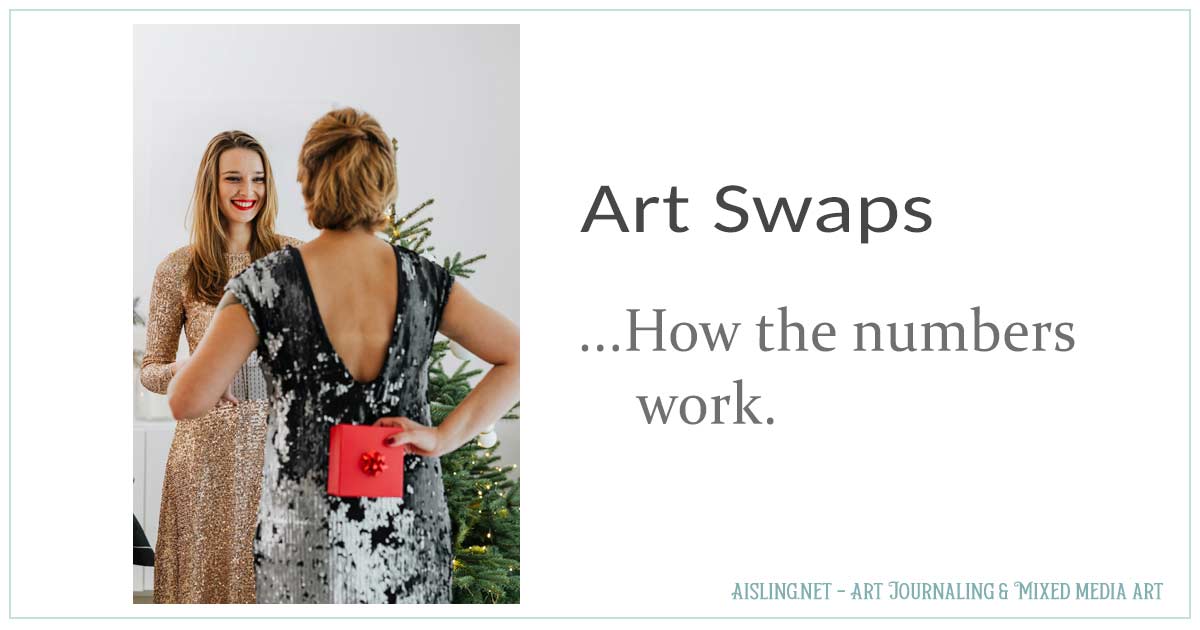
When you’re participating in an art swap through an online group or community, the numbers may confuse you. Here are some tips to help you understand them.
There are three kinds of art swaps:
Equal-for-equal,
Number-for-number-minus-one, and
Number-for-number-minus-X.
Here’s how they work…
EQUAL-FOR-EQUAL Art Swap
When a swap is 3-for-3 or 10-for-10 or anything like that, it means you’ll receive the same number of pieces of art that you sent.
For example, if – in an art doll swap – you send four art dolls you’ve created, you’ll receive four unique art dolls (created by others in the group) in return.
It does not mean that you’ll receive one doll from each player. When hosts organize swaps, they have no idea how many people will actually play.
So, a 5-for-5 swap means you’ll send five dolls and receive five in return, even if 150 people are in the doll swap.
NUMBER-FOR-NUMBER-MINUS-ONE Art Swap
Many swap hosts figure that organizing the swap is enough work.
They don’t necessarily want to make something for the swap, too.
The swap will be announced as 5-for-4 or 10-for-9, or something like that. The first number is how many individual art pieces you’re sending. The second number is how many unique pieces you’ll receive in return.
The number of items you’ll receive is always one less than you sent to the swap’s host.
For example, you’ll send the requested number of art shrines (usually similar or identical… but not always), and the swap host will keep one of them (as a thank-you gift) before sorting the art shrines they’ll send out to participants.
At the present time, most swaps seem to be organized that way. So, if you sent 10 art shrines but received 9 in return… that’s exactly what you were supposed to receive.
NUMBER-FOR-NUMBER-MINUS-X Art Swap
Some art swaps are organized for fun, but also to benefit a specific group, usually some kind of charity, a shelter, a children’s hospital, or something like that.
The charity is always specified in the swap announcement, and a link usually helps you understand why this is an important charity or organization to help.
However, we’re careful not to sound like we’re trying to recruit people to join or support the charity. It’s a fine line, but an important one when the charity is related to a particular religion or political group.
Generally, if you don’t want to contribute an item (or items) to that charity, you should not participate in the swap. Note: It’s considered rude to say, “I’d like to swap with members, but that’s all.” It’s even ruder to leap in with criticism of the charity, or its perceived motives or political affiliations.
Those swaps may be something like 5-for-4 or 10-for-9, but they may be 7-for-5 or 10-for-8, or something different. Ask the host of the swap if you’re not sure what you’ll get in return.
For example, you might send 6 art cards and receive 4 in return. One of your art cards might be kept by the swap host as the usual thank-you gift, and one of your art cards will be donated to the charity.
The remaining four will be shared with other participants, and you’ll receive four different art cards in return.
EVERY SWAP IS DIFFERENT
Though I can post tips like this, every art swap is different. Always read the rules carefully, and follow them to the letter. That will make the swap more fun for everyone, including the swap host and you.
If you have a question, comment, or a suggestion about art swaps, post it as a comment, below.
When you’re participating in art or crafts swaps through an online group or community, the numbers may confuse you. Here are some tips to help you understand how swaps work.
(These tips apply to swaps exchanged through the postal mail. For a typical digital swap example, see my article, Artistamps – digital swaps.)
EQUAL-FOR-EQUAL
When a swap is 3-for-3 or 10-for-10 or anything like that, it means you’ll receive the same number of items that you sent. You’ll send four items and receive four in return, or whatever.
It does not mean that you’ll receive one item from each player. When hosts organize swaps, they have no idea how many people will play. So, a 5-for-5 swap means you’ll send five items and receive five in return, even if 150 people are in the swap.
NUMBER-FOR-NUMBER-MINUS-ONE
Many swap hosts figure that organizing swaps is enough work. They don’t necessarily want to make something for the swap, too.
Those kinds of swaps will be announced as 5-for-4 or 10-for-9, or something like that. The first number is how many items you’re sending. The second number is how many items you’ll receive in return.
You’ll send the requested number of items, and the swap host will keep one of them (as a thank-you gift) before sorting the items to send out.
At the present time, most swaps seem to be organized that way. So, if you sent 10 items but received 9 in return… that’s exactly what you were supposed to receive.
NUMBER-FOR-NUMBER-MINUS-X
Some swaps are organized for fun, but also to benefit a specific group, usually a women’s shelter or a children’s hospital, or something like that.
The charity is always specified in the swap announcement, and a link usually helps you understand why this is an important charity or organization to help.
However, we’re generally careful not to sound like we’re trying to recruit people to join or support the charity. It’s a fine line, but an important one when the charity is related to a particular religion or political group.
Generally, if you don’t want to contribute one swap item to that charity, you should not participate in the swap. It’s considered rude to say, “I’d like to swap with members, but that’s all.”
Those swaps may be something like 5-for-4 or 10-for-9, but they may be 7-for-5 or 10-for-8, or something different.
So, you might send 6 items and receive 4 in return. One of your items might be kept by the swap host as the usual thank-you gift, and one of your items will be donated to charity.
EVERY SWAP IS DIFFERENT
Though I can post tips like this, every swap is different. Always read the rules carefully, and follow them to the letter. That will make the swap more fun for everyone, including the swap host and you.
Swaps are great fun, and a wonderful way to meet other artists and see their art in person. I encourage everyone to get involved in swaps… and to host swaps when you can.
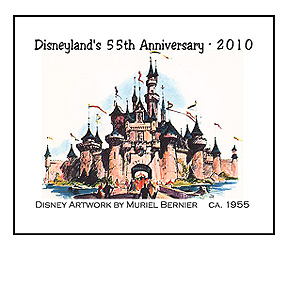
Disneyland is celebrating its 55th anniversary. I’m commemorating it with an artistamp design featuring art by my mother, Muriel Joan Bernier (1919 – 2010).
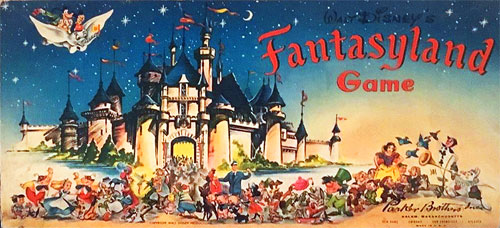
The artwork at left, which was also on the Fantasyland board game, was based on my mother’s art.
She freelanced for Disney in the 1950s. I remember her drawing lots & lots of versions of the castle, for Walt Disney and Parker Brothers (the game manufacturer) to approve. Some versions were tall & skinny. Others were very broad and sturdy, like castles in England and Wales.
My mother’s drawing style was distinctive. I’d recognize it anywhere. She’d start with very simple shapes — ovals, cylinders, squares, and circles — and then adjust the lines.
She did a lot with shading, to get the effects she wanted. She liked contrast in her work. (That wasn’t always possible when she freelanced for Rust Craft, creating greeting cards & wrapping paper designs.)
The next photo shows the final version of the game artwork. (Yes, Bugs Bunny was among the characters entering the castle. I’m not sure if Mum did that deliberately, or if it was a whim of hers, just for fun.)
My mother passed away earlier this year, and — I’m not sure why — she didn’t want me to post her artwork online. (My mother’s always been eccentric. Once she decides something, she rarely changes her mind. Questioning her was pointless.)
This, however, gets around that. The images were already online… just not credited to her.
So, I created the artistamp at the top of this article, as a tribute. Ordinarily, I add my artistamp postal name — Ballynafae — and a postage amount (usually 3p) to make my artistamps look more stamp-like. In this case, it didn’t seem right, so I added the basic text and here it is, as-is.
There are as many ways to create, modify & embellish a single-sheet zine as there are artists.
How to Create a Single-Sheet Zine
Here’s a very simple way to create one:
1. Take any white sheet of paper. Pull one out of your desktop printer, or rip one out of a notebook. (Think of the lines as pinstripes!)
2. Fold the paper in half. Most people fold it so it becomes a four-page zine, with each page being 8.5″ tall and 5.5″ wide, but anything’s possible. (Here’s a sample you can download and print: Free Zine #1.)
3. Write and draw (and create other art) on each page, until it’s full. (Alternative: Create your zine, digitally, and then print it.)
4. Flatten the sheet so you can photocopy (or scan) it.
5. Print copies, two-sided (back to back), and fold them. (Optional: Embellish by hand.)
Next, Share Your Zines!
Mail copies of your zines, sell them (at your site or Etsy, for example) or give them to others, sharing your ideas and artwork!
(If you live in a city, especially one with a student neighborhood, go hand some zines out and watch people blink in amazement. They’re used to advertising flyers, etc., not actual gifts of art & inspiration.)
If you want to make and share zines, this is a great start, and one of the simplest ways to make your own zines.
Single-sheet zines can be easy or complex. In my earlier article, Single-sheet Zine Design – Basics, I showed one of the simpler ways to create a zine.
What most people do…
From what I’ve seen, the majority of people who swap or sell zines take a bunch of letter-sized printed pages (8 1/2″ x 11″) and fold them in half. Each sheet of paper is four pages of the zine.
Here’s how a single-sheet zine might look:
See? It’s just one sheet of paper. This can be really easy!
You can print a free zine – a variation of the single-page zine concept – at Free Zine #1. (Warning: I wrote that around 2002, and included several New Age topics that were popular/trendy at the time.)
Of course, that’s just the beginning…
Zine sizes can vary.
An average zine is five to 15 sheets of paper, meaning 20 to 60 pages. Those are the ones you’ll see at art- and zine-related shops, where you can purchase zines.
However, most zines are at the small end of that figure. Many of them are just a sheet or two of paper, printed (and sometimes cut) and folded/stapled to make a zine.
Once you’ve made a few classic, single-sheet zines, you may want to try something more complex.
The Classic, 16-Page Zine from a Single, Legal-Sized Sheet of Paper
If you’re a purist or on a strict budget, you may love this: It’s a 16-page zine created with one sheet of legal-sized paper, period.
I don’t count the cover as a “page” when I number my zine pages, so my own version of this is 12 pages plus an outside cover & inside covers. Here’s how it fits on the paper:
Cut on the solid lines and fold on the dotted lines.
Staple in the center. One staple is usually enough.
One stamp on the envelope is enough to mail one of these zines. (You can tuck them in with bill payments, notes to friends, birthday and holiday greeting cards, and so on.)
You can also scan your zine, uncut, and put it online so others can print their own copy, cut & assemble it. Easy!
Zines Know No Limits!
There are many other ways to make zines. Look at books about making handmade books, for the best inspiration.
The concept is the same, but zines are usually smaller & more informal, that’s all.
If you want to create a zine that’s a work of art, that’s fine.
If you want to get wild & crazy with design, have fun with it!
Remember that a zine can be one piece of paper, b&w, printed on both sides, and folded in half. That’s a four-page zine. I have several in my collection, and I think some of the simpler ones are better than a few larger ones I’ve seen.
So, put your art & soul into your zine, and don’t worry about the size or technical stuff. I love almost every zine I see; size and expertise often have nothing to do with how enthusiastic I am about a zine.
What to Do with Zines
If you’ve wanted to create a zine for fun, just do it!
Give them to friends.
Sell them (at your website or Etsy, for example).
You can approach local artsy stores, gaming stores, etc., to consign (or outright sell) your zines.
Hand them out on the street, at school, at work, to friends, neighbors, and relatives.
Join a zine swap or launch your own, on- or offline. They can be tremendous, and you’ll receive fabulous zines that you might never see if you hadn’t swapped.
How a Zine Swap Works– One of the more popular ways to share your zines and get some in return!
If you have questions or answers, post a comment below.
Manage Cookie Consent
We use cookies to optimize our website and our service.
Functional
Always active
The technical storage or access is strictly necessary for the legitimate purpose of enabling the use of a specific service explicitly requested by the subscriber or user, or for the sole purpose of carrying out the transmission of a communication over an electronic communications network.
Preferences
The technical storage or access is necessary for the legitimate purpose of storing preferences that are not requested by the subscriber or user.
Statistics
The technical storage or access that is used exclusively for statistical purposes.The technical storage or access that is used exclusively for anonymous statistical purposes. Without a subpoena, voluntary compliance on the part of your Internet Service Provider, or additional records from a third party, information stored or retrieved for this purpose alone cannot usually be used to identify you.
Marketing
The technical storage or access is required to create user profiles to send advertising, or to track the user on a website or across several websites for similar marketing purposes.