Breakthrough Shrines – Notes

My Artfest 2004 workshop, Breakthrough Shrines, was very controversial.

In fact, I’d say it was an absolute disaster for many of my students. (The troll sitting in the back of the room, contributing snarky comments as we worked… that didn’t help.)

This workshop showed me that the audience at Artfest had changed, abruptly and radically.  That year, they wanted “safe” workshops and “cute” art. Though I take delight in cute and happy art, and often create it myself… it’s not what I usually teach.

In fact, I was locked out of my next classroom until my students insisted the organizers open the room. And then my third workshop that year… the room wasn’t set up and we had to wait an hour for enough chairs for students.

I was not prepared for that kind of disapproval – especially at the expense of my students – and, by mutual agreement, I did not teach at later Artfests.

So, with that as background, I’ll admit that you may not like the following class notes and tutorials.

The class had been designed as a process-based experiment to push students towards artistic expressions that were new and different… and perhaps uncomfortable.

There was nothing “safe” about this class.  Students either loved it or hated it.  Some caught the spirit of the exercise and produced amazing work.  Others sat there and stared at me.

Would I teach that class again?  Maybe.  If I did, it would be only for extreme, process-oriented, experimental artists.  And, I’d teach it very differently.

These following notes reflect what I taught during the class, and at the pre-class meeting the night before.

Step one: Add texture to your shrine container

To get the most from this shrine-creation process, start with a box or other paper-like container. Basically, the surface has to be something that plaster and gauze will stick to. (If the container is slick, painted, or metal, you may need to sand it and/or coat it with gesso.)

Drape the outside first, using plaster and gauze. My directions are in: Adding texture with plaster and gauze, two pages of step-by-step instructions.

Step two: Rubbings & mixed-media collage

After waiting for the outside the of the shrine to dry – usually overnight – it’s time to create the interior.

I recommend using rubbings for your backgrounds. They’re a fast way to cover a lot of the surface, uniquely.

You’ll create the rubbings on any kind of paper, from printer paper to tracing paper to… well, whatever comes to mind and is thin enough to pick up details on whatever’s below it.

Although my class examples were very gothic in nature (and too creepy for some), they were intended to challenge students with unfamiliar motifs.

In real life, any rubbings will work.

Try rubbings from:

  • a screen door
  • the sidewalk outside your home
  • the numbers from your front door
  • objects in your jewelry case or from your kitchen tools
  • keys and coins in your wallet, and
  • rubbings made with rubber stamps.

You can add collage art or mixed-media embellishments over the rubbings/background, either before or after cutting the rubbings to size and gluing them in place.

In-class work:

I’d brought a collection of castings from 18th century (and earlier) New England memorials. Many were gothic artwork from grave markers. (Note: They were responsibly cast, using techniques that risked no damage to the original art and carvings.)

Some students used them for rubbings. Others were, frankly, creeped-out. (The class subtitle had been “Art Shrines from Dark to Light.” I guess they weren’t expecting to start with anything that dark.)

A few tips for rubbings:

After completing the inside of the shrine, finish the outside by layering paint and polyurethane to add color and depth to the gauze. (Or, if you were aiming for a “mummy” effect, perhaps tea stain it?)

I like to add elegance, so the following finishing tips include my “easy antiquities” ideas.

Step three: Easy antiquities and other finishing techniques

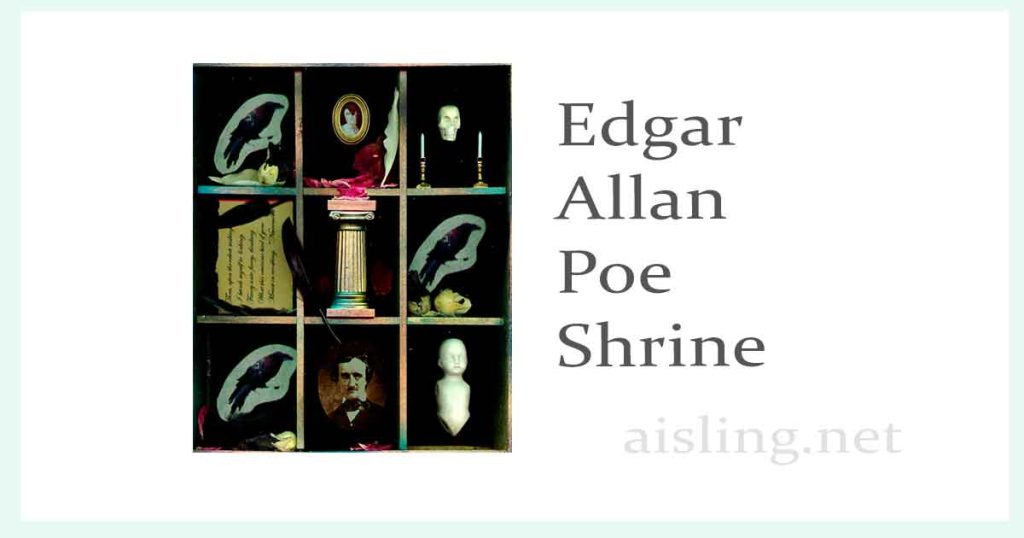
Edgar Allan Poe Shrine

Poe Shrine

The Edgar Allan Poe Art Shrine is one of my favorite assemblages.

The elements include a raven printed on muslin, in three sections.

I found him in a Dover book, and added color in PhotoShop (Image-> Adjust-> Saturation).

Then, I printed him on some iron-on tee shirt transfer paper that works in inkjet printers.

I repeated the design several times on the paper, and then ironed the raven onto plain muslin, which I later cut to size. The edges were treated with Fray Check, a Dritz sewing product that prevents unravelling.

Black feathers and dried Black Malva flowers, plus dried wild rose petals, accent these compartments.

Edgar A Poe's wifeThe portrait in the gold oval frame is Virginia, Poe’s great love.

I found her portrait in an old biography of Edgar Allan Poe, and copied it.

I printed it with sepia brown ink, on my inkjet printer.

The frame is a dollhouse decor frame.

In front of her rest dried wild rose petals, gathered at the seashore. I usually collect them at the park at Cape Neddick “Nubble” Lighthouse, in York, Maine, just over the border from New Hampshire.

(More info about “the Nubble” – Cape Neddick Lighthouse [offsite link]).

A leaf of dried sage is to the right of the portrait. Traditionally, in addition to sage’s popularity in cooking – it’s used in turkey stuffing/dressing – it also signifies healing. It’s also supposed to be an aphrodisiac.

According to Poe’s biography, he never recovered from the death of his wife. So, the healing quality of sage is most appropriate.

Skull and candles in Edgar Allan Poe shrineIn the section to the right of her, there is a skull which was hand-carved from a deer’s antler. I found it at a flea market in Hollis, NH.

That dealer sells all kinds of weird and wonderful antique and reproduction beads and trinkets. He had only a few of these, and while it felt creepy buying one, it also seemed the right kind of creepy for this shrine.

In front of the skull are brass-colored metal candlesticks and dollhouse candles (probably plastic). I really like including dollhouse items in my shrines, especially if they look reasonably accurate. They can be pricey, but I find the best deals at crafts supply shops; these came from A.C. Moore in Nashua, NH.

Poe poemIn the center section, the lines of poetry are from The Raven.

The scan quality isn’t very good in this copy, so here’s what the lines say:

  • Then, upon the velvet sinking
    I betook myself to linking,
    Fancy unto fancy, thinking
    What this ominous bird of yore
    Meant in croaking, “Nevermore.”

Next, a golden and teal-colored pillar represents Poe’s famous Fall of the House of Usher.

In the bottom row, the center image shows a photo of Poe, taken from his biography. I’ve modified this so it looks somewhat pointillist, and a little eerie.

At the far right is a limbless china doll’s body. I’m not certain why I included it, but it adds to the Gothic sensibility of the piece. It also came from the flea market in Hollis, NH.

The outside of the wooden shrine was painted black. On the back, I glued a title card and signed the piece.

The shrine is about 8 3/4 inches wide, and about 10 1/4 inches tall. It was completed in late September 2000, and immediately purchased by a happy collector.

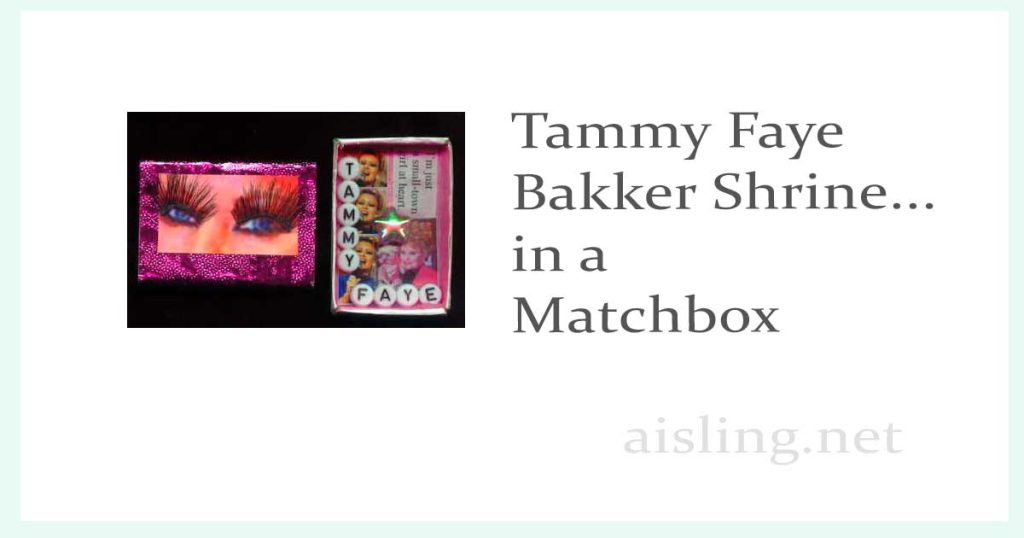
Tammy Fae Pocket Shrine

Tammy Faye art shrine by Aisling D'Art
Shrine to the goddess of mascara,
Tammy Faye Bakker Messner

Tammy Faye Bakker Messner (March 7, 1942 – July 20, 2007) remains a goddess* today as she was during her brief time with us.

Her continuing optimism was a beacon for all of us. Her sincerity was almost as remarkable as her mascara — or were those false eyelashes…or both?

When I began working with art shrines, I had to make at least one shrine to her.

And, when I had reason to create sample “pocket shrines,” it was clear that one had to be to Tammy Faye. Few women have achieved such distinction in modern society. She was a legend in her own time, and success never spoiled her.

Inside the shrine, I’ve posted one of my favorite quotes from Tammy: “I’m just a small-town girl at heart.”  (How could anyone not fall in love with someone that sweet and naive?)

How-to:

The box is a plain matchbox, bought at a scrapbooking store in Massachusetts.

If you can’t find blank matchboxes, discount stores and smoke shops carry inexpensive (full) matchboxes.  Empty them and cover them with art.

I lined the matchbox with a glitzy, irridescent pink fabric that I bought at the local JoAnn Fabrics.

The beads which spell dear Tammy’s name came from crafts shops, and the little star bead from a bead shop in Harvard Square (Cambridge, MA).

The photos of Tammy are from several websites, all featuring the readily-available images of our goddess.

The outside of the matchbox is covered with a thin foil, which I got from Gayle Page-Robak.

I cut out a photo of Tammy to feature her remarkable blue eyes. The eyelashes are false, bought for $2.74 at WalMart. They’re the closest that I could find, to the “official” false eyelashes given to lucky members of the audience at the premiere of “The Eyes of Tammy Faye.”

(I have since acquired two sets of the official false eyelashes from the movie premiere.)

I glued the eyelashes, beads and fabric in place with Perfect Paper Adhesive. Everything else was glued with Rollataq, but any paper adhesive would work fine.

And, I’ve been enormously flattered by the many requests, but this piece is not for sale.

*With all due respect to those who take the term “goddess” seriously, I’m being flippant when I use that word in this context.

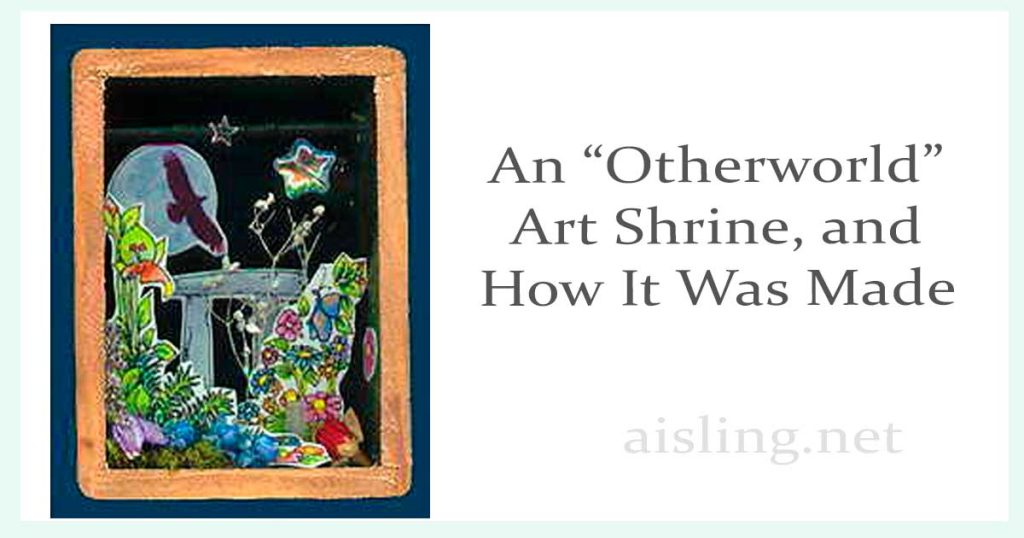
Otherworld Shrine

Otherworld Shrine by Aisling D'ArtThis is a pocket shrine, created for a shrine exchange hosted by Patty Harrison in the UK, September 2000.

Artist’s statement:

This box represents the “other” world. It’s the fantasy land of the faeries. In legends, it’s a world similar to ours but also different.

The black sky represents the darkness people travel through to reach this land. The flowers (painted, and dried, natural flowers) are part of the dazzling beauty of this fairy world.

The dangling opalescent star is what gives the shrine movement and life. The small bit of quartz crystal in each box represents “magic” in everyday life, which we add in our own, unique ways.

How each one was created

Preparing the container

I started with small wooden boxes, purchased at the local fabric store, JoAnn Fabrics. They’re each about four inches tall and have a removable lid with a star cut in it.

I stained the outside of each box to a light oak color, and added color stains using a stencil that I cut in a five-pointed star shape.

The inside of the lid is painted with gold. Inside the box, I used a moss green shade of Lumiere paint. The back of the box is lined with black plush velvet, which I glued to and wrapped around a cardboard base, before gluing it in place with Aleene’s Tacky Glue.

Then I drilled holes in the sides of the box, inserted part of a bamboo skewer (from barbecue supplies) and painted it matte black, so it’s sort of like a rod in a closet.

The shrine elements

In the very back, I have a moon-and-black-bird image that I created for one of my websites. The bird represents the Morrighan, of Irish mythological history. She is one of the Tuatha De Danann, also called fairies.

Next, I drew a dolmen, and painted it with watercolor. Both this and the moon/bird images were scanned a printed on shiny photographic paper, which I trimmed neatly before gluing the images in place on the velvet.

The flowers and elements of the green world were drawn with a zero point Rapidograph, and painted with Dr. Ph. Martin’s concentrated watercolors. These were scanned and printed on a heavy matte paper.

These pieces (two per shrine) were glued, diorama-style, using tabs I left on the sides of the art, when I trimmed it.

Next, I trimmed and glued bits of moss and dried natural flowers in the shrines. I used Aleene’s Tacky Glue for this.

Then, I added one small quartz crystal in each shrine, slightly hidden in the greenery.

Finally, I suspended an opalescent star bead from the “closet rod” in the box, using black thread. I glued one opalescent glitter star to the “closet rod”, and one directly to the black velvet background.

(The black rod conceals the topmost edge of the moon, in this scan. The rod is visible in the real shrines, but does not generally obscure any of the images.)

Completing the shrines

The outside of the box was highlighted with gold, and varished using a glossy polyurethane finish.

Each of the four shrines sent to this exchange contained a small plastic bag. In it, there was a quartz stone with a hole in it, strung on a purple satin ribbon. In fairy lore, if you look through a stone with a hole in it, you may be able to view the faerie world.

I made a total of eleven of these shrines.

Four went to the exchange, three are kept in our family, three were sent to “four creative somethings*” subscribers who requested them.

The remaining one was sold to a collector at Artfest 2001.

*”Four creative somethings” was a four-part subscription to small pieces of art, sent at random to people who signed up. That art subscription is no longer available.

Art and Science of Pocket Shrines

superman shrine by aisling d'art First you start with an idea.

Well, maybe.

It’s where most people begin. You know, “Oh, I MUST make a shrine to chocolate!” Or Elvis, or Russell Crowe, or Barbie, the Banana Splits, or the Planet Melmac.

But where you should start–and of course, we never do what we should–is with the container.

The container should be small, of course. I mean, where will it go?

Select the container

A dashboard shrine may fit nicely in a small candle sconce, or a matchbox.

Something for your pocket might go better in a matchbook, a film canister, or slide out of a gutted dental floss dispenser.

The point is, the container determines everything. Unless you want to collect images and then scan them (or color photocopy them) down to size, start with the container.

The Three Cs:
Cheap,
Clean
and
Compact

Containers should meet the “three Cs” requirements: Cheap, Clean, and Compact. Charming is optional, kitschy is a plus.

So anyway, find your container. I highly recommend glancing in your trash right now, to see what you’ve thrown out recently.

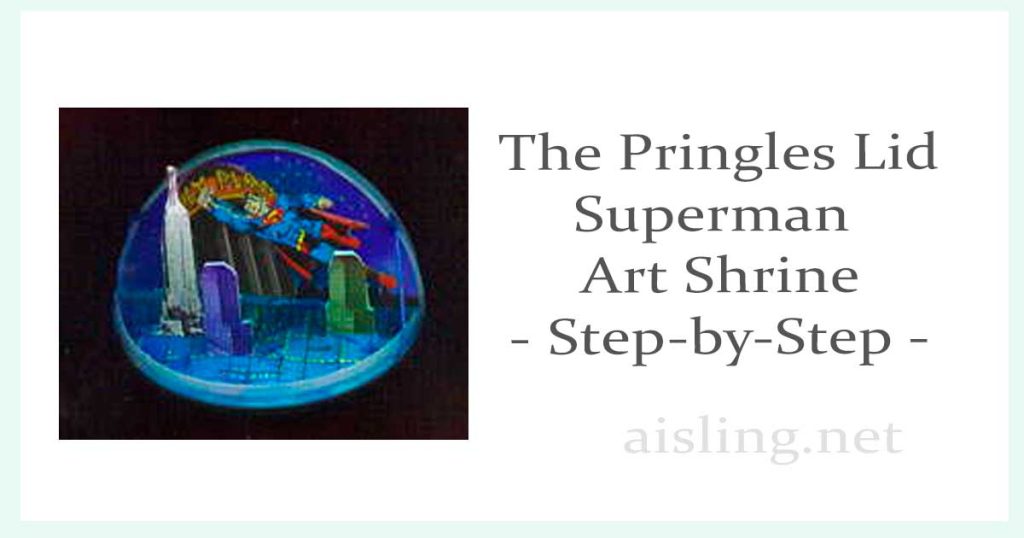
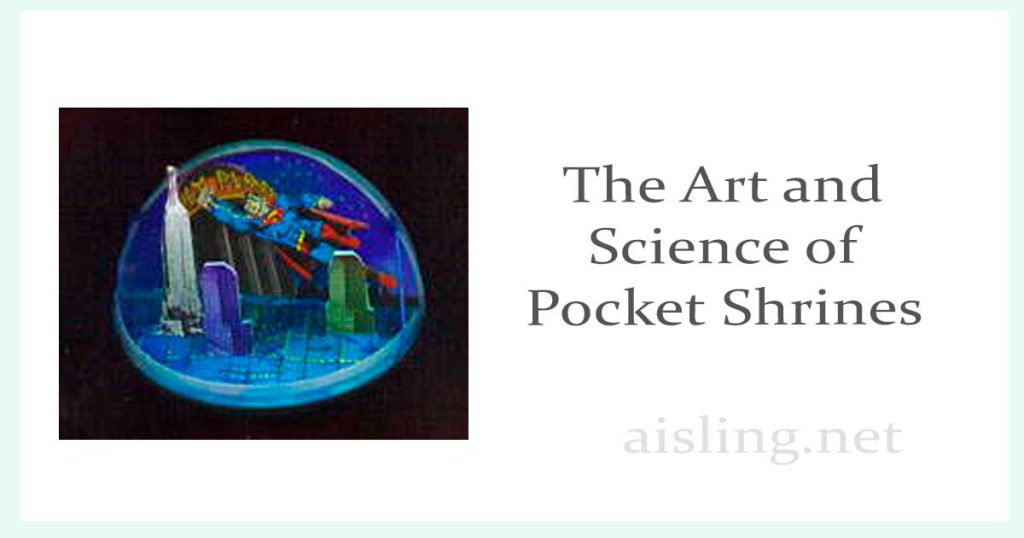
One of my favorite shrines is shown above, the Superman shrine built in a Pringles potato chip lid.

But anyway, let’s assume you have a few containers gathered.

Next, choose a theme

Your theme can be absolutely anything. Select a person, place, idea, event or holiday. I’ve already listed a few, but don’t stop there! Movie idols, personal obsessions, fetishes, and weird/quirky stuff is what we’re looking for.

Serious topics? Why not? Draw on your spirituality, or history, or your dreams.

But find a theme anyway. Maybe it starts with a toy you bought at random from the 25-cent dispensers at the door of the grocery store. Or the fortune card you received at the penny arcade.

Maybe it’s about spike heels, condoms, bubble bath, the Trix rabbit, or Elmo… or a scary combination of some of these!

The thing is, you need a fairly clear vision/theme. You can adjust it as you find trinkets and images for your shrine, so don’t get totally locked into one idea.

Gather shrine elements

It’s time to collect bits and pieces to go into your shrine. You already know the size you’ll need…something which will fit inside your container.

There are several elements to consider when constructing a shrine. Color… either lots of color, or a single theme, such as Elvis and the color blue, as in My Blue Heaven, Blue Suede Shoes, and, “…a blue Christmas without you.”

Also, think in terms of dimension. Flat shrines are fine. No problem.

But, you can raise some elements above others, with foam tape or little blocks or something.

Think about texture, too. You can improve interest in the shrine by using fabric to cover it, or to line it. Satin is an obvious choice. Tacky red satin with mini-fringe or pom-poms for trim…excellent! (Dollhouse supply shops offer some wonderful trims.)

Images are best if they’re the right size. With a scanner or photocopy machine, you can reduce any image to the right size.

The library may have some fabulous books for inspiration.

(But, keep in mind that there are copyright issues, especially if you plan to sell your shrines using copyrighted images.)

So, once you have your bits & pieces, you’ve reached the assembling phase.

Complete your shrine

The first issue is glue: Even “permanent” glue sticks dry in high heat and/or low humidity. The pieces fall off. Yep, done that.

Another poor choice is rubber cement. It can yellow and/or turn paper translucent as the years progress. One brand claims to be archival, sort of. Read the label, and decide for yourself.

I favor hot glue, and Rollataq, or whatever you like for collage/assemblage work. (Rollataq is a glueing system which involves a special rolling dispenser filled with the Rollataq glue. Yes, it’s still messy, but it keeps glued paper smooth.)

Be prepared to change your mind about what goes where. Spontaneous art is the best art!

All done? Congratulations! It’s time to display your work. Dashboards are good. So are office desks, copy machine tables, and so on. Put a pinback on it, and wear it.

Oh sure, you can tuck your shrine in your pocket or purse, but you must promise to take it out regularly, and enjoy it.

Pocket shrines are made to display, show off, and flaunt.

Pocket shrines are FUN! Enjoy!

Elvis Matchbook Shrine

You can never have too many Elvises!

elvis matchbook shrine - outside elvis matchbook shrine - inside

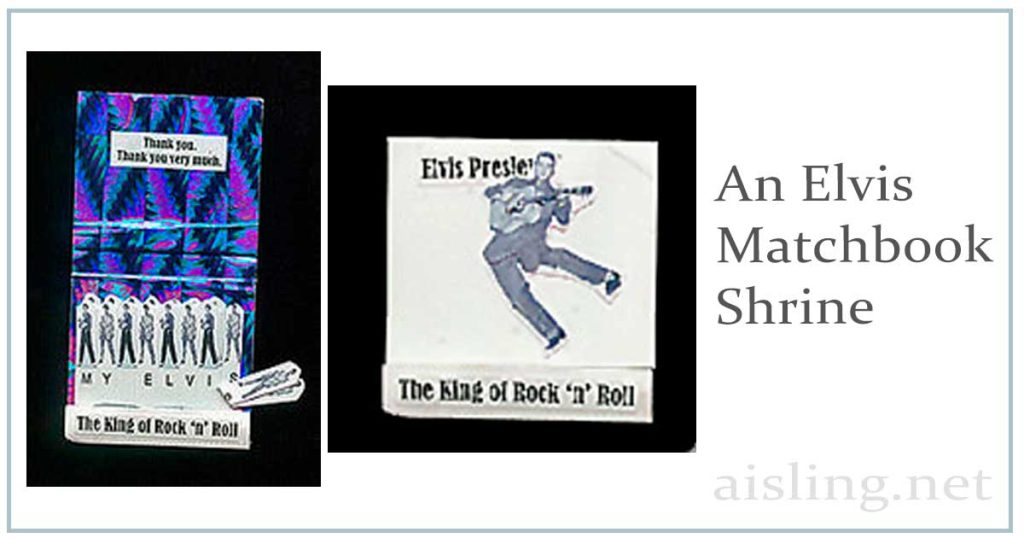
I made this shrine from images I scanned from a deck of Elvis playing cards, plus some glittery wrapping paper, a plain matchbook, and a few phrases related to the King of Rock ‘n’ Roll.

The “matches” are three layers deep. I folded a couple of them over, so you can see the layers. They’re held in place with a thin bead of hot glue at the bottom.

(The glue is inside where the matchbook folds over to hold them. That’s where the striking area is on some matchbooks. On my matchbook shrine, there is no staple.)

Instructions

Although you can make an Elvis shrine, there are many other themes suited to matchbook shrines. For example, you could create a shrine to orchids, or to sunglasses, or to Godzilla.

These how-to tips apply to any kind of matchbook shrine.

Making original graphics

When you plan your “match” images, ¼ inch wide is good. Allow lots of white space beneath. Distorting the image can look a little weird. If your matchbook shrine is humorous like my Elvis shrine, you can stretch the image to fit a pretend match.

Desaturating the image (in a graphics program) allows the graphics to match (so to speak) the widest possible range of background/collage colors.

Cutting

Cut the collage elements bigger than you need, then trim carefully when you’re working with teensy stuff.

Scallop the “match heads” first, then cut between the matches almost to the bottom of the set of matches. Leave about ¼ to ½ inch at the bottom, where the matches will be covered by the fold-up part of the matchbook. The matches will be hot glued in place, inside that fold.

Also, when you trim them, leave a bit of “breathing space” around the top of each match.

Assembling

If you’re covering a matchbook, put the adhesive on the matchbook, then stick a too-large piece of paper/fabric to it.

After the adhesive dries, trim it.

Optional: After the first side has been trimmed, you can cover the other side.

The matches are best held in place by a thin bead of hot glue along the bottom edge. It will blob up, so use just a little.

‘Create’ Pocket Shrine (winged)

Tags can combine with other elements to support wonderful, pocket-sized shrines.  In this shrine, I wanted to use familiar elements such as a matchbox, but make it a little quirky.

I’d already worked with many traditional matchbox shrines.  This time, I wanted to deconstruct one.

create matchbox shrine

This shrine was made with the cut-up-and-reconstructed inside of a matchbox. I lined it with origami paper, attached a miniature Tarot card and a small irridescent bead like a crystal ball.

On the outside of the matchbox, I glued a bit of gold ribbon, some more origami paper, and I added my “signature” antennae with gold wire and beads.  (I’d been using wings and ornate antennae starting in the late 1990s.)

I glued the matchbox to a pair of stamped wings that were reinforced with wire so they bend like real wings.

(I use this wing stamp often. It’s from Stampers Anonymous.)

Then I attached this whole thing to a small tag, stamped with the word “CREATE” (Antique Alphabet Set by Personal Stamp Exchange).

I added beads to the tag string, and glued a miniature Artfest 2001 logo to the back of the tag.

Applying Plaster Gauze to Your Art Shrine

Plaster and gauze – the same materials used in medical settings for traditional plaster casts – can add excitement and dimension to your art shrines and assemblages.

This is page two of instructions that started at Art Shrines – Add Texture with Plaster Gauze.

5. Dip gauze all the way into the water, and remove it quickly.

The longer it sits in the water, the more plaster washes off the gauze, and the less rigid the final results.

Also, it’s not necessary to squeeze water out of the gauze. In fact, if you squeeze the water out, you may also lose some of the plaster.

6. Drape the wet gauze directly onto the surface that you’re embellishing.

Once you have it in place, you can flatten it if you want less texture; otherwise, just leave it where it is.


In this photo, the cigar box had been gesso’d before embellishing. You can gesso afterwards, if you prefer. It doesn’t make much difference in most cases.

This gauze will stick to untreated Altoid tins, without gesso and without removing the paint first.

If it starts to lift up after the gauze dries, the paint and sealer usually act as glue to reattach the gauze.

7. To vary the texture of the gauze…

You can smooth parts of it with your fingers, gently spreading the plaster so that it fills some of the holes in the gauze.

I like to smooth no more than 50% of the gauze in my art.

The holes will catch the paint later, so that your finished piece will look even more ancient and mysterious.

8. As soon as that piece looks good, leave it alone.

Repeat with another piece of gauze, adding more layers or areas of texture to your surface.

The gauze sticks to itself best when wet. Try to apply all of the gauze in one sitting.

9. Impatient? Speed the drying time by heating the gauze.

You can speed drying time with heat from a tool like an embossing gun. However, be sure not to scorch it.

In some cases, the painted surface of the object may bubble or melt under the extreme heat of the embossing gun. Use it cautiously, if you use it at all.

Heating is not necessary.

Even if with extensive use of the embossing gun, you should still wait at least an hour or two before painting the gauze.

In general, it’s good to let the gauze dry overnight rather than rush it with heat.

It’s not necessary to cover the entire surface with gauze. In fact, I recommend leaving part of it untreated.

Let each surface dry to the touch before moving the box to embellish another side.

Wet gauze can slide off the box if it is tilted too soon.

A mix of smooth and rough areas on the gauze will result in a more interesting and varied painted surface when the embellishment is complete.

10. Seal the gauze with gesso.

For best results, cover the gauze with at least one coat of gesso before painting it.

Be sure that the gauze is fully dry before applying the gesso, or the gesso can seal the moisture inside the fabric.

11. When the gesso is dry, apply paint and other embellishments.

Plan to paint your art shrine – or other mixed-media piece – in layers. Let each early layer dry fully. Those layers will form a further seal that prevents the gauze from absorbing moisture.

Here’s what one of my cigar boxes looked like, ready to paint.

Here’s what it looked like with two layers of paint. First, I applied gold paint and let it dry thoroughly. Then, I added a light coat of blue in some areas, and a heavier layer of blue on one side.

Then, when those layers had fully dried, I started getting wild with color. Generally, I’d paint some color on, and then wipe some (or most) of it off.

This shrine had about five or six layers of paint, each a different color.

Sometimes I’d wait for the color to dry. At other times, I’d work a new color into the still-wet pigment.  Then, I’d add another color, doing the same thing.

At the conclusion, I added some further embellishments. They included a deep bottle cap. I think it was from laundry detergent, and I covered it with plaster gauze, too. The final touch was a smooth glass gem, which I think had been a playing piece from a board game.

And here’s another cigar box art shrine, treated similarly. The round shape was a plastic lid* from a Pringles potato chip container.

I hope those give you some ideas for your own mixed media artwork using plaster gauze.

Trivia: Those snap-on lids – like the ones on Pringles chips – were originally created to seal cans of house paint.

However, house painters didn’t warm to that idea, so the patent was sold… I think it went to a coffee company, next.

(The original idea was my grandfather’s. He was the founder of the California Paints, which later expanded to include California Products.)


Art Shrines – Add Texture with Plaster Gauze

Plaster gauze can add exciting dimensions to your art shrines, mixed media art, or even your art journaling book covers.

The effects are completely unlike a “plaster cast.”

Here’s what a finished product can look like. (It started as a cardboard cigar box. Cigar stores often sell them at a good, low price.)

Art Shrines with Plaster Gauze (Part 1)

Supplies

To embellish your art shrines and other mixed media art, you’ll use plaster-embedded gauze.

Years ago, it’s what doctors used for casts on broken limbs. Vets still use it sometimes. You can buy it as an art supply, or from a medical supply house, or through your veterinarian. Some DIY home improvement stores sell it, too.

Amazon offers several brands, including CraftWrap.

You’ll also need the surface that you plan to embellish, a cup or bowl of water, and household scissors. You may also want to include optional surface embellishments. (Also see “Embellishments for mystery and dazzle.”)

1. Open the package and unroll some of the gauze.

Usually plaster gauze is packaged in a plastic bag. That’s because it can be really dusty, and difficult to clean up.

Work over discarded newsprint, such as a newspaper or sheets of ads – “junk mail” – you receive by post.

That’s important. Otherwise, your worktable will be covered with a fine plaster powder.

plaster gauze for art shrines - packaged

2. Cut with inexpensive household scissors.

Use inexpensive scissors to cut the gauze. (Shears of any kind from the dollar store – or pound store – will work fine.) The plaster will dull your scissor blades, and might ruin a good pair of scissors.

After working with the gauze, I usually cut through fine sandpaper to resharpen the scissor blades. That’s worked well.

3. Trim the gauze into irregular shapes.

This isn’t mandatory, but – from my experience – it helps… a lot.

My largest pieces are usually about two inches on the widest edge. My smallest pieces are about 3/4 inch on the narrowest edge. Start with at least six pieces when you are trying this technique.

It helps to cut all of your pieces before getting your hands wet.

4. Dunk one piece of the gauze into a cup or bowl of water.

When you start your work, be sure to have a bowl of water close to the support (such as a cigar box shrine) you’re embellishing.

The water temperature does not matter, and you only need enough water to cover the gauze completely.

Click here for Part 2.