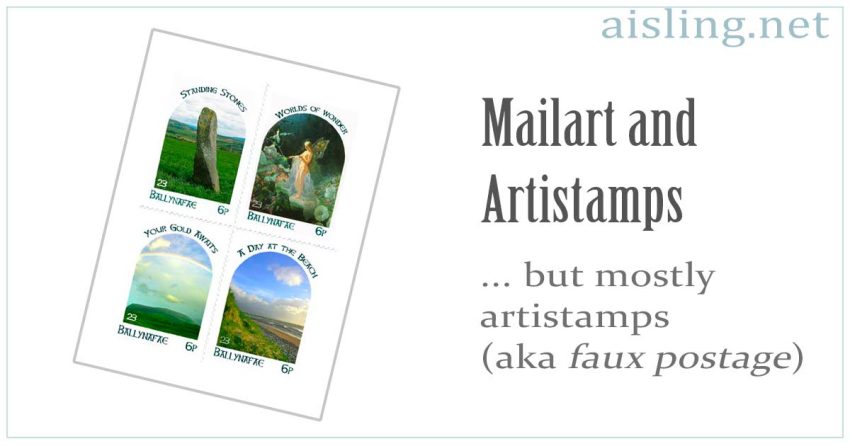
Category Archives: Artistamps

Disneyland Tribute – to My Mom

Disneyland is celebrating its 55th anniversary.  I’m commemorating it with an artistamp design featuring art by my mother, Muriel Joan Bernier (1919 – 2010).

The artwork at left, which was also on the Fantasyland board game, was my mother’s art.  She freelanced for Disney in the 1950s, and I remember her drawing this.

My mom passed away earlier this year, and — I’m not sure why — she didn’t want me to post her artwork online.  (My mother’s always been eccentric.  Once she decides something, she rarely changes her mind.  Questioning her was pointless.)

This, however, gets around that.  The image was already online… just not credited to her.

So, here it is as an artistamp.  Ordinarily, I add my artistamp postal name — Ballynafae — and a postage amount (usually 3p) to make my artistamps look more stamp-like.  In this case, it didn’t seem right, so I added the basic text and here it is, as-is.

You can download it as a stamp-sized image (PDF), either with a stamp-like edge (as a graphic), or as shown above.

Resizing Your Art for Artistamps

3sun-ibQ: I want to make some artistamps by hand, not necessarily on the computer. How do I make my art the right size for stamps? Should I be creating the art in stamp size, to start with?

A: Most commercial artists work much larger than the finished, printed product will be. For example, a standard paperback book cover was often a poster-size painting.

When the image is reduced to the correct size, there will be impressive detail in it without a lot of microscopic work in the first place.

When you’re creating stamps, or any reduced-size art, there are several ways to work:

    Work to size

    Obviously, you can create the work in the size it should be when completed. This is fine for carved stamps, one-of-a-kind work, and so on. However, if you’re working off the computer, or want a lot of detail, this is the difficult way to do things.

    Work larger, then reduce at the photocopy machine

    Create the images you want, in a larger size. Try to work in a size that can at least fit on the glass of the copy machine.

    If your art fills a standard letter-size sheet of paper, and your finished stamp will be less than one inch square, you’re probably including more detail than you need to.

    Next, use the photocopier’s reducing option, until the image is the size that you want. That is, if you’re working h-u-g-e, reduce the image to the smallest size the machine permits, then reduce that copy to the size you need.

    If you’re using a color copier, this can get expensive as you use trial-and-error to achieve the correct size. Experiment with a regular (cheaper) photocopier first. Make note of the percentages you used to reduce to the ideal size.

    Once you’ve figured out what percentage of reduction looks best, switch to the color copier, enter the correct reduction percentage, and print your final work.

    Work larger, and reduce with your computer graphics program

    If you’re using your own color printer, this is one of the best choices.

    Basically, scan your work with your computer scanner, then use your graphics program to reduce the image to the finished size. Repeat the image for a full sheet.

    (Some programs call this “tiling,” others–including Adobe–use words such as “pattern.” You can learn how to do this at my article, How to make a sheet of stamps, with Adobe Photoshop.)

    Finally, print it on your printer.

    If you don’t have your own color printer, many larger copy shops (for example, some FedEx/Kinko’s shops) have computers and color printers for customers to use, for a small fee. Bring them a disk of your completed work, and print it on their printer.

    Work larger in b&w, adding color to the correct-size image

    You can avoid the color issue altogether by designing black and white artistamps. However, if you want colored artistamps and the previous methods won’t work for you, there are alternatives.

    Create the black-and-white line work in a larger format.

    Then, reduce it with a b&w photocopier, and tile with repeated copies, as necessary.

    Hand-color the image/s.

    Finally, either use those as stamps, or visit a copy shop with a color copier, and make multiple photocopies for use as stamps.

No doubt there are other ways to accomplish your goal, but these are among the most popular.

There is no point in using a magnifying glass and a three-haired paintbrush to create eensy-weensy images for the stamps. Work big and bold, and then reduce the images for the best results.

When I work larger for any purpose, I always work at least 33% bigger than the final image, for the best impression of detail in the finished product.

How to make a Sheet of Artistamps with Adobe PhotoShop

If you’re new to Adobe’s PhotoShop program, it can be overwhelming to figure out all the fabulous bells & whistles it offers. However, it’s a wonderful tool for artistamps!

When I wrote this article around 2002, I was using Adobe 5.0. The commands may vary slightly if you’re using a different version, but the concepts remain the same.

If you have an image that you’ve created with (or scanned into) Adobe, here are the steps to repeat it easily, so the image fills a page of artistamps when you print it:

1. Select the image you want to use. This means it should be surrounded by dotted lines indicating that the Adobe program has “selected” it. If you don’t know how to do this, go into Adobe’s Help menu and look up “selecting an area.”

2. Go into the Edit menu, select Define and then Define Pattern. (Some programs go directly to Define Pattern.) Your image is now saved in Adobe’s short-term memory.

3. Delete your original image, by clicking on the X on the image window, or you can just delete the layer with the image by using Layer–>Delete Layer.

4. Either enlarge that emply window/layer (if you merely deleted the layer) so the Image Size is slightly smaller than the paper you’ll be printing on –OR– (if you clicked on the X and removed the entire image) create a new image (File–>New) in that size.

I like to work with an image that’s about 7″ x 10″ for paper that’s 8.5″ x 11″.

5. Select the entire image/layer. You can do this by hitting Control-A, or by right clicking and choosing Select All.

6. Right click inside the new image/layer, select Fill and then choose Pattern. Your image, repeated to fill the new size, will appear. If you are happy with what you see, you’re ready to print.

7. If your new, repeated image isn’t tidy–and it usually isn’t–you’ll want to remove (crop) the partial images. Use your Select Area tool to surround all of the complete images. Then choose Image and Crop so the loose pieces vanish. Now you’re ready to print.

8. If you’re using nice (price-y) paper for your finished product, it’s a good idea to print a “proof” copy on plain (cheap) paper, to make certain the finished plate of stamps looks pleasing.

If positioning is key, you may want to print on tracing vellum first, lay it over the paper you’ll be using for the finished product, and see if it lines up okay.

9. After you’ve printed your stamps and are ready to close your Adobe program, save just ONE copy of the stamp image, using the Crop feature. You can save the entire repeated image if you like, but that can take up a lot of disk space if your hard drive is nearly full.

Cheatsheet version:

1. Select image area
2. Edit–>Define–>Pattern
3. Delete original image
4. Create new image in size to fit on printer paper
5. Right click to Select All
6. Right click inside area, choose Fill–>Pattern

tap-hammer-b

Perforations for Artistamps

I wrote the first version of this article around 2002. New perforating options are constantly being developed, tested and marketed.

So, this article is dated, and remains at this site as a starting point for people who want to explore perforating options for artistamps.

One of the first questions people have, is how to make perforated edges so artistamps look like “real” postage.

Many of us simply use the purple-handled Fiskars scissors that create small, wavy edges similar to perforated stamps. You’ll find them around the scrapbooking or rubber stamp aisles of most large crafts shops such as Michael’s.

Others put black or grey dots, similar to the appearance of perforations, on the stamps themselves. Then they cut right next to the dots, with a normal papercutter or scissors.

And some don’t fret about this aspect of the process, and simply leave the stamps straight-edged, or unperforated.

Home-grown perforation options

Another solution to the perforation problem is to create your own holes.

So far, the results with wheels intended for other purposes has been disappointing. The best reviews are from people who use a dressmakers’ marking wheel (on a soft surface so the wheel actually perforates the paper).

Another suggestion is to use a sewing machine without thread in the needle, to punch the holes. These won’t exactly fool anyone into thinking they’re real perforations, but they’re a pretty good substitute.

Use the largest possible needle, intended for sewing through leather or denim. Use masking tape to mark the arm of your sewing machine as a guide, for each line of perforations, so you’ll know how to keep the paper straight as you feed it under the needle.

And, be sure to clean the machine often. Shards of paper and excess dust can build up quickly around the bobbin housing.

However, the only real perforations–so far–are made by a perforating machine.

Professional perforation

WCP-NM (Olathe Poste) sells a variety of perforated papers.

100 Proof Press has artistamp kits and perforated papers.

The Olathe Poste offers an affordable perforating service with a very quick turnaround time.

Home perforating machines

Late in 2005, Dr. Arcane (on the AML [Artistamp] list at Yahoo Groups), created a relatively affordable home perforation machine for artistamp creators. However, his early production run was very limited. Check that list for updates, if you’re interested.

(Search the list archives using the name of the machine, Whizbang, to learn more about it at AML.)

My ex-husband tried to make a similar machine a few years ago, but a major problem couldn’t be resolved: The paper moved too much. The two-handled approach of the Whizbang looks like a fine solution.

Professional and antique perforating machines

Ideally, you’ll find someone who owns one of those wonderful antique perforators. These are massive, heavy beasts that will punch teensy, professional-looking holes in sheets of your stamps.

Frankly, the only way to buy one–except through sheer luck at eBay or a local auction–is to network with printers and other artistampers, so you hear about the infrequent but available perforator when someone is willing to part with one.

Remember that most modern perforating machines are designed to cut dashed lines for tear-out coupons, and so on. They don’t make rows of round holes as on postage stamps.

The next best thing to having your own perforating machine, is to know someone else who owns one, who will swap perforating services for free artistamps, or some other reasonable barter.

k6web

Real, Exotic and Foreign-looking Stamps

These are a few stamps from my own collection of inexpensive, international postage stamps. They are “real” stamps, used on mail.

I like them because they look exotic and/or old, and I gather ideas from them.

I’m providing them as inspiration. You can copy* them, tweak them with your own color and design ideas, or… well, you decide!

Want to see more cool and unusual stamps?

I recommend The Mystery Box, a philatelists’ site.

___

*No stamps at this site — “real” or artistamps — should be copied or used illegally.